1. Introduction
In the height of a sweltering summer, or during the frantic pace of a back-to-back workday, the kitchen stove can feel like an enemy. The “No-Cook Lunch” isn’t just a category of food; it’s a lifestyle choice rooted in efficiency, freshness, and the celebration of raw ingredients.
Historically, the concept of the no-cook meal traces back to simple agrarian diets—think of the Spanish Gazpacho or the Italian Panzanella—where the heat of the day dictated a menu of crisp vegetables, oils, and cured proteins. Today, we’ve elevated this concept. We are moving beyond the basic ham sandwich into a world where textures are balanced, acidity brightens the palate, and “prep” replaces “cooking.”
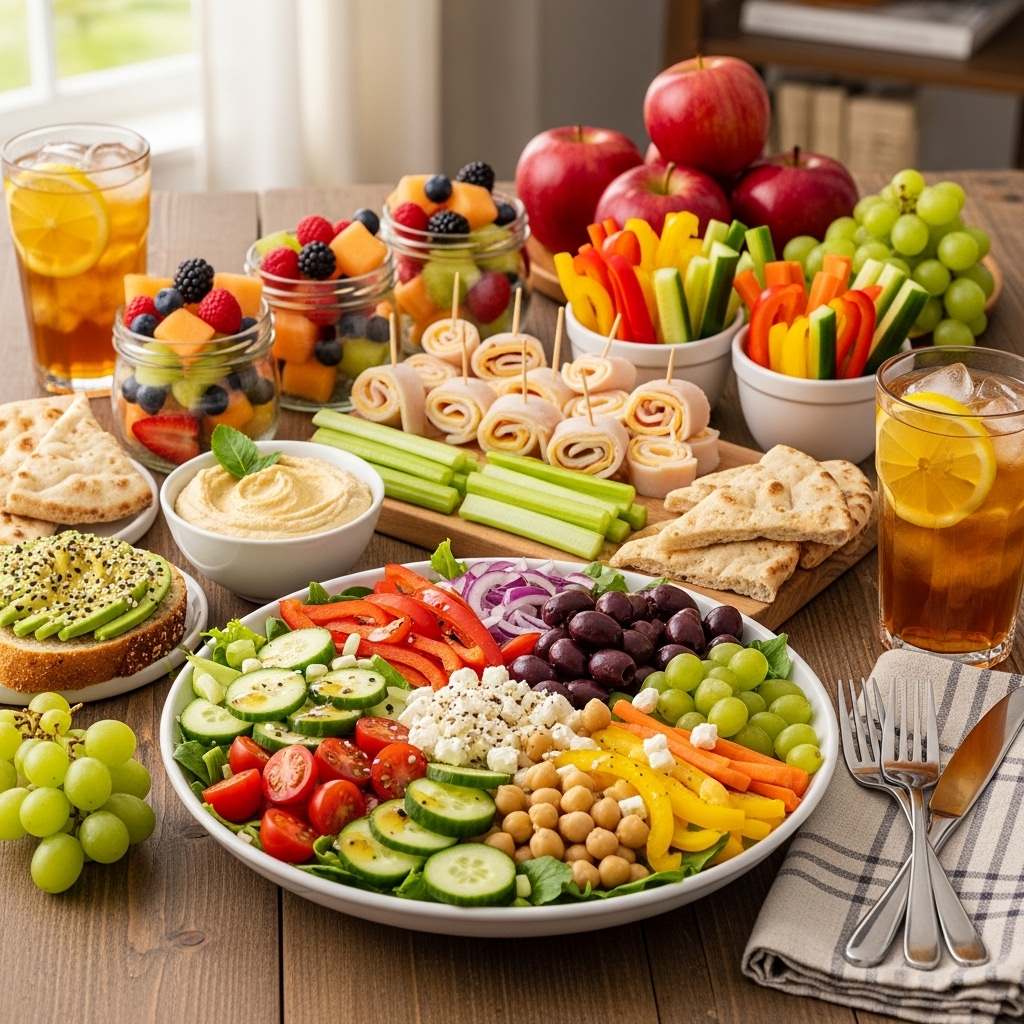
This specific recipe, our Mediterranean Chickpea & Avocado Smash, is a testament to how pantry staples like canned legumes can be transformed into a gourmet experience using nothing but a bowl and a fork. It’s a dish that tells a story of the sun-drenched Mediterranean coast, combining the creaminess of ripe avocado with the briny punch of feta and olives.
2. Recipe Overview
- Cuisine Type: Mediterranean / Fusion
- Difficulty Level: Beginner
- Total Preparation Time: 15 Minutes
- Total Cooking Time: 0 Minutes
- Dietary Classifications: Vegetarian, Gluten-Free (if served without bread), High-Fiber, Nut-Free.
3. Equipment and Tools
One of the greatest joys of a no-cook recipe is the minimal cleanup. You won’t need to scrub burnt pans or deglaze a pot.
- Mixing Bowl: A medium-sized glass or stainless steel bowl (approx. 2.5 to 3 liters) to allow for vigorous tossing without spilling.
- Chef’s Knife: A sharp 8-inch blade for precision dicing of vegetables.
- Large Fork or Potato Masher: Used to partially crush the chickpeas to create a “bound” texture.
- Measuring Cups and Spoons: For both Metric and Imperial precision.
- Citrus Juicer: (Optional) To extract maximum juice from the lemon.
- Salad Spinners: Ideal if you are adding leafy greens to the base.
4. Serving Suggestions
Plating Recommendations For a casual lunch, serve the salad in a wide, shallow pasta bowl to showcase the vibrant colors. For a more formal presentation, use a ring mold to stack the salad in the center of the plate.
Garnish Ideas
- A sprig of fresh mint or flat-leaf parsley.
- A sprinkle of Sumac or Aleppo pepper for a touch of heat and color.
- Toasted pine nuts for an added buttery crunch.
Complementary Side Dishes
- Chilled cucumber slices seasoned with rice vinegar.
- A side of Greek yogurt mixed with dill.
- Warm pita bread or crusty sourdough (if you aren’t strictly grain-free).
Beverage Pairings
- Wine: A crisp, chilled Sauvignon Blanc or a dry Provencal Rosé.
- Non-Alcoholic: Sparkling water with a squeeze of lime and a muddled cucumber slice.
5. Nutritional Information
Per Serving (based on 2 servings):
Health Benefits: This meal is a powerhouse of monounsaturated fats (from avocado and olive oil) which support heart health. The chickpeas provide a low-glycemic index carbohydrate source, ensuring you don’t experience a mid-afternoon “sugar crash.”
6. Storage and Reheating
- Refrigeration: Store in an airtight container for up to 48 hours. Note: The avocado may oxidize (turn slightly brown), but the lemon juice in the recipe helps slow this process.
- Freezing: Not recommended. The fresh vegetables and avocado will lose their structural integrity upon thawing.
- Reheating: This is a strictly cold dish. If it has been in the fridge, let it sit at room temperature for 5 minutes before eating to allow the olive oil to liquefy and the flavors to bloom.
7. Expert Tips and Variations
Professional Chef Tips
- The “Salt & Sit” Method: After dicing your cucumbers and tomatoes, toss them with a pinch of salt in a separate small bowl for 5 minutes. Drain the excess liquid before adding them to the chickpeas. This prevents your salad from becoming “soupy.”
- Zest First: Always zest your lemon before juicing it. The oils in the zest contain more concentrated flavor than the juice itself.
Common Mistakes to Avoid
- Over-mashing: You want a mix of whole chickpeas and mashed ones. If you mash everything, it becomes hummus—still tasty, but not a salad.
- Under-seasoning: Canned chickpeas are often bland. Don’t be afraid of salt, pepper, and acid.
Creative Variations
- The Protein Boost: Add a tin of high-quality oil-packed tuna or shredded rotisserie chicken.
- Vegan Version: Swap the feta cheese for extra-firm tofu cubes marinated in lemon juice and nutritional yeast, or simply add more Kalamata olives for that salty hit.
- Seasonal Adaptation: In winter, swap the fresh tomatoes for sun-dried tomatoes and add roasted red peppers from a jar.
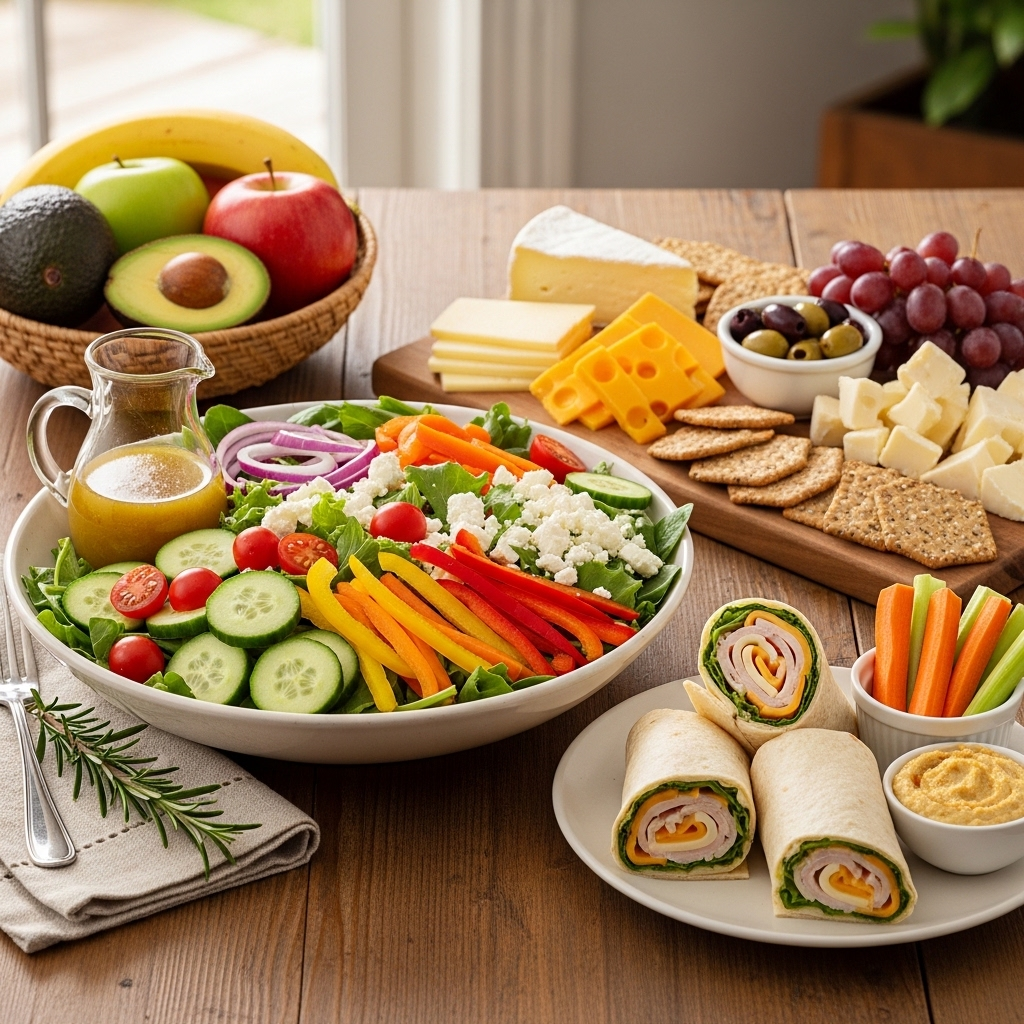
8. Ingredients Section
The Base
- 1 can (15 oz / 425g) Chickpeas (Garbanzo beans), rinsed and thoroughly drained.
- 1 Large Ripe Avocado, pitted and peeled.
- 1/2 cup (75g) English Cucumber, finely diced.
- 1/2 cup (75g) Cherry Tomatoes, quartered.
- 1/4 cup (40g) Red Onion, finely minced (soak in cold water for 5 mins to remove the “bite”).
The Dressing & Aromatics
- 1/4 cup (30g) Feta Cheese, crumbled.
- 2 tbsp Extra Virgin Olive Oil (cold-pressed recommended).
- 1 tbsp Fresh Lemon Juice.
- 1 tsp Lemon Zest.
- 1/4 cup Fresh Parsley or Cilantro, chopped.
- 1/2 tsp Dried Oregano.
- Salt and Black Pepper to taste.
9. Step-by-Step Instructions
- Prep the Legumes: Open the can of chickpeas and pour into a colander. Rinse under cold water until the foam disappears. Pat them dry with a paper towel. Excess water is the enemy of a flavorful dressing.
- The “Rough Mash”: Place the dried chickpeas in your mixing bowl. Use a fork to press down on about half of the beans. You are looking for a variety of textures—some whole, some smashed.
- Incorporate the Creaminess: Add the avocado to the bowl. Lightly mash it into the chickpeas. The avocado acts as a natural binder, reducing the need for heavy mayo or cream dressings.
- The Vegetable Fold: Add the diced cucumbers, tomatoes, and minced red onion. Use a large spoon to gently fold these in so you don’t pulverize the delicate tomatoes.
- Emulsify the Flavors: Drizzle the olive oil and lemon juice directly over the mixture. Sprinkle the lemon zest, dried oregano, and chopped fresh herbs.
- The Final Seasoning: Add the crumbled feta cheese. Toss gently one last time. Taste a spoonful—does it need more brightness? Add a drop more lemon. More depth? A crack of black pepper.
- Resting (Optional): If time permits, let the salad sit for 10 minutes. This allows the acids to soften the onion and the chickpeas to absorb the dressing.
10. Frequently Asked Questions (FAQ)
Q: Can I use dried chickpeas instead of canned? A: Absolutely. However, you will need to soak and boil them beforehand, which technically moves this out of the “no-cook” category. 1.5 cups of cooked chickpeas equals one 15 oz can.
Q: How do I keep the avocado from turning brown if I prep this in the morning? A: Ensure the salad is packed tightly in a container with as little air headspace as possible. Press a piece of plastic wrap directly onto the surface of the salad before sealing the lid.
Q: I don’t like cilantro; what can I use instead? A: Flat-leaf parsley is the classic Mediterranean choice. Fresh dill or mint also works beautifully with the feta and lemon profile.
Q: Is this recipe spicy? A: As written, no. If you want heat, add half a diced jalapeño or a teaspoon of red chili flakes.
Q: Can I make this a “wrap”? A: Yes! This mixture is perfect inside a whole-wheat tortilla, a collard green leaf, or tucked into a pita pocket.