1. Introduction: The Art of the Perfect Bite
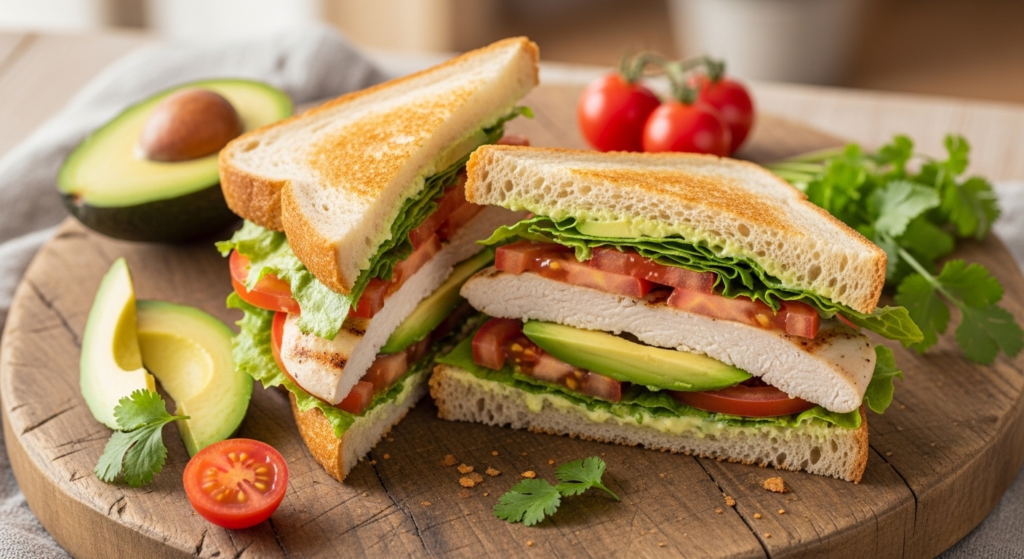
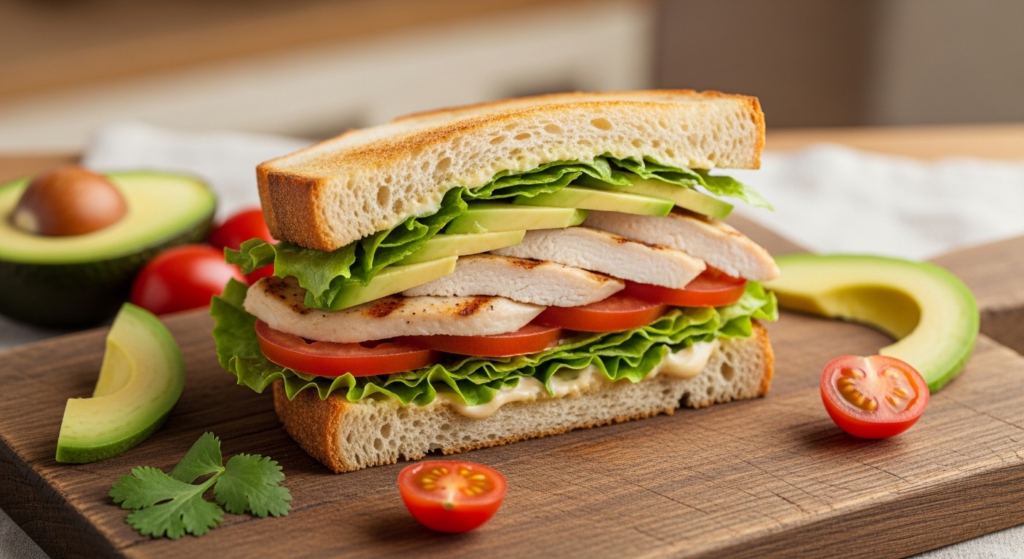
There is something inherently comforting about a sandwich, but the Chicken Avocado Sandwich sits in a league of its own. It is the intersection of high-protein fuel and indulgent, healthy fats. This isn’t just a quick fix thrown between two slices of bread; it is a symphony of textures—the crunch of toasted sourdough, the velvety smoothness of a ripe Hass avocado, and the savory, charred exterior of a perfectly seasoned chicken breast.
Historically, the pairing of poultry and avocado gained massive popularity in California during the mid-20th century, often referred to as “California Style.” This culinary movement prioritized fresh, local ingredients over heavy sauces. Our version honors that tradition while introducing modern culinary techniques like dry-brining and pan-searing to ensure every bite is bursting with moisture. Whether you’re fueling up for a busy afternoon or looking for a sophisticated weekend brunch option, this recipe is designed to be your new gold standard.
2. Recipe Overview
- Cuisine Type: American Fusion / California Coastal
- Difficulty Level: Easy to Intermediate
- Total Preparation Time: 10 minutes
- Total Cooking Time: 10 minutes
- Dietary Classifications: High-protein, Sugar-free (Can be made Gluten-free or Dairy-free with substitutions)
3. Equipment and Tools
To achieve a professional-grade sear and a perfectly assembled sandwich, you will need the following tools:
- 12-inch Cast Iron Skillet or Heavy-bottomed Stainless Steel Pan: Essential for achieving the Maillard reaction (the browning process) on the chicken.
- Meat Mallet: For evening out the thickness of the chicken breast to ensure uniform cooking.
- Instant-Read Digital Thermometer: To ensure the chicken reaches exactly 165°F (74°C) without drying out.
- Chef’s Knife (8-inch): For precision slicing of the avocado and vegetables.
- Bread Knife (Serrated): To slice through crusty bread without crushing the airy interior.
- Small Mixing Bowl: For mashing the avocado spread.
- Silicone Spatula or Tongs: For flipping the chicken and spreading condiments.
4. Serving Suggestions
Presentation is everything. To make this feel like a $20 bistro meal, consider these serving tips:
- Plating: Slice the sandwich diagonally and secure each half with a long bamboo pick. Serve on a wooden board or a matte ceramic plate.
- Garnish: A light dusting of smoked paprika or a few microgreens on top of the avocado spread adds a pop of color.
- Side Dishes:
- Sweet Potato Fries: Air-fried with rosemary and sea salt.
- Mixed Greens Salad: A simple vinaigrette of lemon and olive oil to cut through the richness of the avocado.
- Pickled Red Onions: These provide a bright, acidic contrast to the savory chicken.
- Beverage Pairings:
- Wine: A crisp, chilled Sauvignon Blanc or an un-oaked Chardonnay.
- Non-Alcoholic: Sparkling water with a squeeze of lime and fresh mint leaves.
5. Nutritional Information
Per Serving (Approximate based on 1 large sandwich)
| Nutrient | Amount |
| Calories | 580 kcal |
| Total Fat | 24g |
| Saturated Fat | 4.5g |
| Cholesterol | 85mg |
| Sodium | 720mg |
| Total Carbohydrates | 42g |
| Dietary Fiber | 9g |
| Protein | 48g |
Health Benefits: This sandwich is rich in monounsaturated fats (heart-healthy fats from avocado) and provides a significant dose of Vitamin K, Folate, and Vitamin C.
6. Storage and Reheating
While this sandwich is best enjoyed fresh, here is how to handle leftovers:
- Refrigeration: Store the cooked chicken separately in an airtight container for up to 3 days. Do not store the fully assembled sandwich, as the bread will become soggy and the avocado will oxidize (turn brown).
- Freezing: You can freeze the seasoned, cooked chicken breasts for up to 1 month. Do not freeze the avocado or bread.
- Reheating: * Chicken: Reheat in a pan over medium heat with a splash of water or chicken broth to maintain moisture. Avoid the microwave if possible, as it toughens the protein.
- Bread: Re-toast the bread separately just before assembly.
7. Expert Tips and Variations
Professional Chef Tips
- The “Press” Technique: While searing the chicken, use a heavy weight (like another pan) to press the chicken against the skillet. This creates an even, golden-brown crust.
- Bread Choice: Use a sturdy bread like Sourdough or Ciabatta. Soft white bread will collapse under the weight of the avocado and juicy chicken.
- Avocado Ripeness: Use an avocado that yields slightly to gentle pressure. If it’s too soft, it will be oily; if too hard, it won’t spread.
Creative Variations
- The Spicy Kick: Add sliced jalapeños and replace mayo with Sriracha Aioli.
- The Mediterranean: Use feta cheese crumbles, sun-dried tomatoes, and a pesto spread.
- The Low-Carb: Replace the bread with large Collard Green wraps or sturdy Romaine lettuce leaves.
8. Ingredients Section
The Chicken
- 2 Chicken Breasts (approx. 150g each): Boneless and skinless.
- 1 tbsp Olive Oil: For searing.
- Seasoning: 1 tsp Garlic powder, 1/2 tsp Smoked paprika, Salt, and Black pepper to taste.
The Avocado Spread
- 1 Large Ripe Hass Avocado.
- 1 tbsp Fresh Lime Juice: Prevents browning and adds acidity.
- 1 tsp Red Pepper Flakes: For a subtle hum of heat.
The Assembly
- 4 Slices of Sourdough Bread: (approx. 1/2 inch thick).
- 2 tbsp Garlic Aioli or Mayonnaise.
- 1 cup Baby Arugula: For a peppery bite.
- 2 Slices of Heirloom Tomato: Thick-cut.
9. Step-by-Step Instructions
- Prepare the Chicken: Place the chicken breasts between two sheets of plastic wrap. Use a meat mallet to pound them to an even 1/2-inch thickness. This ensures they cook at the same rate.
- Seasoning: Rub both sides with olive oil, garlic powder, paprika, salt, and pepper. Let it sit for 5 minutes.
- The Sear: Heat your skillet over medium-high heat. Once wisps of smoke appear, add the chicken. Cook for 4-5 minutes per side.
- The Rest: Remove chicken from the pan and let it rest on a cutting board for at least 3 minutes. Crucial: Resting allows the juices to redistribute.
- Toast the Bread: In the same pan (using the leftover chicken fats), toast your bread slices until golden brown.
- The Mash: In a small bowl, mash the avocado with lime juice, salt, and red pepper flakes until it reaches your desired consistency (chunky or smooth).
- Final Assembly: * Spread a thin layer of aioli on the bottom slice.
- Add a layer of arugula and the tomato slice.
- Place the rested chicken breast on top.
- Slather the top slice of bread generously with the avocado mash.
- Close the sandwich and press down gently to marry the layers.
10. Frequently Asked Questions (FAQ)
Q: How do I keep the avocado from turning brown if I pack this for lunch?
A: The lime juice in the recipe helps, but for extra protection, keep the avocado mash in a separate small container with plastic wrap pressed directly against the surface to eliminate air contact. Assemble right before eating.
Q: Can I use rotisserie chicken instead?
A: Absolutely! If you’re short on time, shred a store-bought rotisserie chicken and toss it with a little lime juice and paprika before adding it to the sandwich.
Q: What is the best bread for this sandwich?
A: Sourdough is the winner for its structural integrity and tangy flavor, but a toasted Brioche bun works if you prefer a softer, richer bite.
Q: Is this sandwich healthy?
A: Yes. It is balanced with lean protein, complex carbohydrates (if using whole-grain or sourdough), and healthy fats. To reduce calories, use Greek yogurt instead of mayonnaise.
Q: My chicken always turns out dry. What am I doing wrong?
A: You are likely overcooking it. Use a meat thermometer and pull the chicken off the heat at 160°F. Residual heat will bring it to the safe 165°F while it rests.


