1. Introduction: The Magic of the “Dump” Cake
There is a certain kind of culinary magic found in recipes that defy the laws of effort versus reward. The Cherry Pineapple Dump Cake is the undisputed champion of this category. If you have ever found yourself in a “dessert emergency”—perhaps a last-minute potluck invitation or a late-night craving that won’t quit—this recipe is your secret weapon.
The “Dump Cake” rose to fame in the mid-20th century, peak Americana era, when home cooks began looking for ways to create high-impact flavors using convenient pantry staples. The name, while unglamorous, is entirely literal: you simply “dump” the ingredients into a pan and bake. There’s no whisking, no folding, and—perhaps most importantly—hardly any dishes to wash.
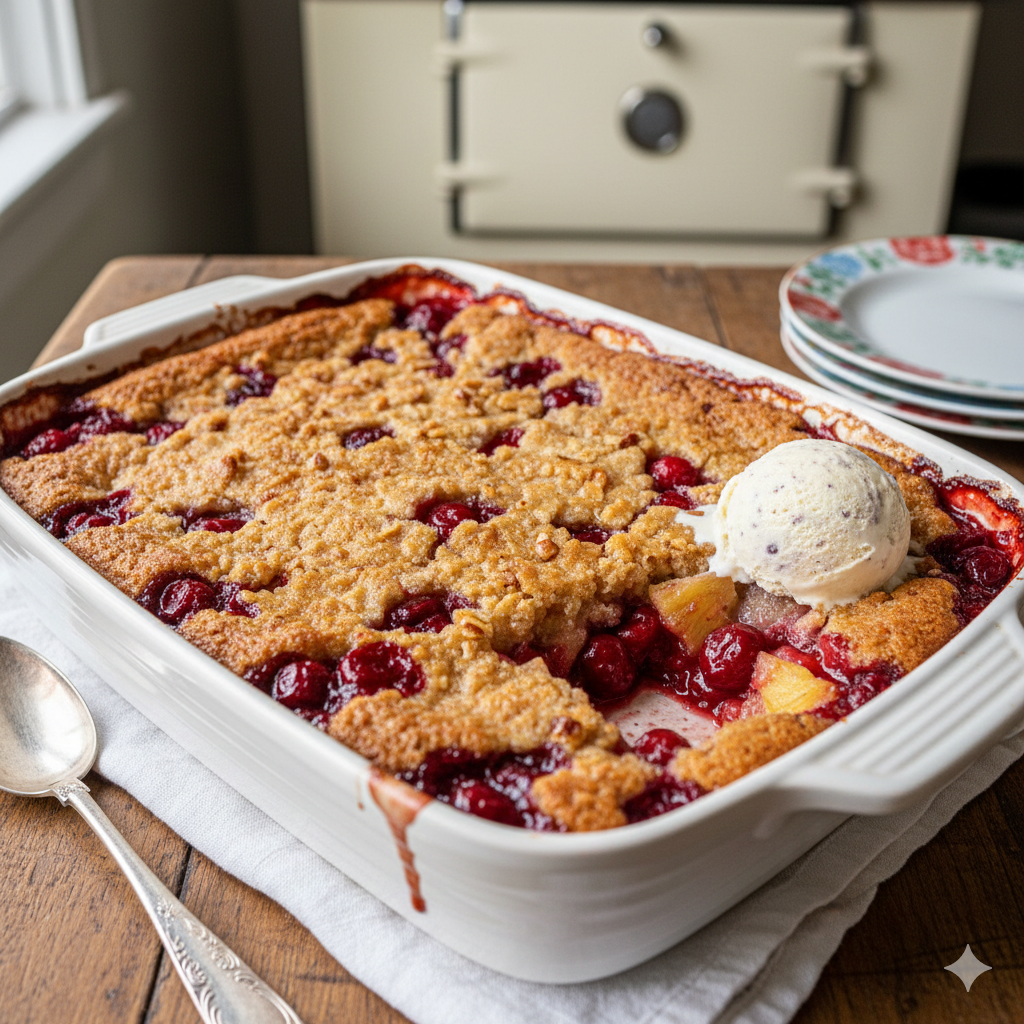
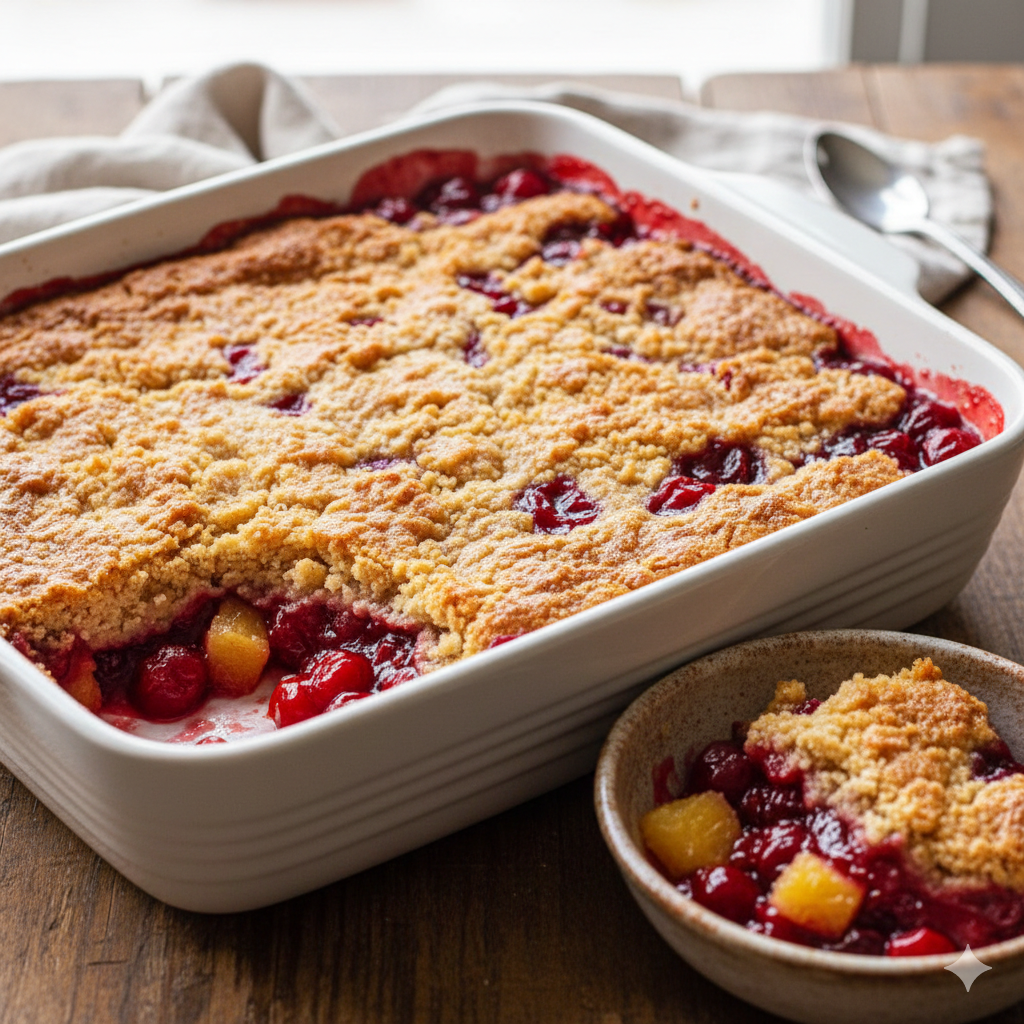
Culturally, this dish represents the heart of community gatherings. It’s the cake found at church socials, backyard barbecues, and family reunions. What makes it unique is the chemistry of the bake. By layering fruit, dry cake mix, and butter, the oven transforms these humble components into a cobbler-like masterpiece. The bottom becomes a luscious, bubbly fruit compote, while the top morphs into a golden, buttery, slightly chewy crust that rivals the best crumbles.
2. Recipe Overview
- Cuisine Type: American / Comfort Food
- Difficulty Level: Beginner (Zero technical skills required)
- Prep Time: 5 minutes
- Cook Time: 45–50 minutes
- Total Time: 55 minutes
- Dietary Classifications: Vegetarian (can be made Vegan or Gluten-Free with substitutions)
3. Equipment and Tools
To achieve the perfect textural contrast between the gooey fruit and the crisp topping, using the right tools is essential.
- 9×13 Inch Baking Dish: A standard glass (Pyrex) or ceramic rectangular dish is ideal. Glass allows you to see the fruit bubbling, which is a key indicator of doneness.
- Can Opener: For the pineapple and cherry filling.
- Rubber Spatula: Useful for spreading the fruit evenly.
- Small Saucepan or Microwave-Safe Bowl: To melt the butter.
- Measuring Cups: While the recipe uses standard canned sizes, you’ll need to measure the butter.
- Knife or Pastry Brush: If using the “sliced butter” method rather than the “melted butter” method.
4. Serving Suggestions
A dump cake is best served warm, but its presentation can be elevated with a few simple additions.
Plating Recommendations
Serve generous scoops in shallow bowls rather than neat slices. Because of its cobbler-like consistency, it doesn’t hold a “square” shape like a traditional sponge cake.
Garnish Ideas
- Fresh Mint: A sprig of mint adds a pop of color against the deep red cherries.
- Toasted Nuts: Sprinkle 1/2 cup of chopped pecans or walnuts over the top before baking for a “Crunch Cake” variation.
- Zest: A little lime or orange zest over the pineapple layer adds a bright acidity.
Beverage Pairings
- Coffee: A dark roast balances the intense sweetness of the cake mix.
- Dessert Wine: A chilled Moscato d’Asti complements the tropical pineapple notes.
- Milk: A cold glass of whole milk is the classic kid-friendly pairing.
5. Nutritional Information
(Estimated per serving based on 12 servings)
| Nutrient | Amount |
| Calories | 310 kcal |
| Total Fat | 14g |
| Saturated Fat | 8g |
| Carbohydrates | 46g |
| Fiber | 1g |
| Sugars | 29g |
| Protein | 2g |
Note: This is a decadent dessert. For a lighter version, look for “No Sugar Added” fruit fillings or use a reduced-fat butter substitute.
6. Storage and Reheating
Refrigeration
Store any leftovers in an airtight container in the refrigerator for up to 4 days. The crust will soften slightly over time as it absorbs moisture from the fruit.
Freezing
You can freeze the baked cake for up to 3 months. Wrap it tightly in plastic wrap and then foil. Thaw in the fridge overnight before reheating.
Reheating
- Oven (Recommended): Reheat at 350°F (175°C) for 10-15 minutes to help the topping regain its crispness.
- Microwave: 30–45 seconds for a single serving. Note: This will result in a softer, more pudding-like texture.
7. Expert Tips and Variations
Professional Tips
- Don’t Stir! This is the golden rule. If you stir the cake mix into the fruit, you will end up with a dense, gummy mess. The dry mix must sit on top to create the “crust.”
- Even Butter Coverage: Ensure the butter (melted or sliced) covers as much of the dry cake mix as possible. Any large patches of dry flour will remain powdery after baking.
Creative Variations
- Chocolate Cherry: Use a Devil’s Food cake mix instead of yellow cake mix for a “Black Forest” vibe.
- Tropical Blast: Add a layer of shredded coconut over the pineapple.
- The “Crunch” Factor: Add a layer of crushed graham crackers or pretzels between the fruit and the cake mix.
8. Ingredients Section
To make this recipe truly effortless, quality sourcing is key.
- 21 oz Cherry Pie Filling: Look for “Extra Fruit” or “Premium” varieties for a better fruit-to-syrup ratio.
- 20 oz Crushed Pineapple: Use the version packed in heavy syrup for a sweeter cake, or juice for a slightly tart version. Do not drain the juice.
- 15.25 oz Yellow Cake Mix: A standard box. White cake mix or Butter Recipe mix also works beautifully.
- 1/2 cup (1 stick) Unsalted Butter: High-quality butter (like European style) provides a richer flavor.
9. Step-by-Step Instructions
- Preheat and Prep: Preheat your oven to 350°F (175°C). Lightly grease your 9×13 baking dish with non-stick spray or a thin layer of butter.
- The Pineapple Base: Pour the entire can of crushed pineapple (including the liquid) into the bottom of the dish. Spread it out into an even layer using your spatula.
- The Cherry Layer: Spoon the cherry pie filling over the pineapple. You can swirl them slightly or leave them in distinct layers.
- The “Dump”: Sprinkle the dry cake mix evenly over the top of the fruit. Use your hands or a spoon to break up any large clumps of flour.
- The Butter Seal: Pour the melted butter evenly over the cake mix. Try to hit as many “dry spots” as possible. Alternatively, use a vegetable peeler to shave cold butter slices across the entire surface.
- Bake: Place in the center rack of the oven and bake for 45 to 50 minutes.
- Visual Cue: The cake is done when the edges are bubbling vigorously and the top is a deep, golden brown.
- Rest: Allow the cake to sit for at least 15 minutes before serving. This allows the fruit filling to set so it isn’t too runny.
10. Frequently Asked Questions (FAQ)
Q: Can I use fresh fruit instead of canned?
A: You can, but you will need to add sugar and a thickening agent (like cornstarch) to the fruit, plus about 1/2 cup of water or juice to compensate for the liquid found in canned fruit.
Q: Why is my dump cake still powdery on top?
A: This happens if the butter didn’t reach certain areas of the cake mix. You can fix this mid-bake by placing a small pat of butter on the dry spot or lightly spraying it with cooking oil.
Q: Can I make this in a Slow Cooker?
A: Yes! Layer the ingredients the same way in a greased crockpot and cook on High for 2 hours or Low for 4 hours.
Q: Is it okay to use salted butter?
A: Absolutely. The salt actually helps balance the intense sweetness of the cake mix and fruit syrups.
Q: Can I use a different fruit?
A: Definitely. Peach, blueberry, or even apple pie filling work perfectly with this exact same method.