1. Introduction
There is something deeply nostalgic about the combination of roasted peanuts and sweet undertones. For many of us, the peanut butter and jelly sandwich was the cornerstone of childhood lunches. However, as we transition into busy adult lives—juggling fitness goals, professional demands, and personal wellness—that classic flavor profile needs an upgrade.
Enter the Peanut Butter Protein Smoothie. This isn’t just a blended drink; it is a meticulously crafted meal replacement designed to satisfy the palate while providing the sustained energy required for a high-performance lifestyle. Originally popularized in the bodybuilding communities of the 1970s as a “bulk-up” shake, the modern iteration has evolved. We have moved away from heavy creams and raw eggs toward plant-based proteins, natural sweeteners, and “superfood” additions.
This recipe strikes the perfect balance between a decadent milkshake and a functional nutritional powerhouse. Whether you are recovering from a grueling session at the gym or looking for a breakfast that will keep you satiated until noon, this smoothie serves as your secret weapon.
2. Recipe Overview
- Cuisine Type: American / Health-Conscious
- Difficulty Level: Easy (Beginner-friendly)
- Prep Time: 5 minutes
- Total Time: 5 minutes
- Dietary Classifications: Vegetarian, Gluten-Free (can be made Vegan/Dairy-Free with substitutions)
- Yield: 1 Large Serving (approx. 16–20 oz)
3. Equipment and Tools
To achieve that signature “velvet” texture, the quality of your equipment is just as important as your ingredients.
- High-Speed Blender: A motor with at least 900 to 1200 watts is recommended to completely pulverize frozen fruit and ice without leaving grit.
- Blender Jar: A minimum capacity of 32 ounces (approx. 950 ml) to allow for proper vortex formation.
- Measuring Tools: A set of dry measuring cups and liquid measuring beakers for precision.
- Silicone Spatula: Essential for scraping down the sides of the blender to ensure every bit of peanut butter is incorporated.
- Glassware: A chilled 20 oz hurricane or pint glass.
4. Serving Suggestions
A smoothie should be an experience for the senses. Don’t just pour and gulp—elevate the presentation.
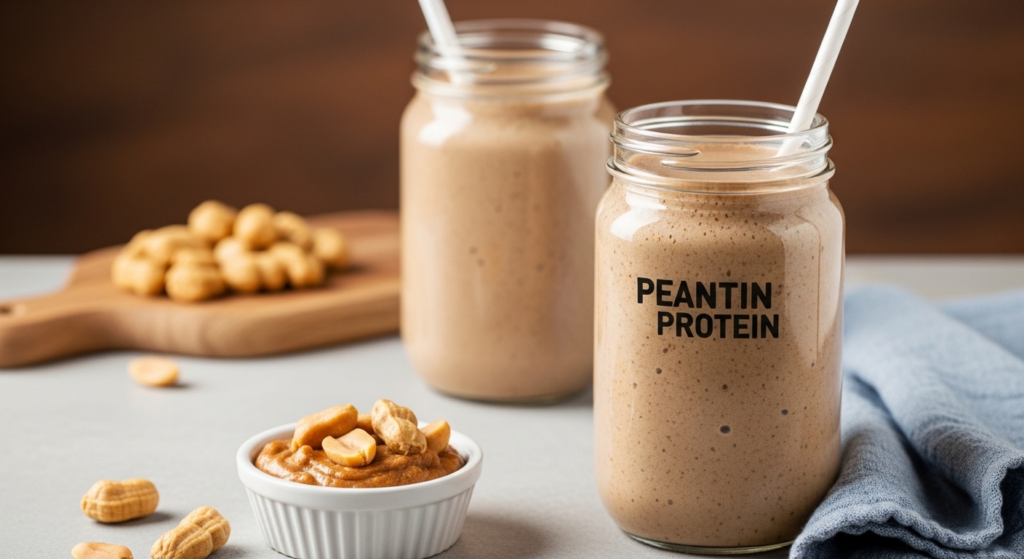
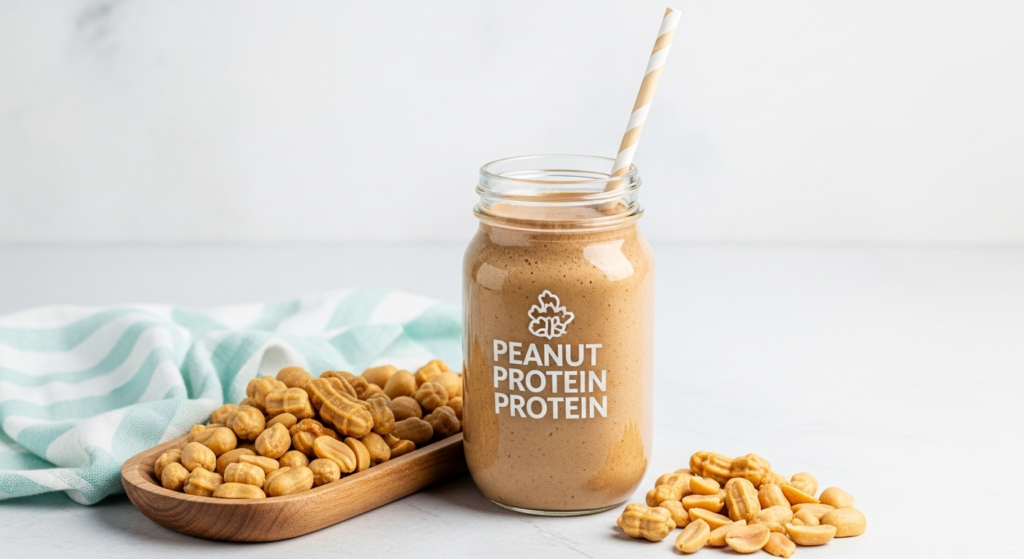
- Plating: Serve in a tall, chilled glass. If you’re feeling fancy, drizzle a teaspoon of melted peanut butter or chocolate ganache inside the glass before pouring.
- Garnish: Top with a sprinkle of hemp hearts, a dash of cinnamon, or a few crushed roasted peanuts for a satisfying crunch.
- Complementary Sides: If serving as a light breakfast, pair with a side of fresh berries or a slice of sprouted grain toast.
- Beverage Pairings: Best enjoyed solo, but if you need a caffeine kick, a shot of chilled espresso can be blended directly into the mix for a “Mocha Peanut Butter” twist.
5. Nutritional Information
(Calculated based on standard ingredients: 1 banana, 2 tbsp peanut butter, 1 scoop whey protein, 1 cup almond milk)
| Nutrient | Amount per Serving |
| Calories | 420 kcal |
| Total Fat | 18g |
| Saturated Fat | 3.5g |
| Protein | 30g – 35g |
| Total Carbohydrates | 38g |
| Dietary Fiber | 6g |
| Sugars | 18g (Natural) |
Health Benefits:
- Muscle Recovery: High biological value protein aids in muscle protein synthesis.
- Heart Health: Monounsaturated fats from peanuts support healthy cholesterol levels.
- Potassium: Frozen bananas provide electrolytes to prevent muscle cramping.
6. Storage and Reheating
Smoothies are best consumed immediately, but life happens.
- Refrigeration: Store in an airtight mason jar for up to 12 hours. Note: Separation is natural; shake vigorously before drinking.
- Freezing: You can freeze the mixture in silicone ice cube trays. When ready to eat, pop the cubes back into the blender with a splash of liquid and re-blend.
- Pro Tip: Do not “reheat” a smoothie. If it melts, it loses its structural integrity.
7. Expert Tips and Variations
Professional Tips
- The Frozen Factor: Always use frozen bananas. They act as the “ice cream” base. Room temperature bananas result in a watery drink.
- Order Matters: Always pour your liquid in first. This prevents the protein powder from sticking to the bottom and creates a better vortex.
Creative Variations
- The “Green” PB: Add a handful of baby spinach. You won’t taste it, but you’ll add a massive dose of Vitamin K and Iron.
- Low-Carb Version: Swap the banana for frozen cauliflower rice (1/2 cup) and add 2–3 drops of liquid stevia. It maintains the creaminess without the sugar.
- PB & J: Add 1/2 cup of frozen raspberries or strawberries to the mix.
8. Ingredients Section
The Core Components
- 1 medium Frozen Banana: (Peel before freezing for easier use).
- 2 tablespoons Natural Peanut Butter: Use the “drippy” kind with only peanuts and salt listed as ingredients.
- 1 scoop (approx. 30g) Protein Powder: Vanilla or Chocolate works best.
- 1 cup (240ml) Unsweetened Almond Milk: Or your milk of choice (Oat, Soy, Dairy).
- 1/2 teaspoon Vanilla Extract: Enhances the “cookie” flavor profile.
- 1/4 teaspoon Ground Cinnamon: To stabilize blood sugar.
- Optional: 1/2 cup of ice cubes for a thicker, frostier consistency.
Substitutions
- Nut-Free: Swap peanut butter for Sunflower Seed Butter.
- Vegan: Ensure your protein powder is pea, rice, or hemp-based.
- Sweetener: If your banana isn’t ripe enough, add 1 pitted Medjool date.
9. Step-by-Step Instructions
- Prep the Liquid Base: Pour 1 cup of almond milk into the blender. Adding liquid first protects the blades and ensures a smooth start.
- Add the “Glue”: Spoon in 2 tbsp of peanut butter and 1/2 tsp of vanilla extract.
- The Protein Punch: Add 1 scoop of protein powder. By placing it between the liquid and the frozen fruit, you prevent “clumping” on the lid or base.
- The Texture Element: Break your frozen banana into 3 or 4 chunks and drop them in. Add cinnamon and ice (if using).
- The Blend: Start your blender on the lowest speed to break up the frozen chunks. Gradually increase to high speed and blend for 45–60 seconds.
- The “Vortex” Check: Look for a small hole (the vortex) forming in the center of the liquid. Once the sound of the blender changes from “crunching” to a smooth “hum,” you are done.
- Adjusting Consistency: If it’s too thick, add milk 1 tablespoon at a time. If too thin, add more ice or frozen fruit.
- The Pour: Pour into a glass and serve immediately.
10. Frequently Asked Questions (FAQ)
Q: Can I use peanut butter powder (like PB2) instead of real peanut butter?
A: Yes! You will save about 100 calories and 10g of fat, but you will lose that rich, silky mouthfeel. If using powder, I recommend adding a teaspoon of flax oil to keep some healthy fats.
Q: My smoothie is always gritty. Why?
A: This is usually due to the protein powder or an underpowered blender. Try blending the milk, peanut butter, and powder first before adding the frozen fruit to ensure the powder is fully dissolved.
Q: Is it okay to drink this every day?
A: Absolutely. As long as it fits within your daily caloric needs, it is a balanced source of macros.
Q: How do I freeze bananas without them turning into a giant clump?
A: Peel them, slice them into “coins,” and freeze them in a single layer on a parchment-lined tray for two hours before transferring them to a bag.
Q: What is the best protein powder for this?
A: Whey Isolate provides the smoothest texture. If you are plant-based, a Soy or Pea protein blend is best for creaminess. Avoid “Plain” hemp protein if you don’t like an earthy taste.


