1. Introduction
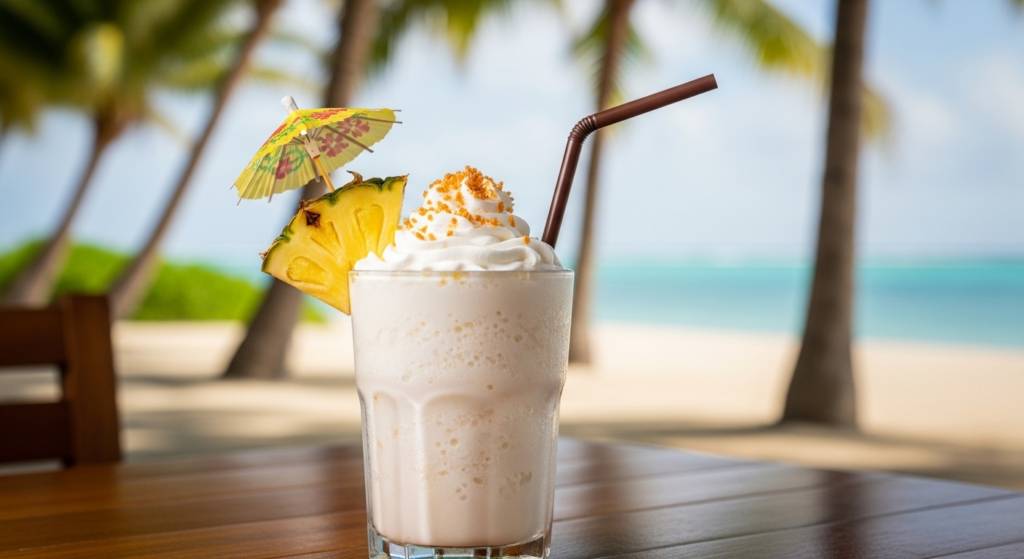
Imagine standing on a sun-drenched beach, the rhythmic sound of turquoise waves crashing against the shore, and a cool breeze carrying the scent of salt and palm fronds. While we can’t all hop on a plane to the Maldives or the Caribbean every morning, we can certainly transport our taste buds there. Enter the Coconut Smoothie—a velvety, luscious beverage that is far more than just a drink; it is a tropical experience in a glass.
Coconut has long been celebrated as the “tree of life” in many Pacific Island and Southeast Asian cultures. From the refreshing water found in young green coconuts to the rich milk pressed from mature ones, every part of the fruit serves a purpose. In this recipe, we celebrate that versatility by blending high-quality coconut elements into a drink that balances indulgence with wellness.
What sets this particular smoothie apart is its texture. Unlike watery fruit blends, this recipe focuses on a “cream-first” philosophy, utilizing coconut milk and flesh to achieve a consistency reminiscent of a fine milkshake, but without the heavy dairy bloat. Whether you are looking for a quick fuel-up before the gym or a sophisticated non-alcoholic treat for a summer brunch, this smoothie stands as a testament to the beauty of simple, high-quality ingredients.
2. Recipe Overview
- Cuisine Type: Tropical / Fusion
- Difficulty Level: Beginner
- Total Time: 5–7 minutes
- Dietary Classifications: Vegan, Plant-Based, Gluten-Free, Dairy-Free, Paleo-Friendly (with compliant sweetener).
3. Equipment and Tools
To achieve that signature silkiness, the quality of your tools matters just as much as your ingredients.
- High-Speed Blender: A blender with at least 1000–1200 watts is recommended to ensure the coconut meat and ice are pulverized into a smooth liquid.
- Measuring Cups and Spoons: For precision in balancing the fats and liquids.
- Silicone Spatula: Essential for scraping down the sides of the blender jar.
- Glassware: A chilled 16 oz (475 ml) hurricane glass or a tall mason jar.
- Fine-Mesh Sieve (Optional): If using fresh coconut meat and you prefer an absolutely pulp-free experience.
4. Serving Suggestions
A drink this beautiful deserves a grand presentation.
Plating and Garnish
- Toasted Shavings: Sprinkle a tablespoon of toasted, unsweetened coconut flakes on top for a nutty crunch.
- Lime Zest: A micro-plane grating of fresh lime zest adds a bright, aromatic pop that cuts through the richness.
- Tropical Skewers: Thread a piece of fresh pineapple and a maraschino cherry onto a bamboo pick.
Beverage Pairings
- Morning: Pair with a shot of dark roast espresso on the side.
- Afternoon: Serve alongside a crisp hibiscus iced tea.
- Evening (Mocktail Style): Serve in a salt-rimmed glass with a splash of sparkling mineral water.
5. Nutritional Information
(Per 16 oz Serving)
| Nutrient | Amount |
| Calories | 310 kcal |
| Total Fat | 22g |
| Saturated Fat | 18g |
| Sodium | 45mg |
| Total Carbohydrates | 28g |
| Dietary Fiber | 4g |
| Sugars | 18g |
| Protein | 3g |
Health Benefits:
The Medium-Chain Triglycerides (MCTs) found in coconut milk are known for providing a quick source of energy for the brain and body. Additionally, coconut water provides essential electrolytes like potassium, making this an excellent recovery drink after physical activity.
6. Storage and Reheating
Refrigeration: This smoothie is best enjoyed immediately. However, you can store it in an airtight container for up to 12 hours. Note that separation is natural; shake vigorously before consuming.
Freezing: You can freeze the mixture in silicone ice cube trays. When ready to drink, simply pop the “smoothie cubes” back into the blender with a splash of coconut water and re-blend.
Note: Never reheat a smoothie. The heat will break the emulsion of the coconut fats and result in an unappealing, oily liquid.
7. Expert Tips and Variations
Professional Tips
- Chill Your Glass: Put your glassware in the freezer 20 minutes before serving. It keeps the smoothie thick for longer.
- The Layering Secret: Always add your liquids first, followed by powders, then solids, and finally ice. This prevents the blades from getting stuck.
Creative Variations
- The “Green” Goddess: Add a handful of baby spinach and half an avocado. You won’t taste the greens, but you’ll gain a massive nutrient boost.
- Protein Power: Add a scoop of vanilla pea protein or collagen peptides for a post-workout meal replacement.
- The Golden Smoothie: Add $1/2$ tsp of turmeric and a pinch of black pepper for anti-inflammatory benefits.

8. Ingredients Section
The Base
- 1 cup (240ml) Full-fat canned coconut milk (Shake the can before measuring).
- 1/2 cup (120ml) Pure coconut water (unflavored).
- 1/2 cup (75g) Frozen young coconut meat (or 1 frozen banana for extra creaminess).
The Flavor Enhancers
- 1 tbsp (15ml) Pure maple syrup or agave nectar (adjust to taste).
- 1/2 tsp Pure vanilla extract (or the seeds from half a vanilla bean).
- 1/8 tsp Sea salt (to brighten the coconut flavor).
- 1 cup Ice cubes (made from filtered water).
Sourcing Notes
Look for coconut milk that contains only “Coconut” and “Water” on the label. Avoid brands with excessive gums (like guar gum) if you want the cleanest flavor profile.
9. Step-by-Step Instructions
- Prep the Blender: Ensure your blender jar is clean. Pour in the 1 cup of coconut milk and 1/2 cup of coconut water first. This creates a “vortex” that pulls the heavier ingredients down.
- Add the Body: Add the frozen coconut meat (or frozen banana). Using frozen fruit instead of just ice ensures the smoothie stays creamy rather than slushy.
- Seasoning: Add the sweetener, vanilla, and sea salt.
- The Chill Factor: Top it off with 1 cup of ice.
- The Blend: Start the blender on its lowest setting and gradually increase to “High.” Process for 45–60 seconds. You are looking for a complete disappearance of ice crystals.
- The Consistency Check: Stop the blender. Insert a spoon to check the thickness. If it’s too thick, add a tablespoon of coconut water. If too thin, add 2-3 more ice cubes and pulse.
- Serve: Pour immediately into your chilled glass. Garnish with your choice of toppings and serve with a wide-diameter straw.
10. Frequently Asked Questions (FAQ)
Q: Can I use “carton” coconut milk instead of canned?
A: Yes, but the result will be much thinner and less “rich.” Carton milk is primarily water. If you use it, add half an avocado to regain that creamy mouthfeel.
Q: Is coconut meat necessary?
A: It provides the “chew” and depth of flavor. If you can’t find it, a frozen banana is the best substitute for texture, though it will add a slight banana flavor.
Q: How do I make this lower in calories?
A: Use “lite” coconut milk and replace the maple syrup with a stevia or monk fruit sweetener.
Q: My smoothie is too grainy. What happened?
A: This usually happens if the coconut meat wasn’t fully thawed or if the blender isn’t powerful enough. Try blending the liquids and coconut meat first before adding the ice.
Q: Can I add pineapple to make a Piña Colada smoothie?
A: Absolutely! Replace the coconut meat with 1 cup of frozen pineapple chunks for a classic tropical flavor profile.


