1. Introduction: The Art of the Golden Grid
There are few things in the culinary world as comforting as the aroma of freshly cooked waffles wafting through the house on a slow weekend morning. That distinct, toasted scent—a blend of caramelized butter, vanilla, and perfectly browned batter—is the hallmark of a great breakfast.
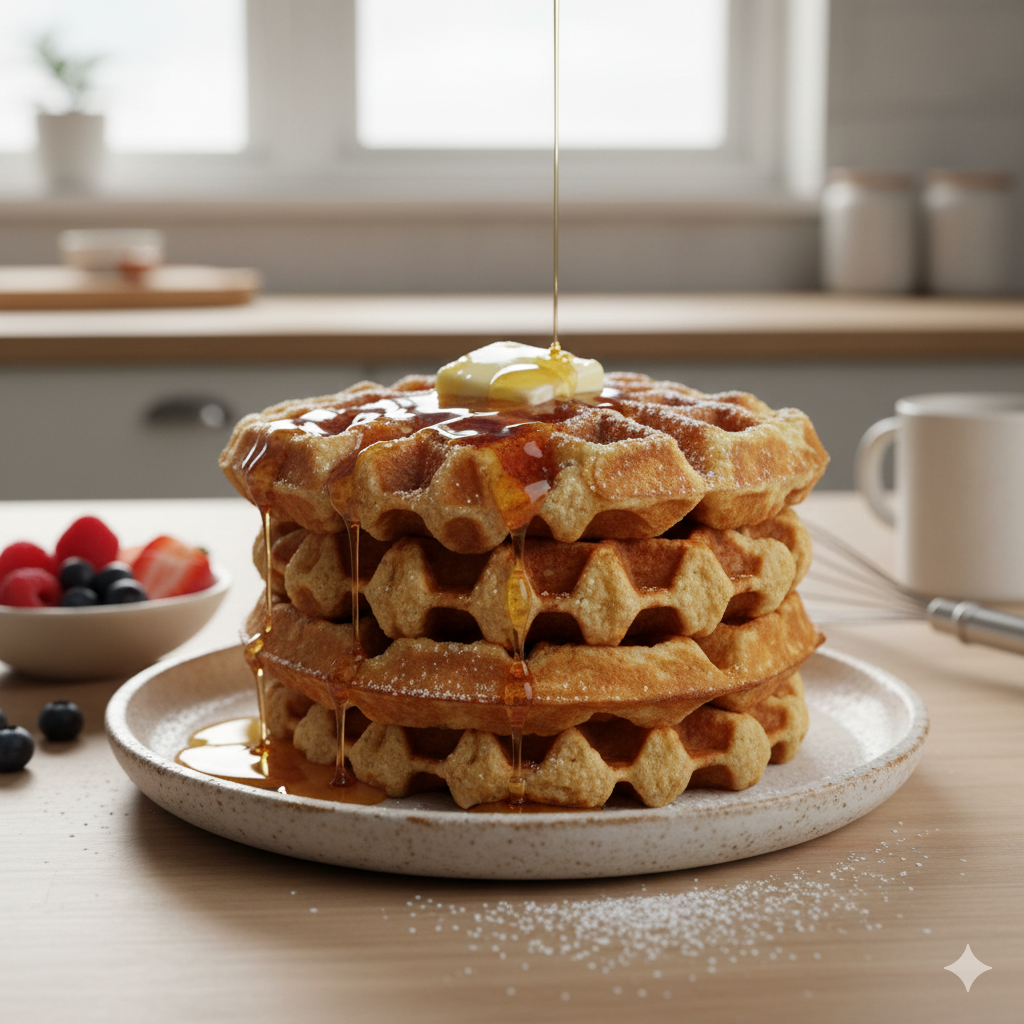
While pancakes are a classic, the waffle is a structural masterpiece. With its signature deep pockets and crisp, golden-brown edges, the waffle isn’t just a breakfast dish; it is a vessel for flavor. Whether you fill those divots with high-quality maple syrup, fresh fruit compote, or a dollop of whipped cream, the waffle provides a texture-contrast that remains unmatched in the world of griddled cakes.
The history of the waffle is as rich as its taste. Tracing its roots back to medieval Europe, specifically the “wafer” irons used by street vendors to press thin cakes, the dish evolved over centuries. By the time it reached the Belgian masters and eventually the American diner culture, it had transformed into the leavened, airy creation we adore today. Whether you prefer the thin, crisp styles or the thick, airy Belgian variety, the goal is always the same: a perfect balance of crunch and fluff. In this guide, we will walk you through the science, the technique, and the “secret” adjustments needed to bring professional-grade waffles to your own kitchen.
2. Recipe Overview
- Cuisine Type: American/Belgian-style
- Difficulty Level: Easy to Moderate (Perfect for home cooks)
- Total Time: 30–40 minutes
- Dietary Classifications: Vegetarian. (Easily adaptable to gluten-free or dairy-free).
3. Equipment and Tools
Great results start with the right tools. Ensure your kitchen is equipped with the following:
- Waffle Iron: A Belgian-style iron (with deep grids) is recommended for a better pocket-to-batter ratio. Ensure the iron is non-stick or well-seasoned.
- Mixing Bowls: Two large bowls (stainless steel or glass).
- Whisk: A sturdy balloon whisk for aeration.
- Silicone Spatula: For gentle folding of ingredients.
- Measuring Tools: Precise dry and liquid measuring cups are essential for consistent ratios.
- Wire Cooling Rack: A critical tool. Placing hot waffles directly on a plate traps steam, making them soggy. A rack allows airflow to keep the crust crisp.
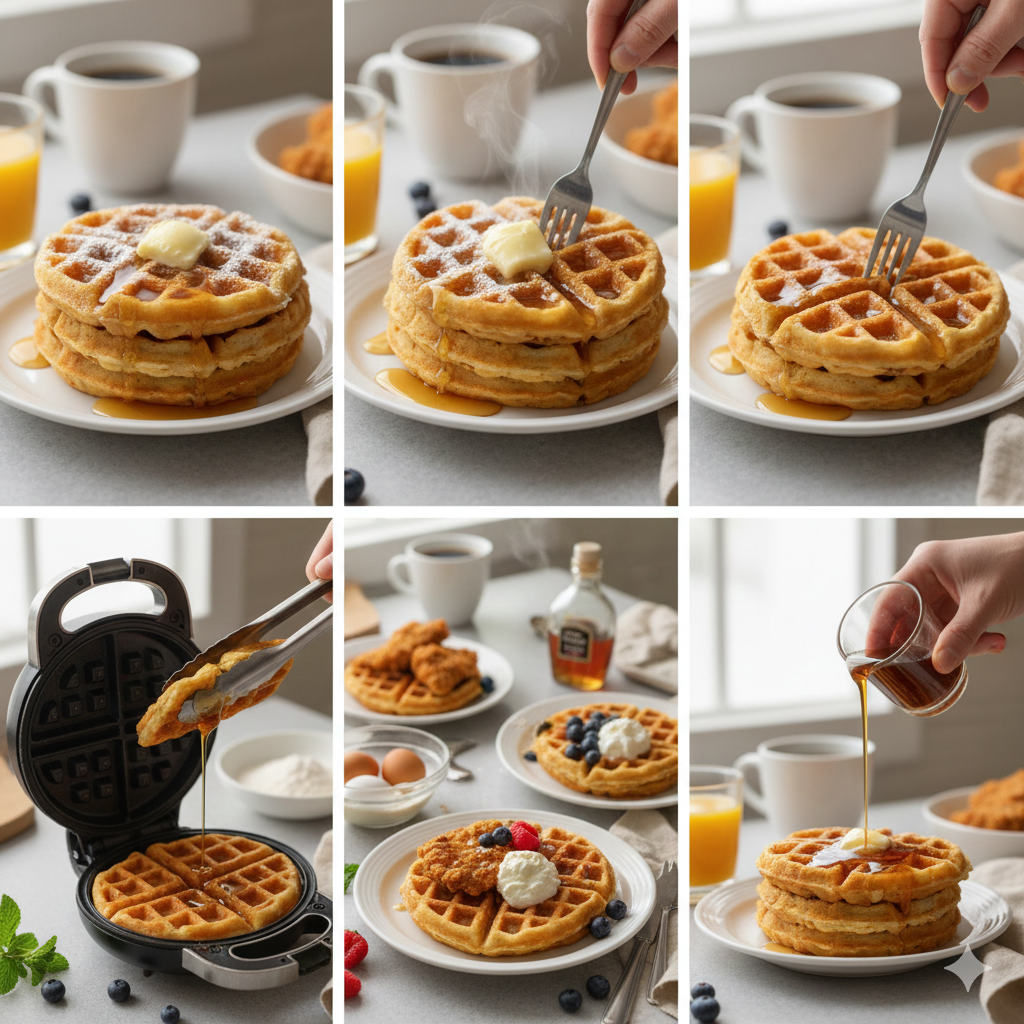
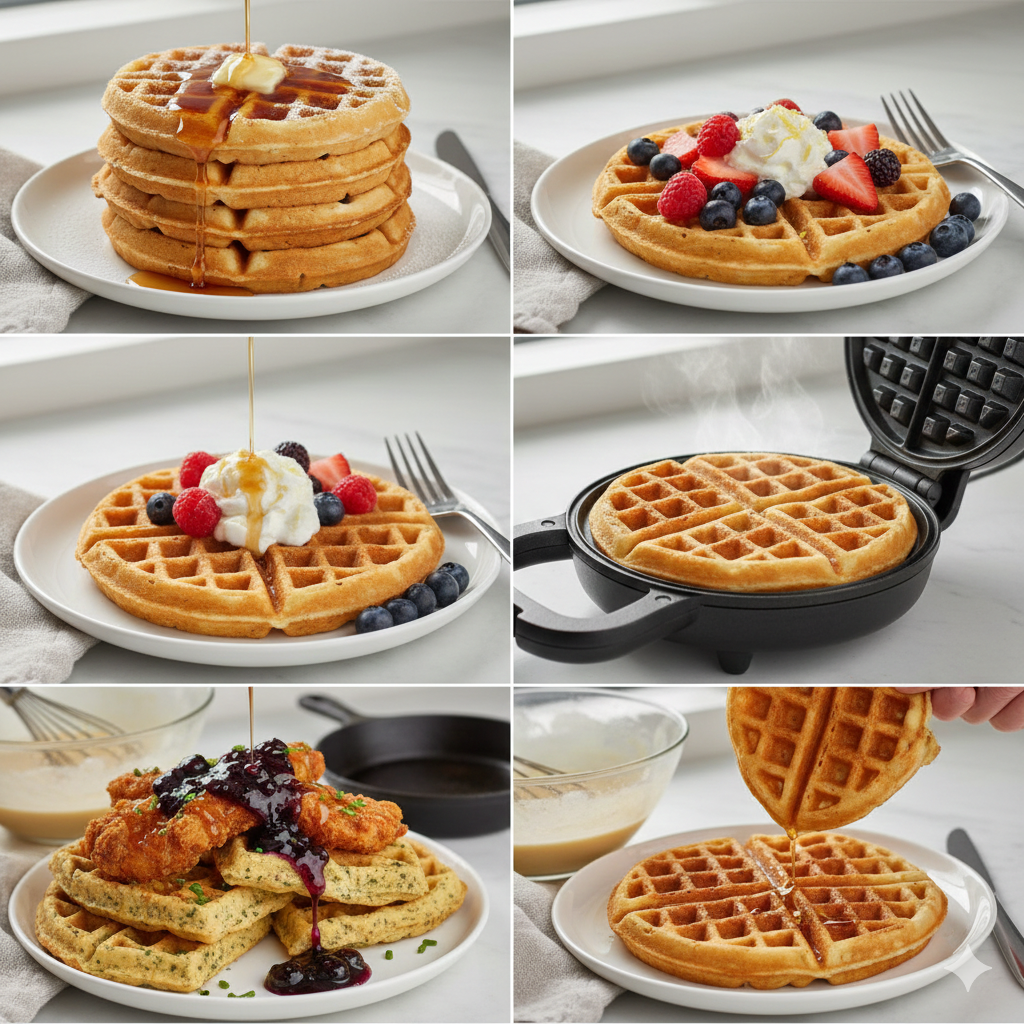
4. Serving Suggestions
- Classic Comfort: Melted grass-fed butter and warm, pure maple syrup.
- Fresh & Bright: Seasonal berries (strawberries, blueberries), a squeeze of lemon juice, and a light dusting of powdered sugar.
- The Savory Route: If you’re feeling adventurous, top with fried chicken, a drizzle of hot honey, or a poached egg with a touch of fresh chives.
- Beverage Pairing: A bright, acidic coffee (like a Kenyan roast) cuts through the richness of the butter, or a glass of chilled Prosecco for a celebratory brunch.
5. Nutritional Information
(Estimates based on one standard-sized waffle)
- Calories: 280–320 kcal
- Carbohydrates: 40g
- Protein: 7g
- Fat: 12g (mostly from butter/oil)
- Dietary Note: To improve the nutritional profile, substitute 50% of the all-purpose flour with white whole-wheat flour to increase fiber content.
6. Storage and Reheating
- Refrigerator: Store in an airtight container for up to 3 days.
- Freezing: Let waffles cool completely on a rack. Wrap individually in parchment paper and place in a freezer-safe bag for up to 1 month.
- Reheating: Avoid the microwave at all costs. Pop them into a toaster or a preheated oven (175°C / 350°F) for 3–5 minutes. The oven approach is best for restoring that “fresh-from-the-iron” crunch.
7. Expert Tips and Variations
- The “Cornstarch Hack”: Substitute 1/4 cup of your flour with cornstarch. This creates a lighter, crispier exterior that stays crunchy even after syrup is added.
- Don’t Overmix: This is the most common mistake. Mix until the flour is just incorporated. Small lumps are okay; overmixing creates long gluten strands, resulting in a rubbery texture.
- Room Temp Matters: Ensure your eggs and milk are at room temperature. Cold ingredients can cause the melted butter to seize into small, unwanted lumps.
- Seasonal Variations: Fold in blueberries in the summer, or a teaspoon of pumpkin spice and some chopped walnuts during the autumn months.
8. Ingredients Section
| Ingredient | Measurement | Notes |
| All-Purpose Flour | 2 cups (250g) | Sifted for better aeration |
| Cornstarch | 1/4 cup (32g) | Secret for crispiness |
| Baking Powder | 1 tbsp (12g) | Freshness is key for lift |
| Salt | 1/2 tsp | Enhances all flavors |
| Sugar | 2 tbsp (25g) | Adds browning color |
| Large Eggs | 2 | Separated (whites whipped) |
| Whole Milk | 1 3/4 cups (415ml) | Can use buttermilk for tang |
| Melted Butter | 1/2 cup (115g) | Unsalted, slightly cooled |
| Vanilla Extract | 1 tsp | Use high-quality extract |
9. Step-by-Step Instructions
- Preparation: Preheat your waffle iron. Ensure it is fully hot before pouring the first scoop.
- Combine Dry: In a large bowl, whisk the flour, cornstarch, baking powder, salt, and sugar.
- Prepare Wet: In a separate bowl, whisk the egg yolks, milk, butter, and vanilla.
- The Technique (The “Lift”): For the ultimate texture, beat your egg whites in a separate bowl until they hold stiff peaks. This is the secret to a professional, cloud-like interior.
- Mix: Combine wet and dry ingredients. If you whipped the egg whites, gently fold them into the batter last using a silicone spatula.
- Rest: Allow the batter to rest for 10 minutes. This lets the flour hydrate and ensures a superior rise.
- Cook: Pour the recommended amount of batter (usually 1/2 to 2/3 cup) into the center of the iron. Close the lid and do not lift until the steam significantly subsides—this usually indicates the waffle is crisp and set.
- Cool: Transfer directly to a wire rack.
10. Frequently Asked Questions (FAQ)
Q: Why does my waffle stick to the iron?
A: Usually, this is because the iron wasn’t hot enough or didn’t have enough fat. Ensure the iron is fully preheated and consider a light spray of neutral oil.
Q: Can I make this batter ahead of time?
A: You can, but the leavening agent (baking powder) will start to lose its potency. If prepping ahead, store the dry and wet ingredients separately and mix just before cooking.
Q: How do I know if the waffle is finished?
A: Steam is your guide. When steam stops escaping from the iron, the waffle is usually golden and ready.
Q: Why is my waffle chewy instead of crispy?
A: You likely overmixed the batter, which developed too much gluten. Remember: treat the batter gently!
Q: Is it okay to substitute almond flour?
A: You can substitute up to 25% of the flour with almond flour for a nutty flavor, but replacing all of it will result in a denser, less structural waffle.


