1. Introduction: A Symphony of Flavor and Fuel
There is a rare, almost magical intersection in the culinary world where “decadent indulgence” meets “functional nutrition.” The Chocolate Peanut Butter Smoothie Bowl lives exactly at that crossroads. For many, the combination of rich, earthy cacao and salty, roasted peanut butter evokes memories of childhood confections—specifically the iconic peanut butter cup. However, this bowl reclaims those flavors from the world of candy and transforms them into a sophisticated, high-performance breakfast.
The “smoothie bowl” phenomenon traces its roots back to the Açaí na tigela of Brazil, a dish that became a staple for surfers and athletes seeking quick energy and cooling refreshment. As the trend migrated to the global stage, it evolved. We moved beyond just berries to embrace the “nice cream” base—frozen bananas blended into a texture indistinguishable from premium soft-serve ice cream.
This recipe isn’t just about eating; it’s about an experience. It’s the contrast between the freezing, velvety base and the crunch of toasted toppings. It’s the visual artistry of a perfectly arranged garnish. Whether you are recovering from an intense morning workout or looking for a way to make healthy eating feel like a reward rather than a chore, this bowl is a game-changer. It is proof that you don’t have to sacrifice your cravings to honor your health.
2. Recipe Overview
- Cuisine Type: Modern American / Health Fusion
- Difficulty Level: Easy (Beginner-friendly)
- Total Preparation Time: 10 minutes
- Cooking Time: 0 minutes (No-cook recipe)
- Dietary Classifications: Vegan, Vegetarian, Gluten-Free, Dairy-Free, Soy-Free (depending on milk choice).
3. Equipment and Tools
To achieve the professional, “spoon-able” thickness required for a true smoothie bowl, your equipment choices are vital.
- High-Speed Blender: A motor with at least 1200 watts is ideal. Brands like Vitamix or Ninja are preferred because they can process frozen fruit with minimal liquid.
- Blender Tamper: This is the plastic tool that allows you to push ingredients into the blades safely while the motor is running. It is the secret to a thick consistency.
- Digital Kitchen Scale: Essential for those tracking macros or wanting consistent results every time.
- Silicone Spatula: For scraping every last bit of chocolatey goodness from the blender walls.
- Chilled Ceramic Bowl: Using a bowl that has been in the freezer for 5 minutes prevents the smoothie from melting as you apply toppings.
4. Serving Suggestions
Plating Recommendations
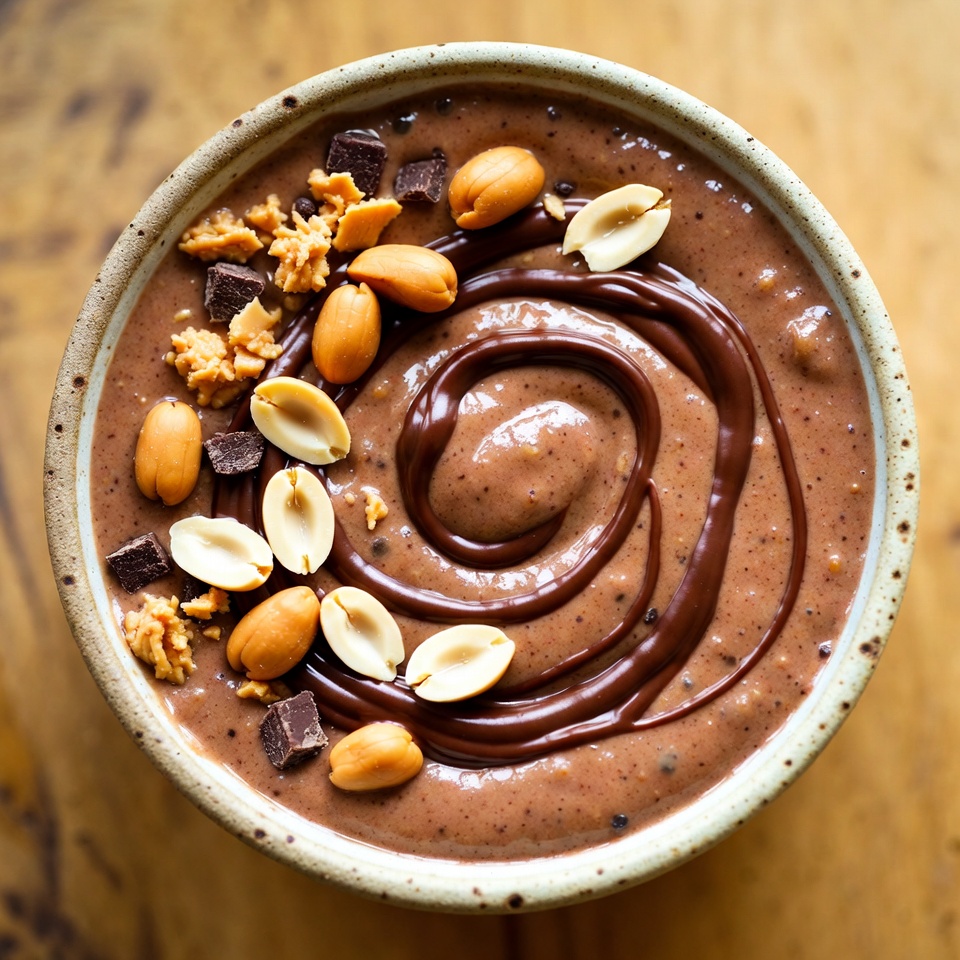
Pour the thick base into a wide, shallow bowl. Use the back of a spoon to create “waves” or a central well. This isn’t just for aesthetics; these grooves catch the liquid toppings like honey or melted peanut butter.
Garnish Ideas
- The Crunch: Cacao nibs, hemp hearts, or a sprinkle of grain-free granola.
- The Freshness: Sliced organic strawberries or a handful of tart raspberries to balance the richness.
- The Decadence: A final drizzle of warmed, runny peanut butter and a few flakes of Maldon sea salt.
Beverage Pairings
Since this bowl is cold and rich, it pairs beautifully with a warm Oat Milk Latte or a Ceremonial Grade Matcha. If you prefer a cold pairing, a glass of Chilled Hibiscus Tea provides a floral acidity that cleanses the palate between bites.
5. Nutritional Information
Note: Values are estimates based on standard ingredients.
- Calories per serving: 445 kcal
- Total Fat: 19g
- Saturated Fat: 4.5g
- Carbohydrates: 58g
- Dietary Fiber: 11g
- Sugars: 26g (Natural sugars from bananas)
- Protein: 14g
Potential Health Benefits:
- Magnesium: Found in raw cacao, supporting muscle relaxation and nervous system health.
- Potassium: Provided by the bananas to aid in hydration and heart function.
- Healthy Fats: The monounsaturated fats in peanut butter support brain health and long-term satiety.
6. Storage and Reheating
Smoothie bowls are best enjoyed immediately. Because the texture relies on the structural integrity of frozen fruit fibers, they do not “keep” well in the fridge.
- Refrigeration: Not recommended (it will turn into a liquid smoothie).
- Freezing: If you have leftovers, freeze them in silicone muffin molds. These “pucks” can be dropped into a blender later with a splash of milk for a quick refresh.
- Reheating: Do not reheat. This dish is intended to be served at approximately -2°C to 0°C.
7. Expert Tips and Variations
Professional Chef Tips
- The “Frozen Coin” Technique: Never freeze a whole banana. Peel them, slice them into “coins,” and freeze them on a baking sheet. This increases the surface area, allowing the blender to catch them easier without needing excess liquid.
- The Liquid Ratio: Add liquid 1 tablespoon at a time. The goal is to hear the blender “growl”—that means it’s working through a thick mass, which creates the best texture.
Creative Variations
- The “Pro” Bowl: Add 1 scoop of chocolate whey or pea protein powder.
- The “Hidden Veggie”: Add 1/2 cup of frozen steamed cauliflower. It adds creaminess and fiber without changing the flavor.
- The “Snickers” Variation: Add a pinch of salt and top with crushed roasted peanuts and a date-syrup drizzle.
8. Ingredients Section
The Base
- 2 Large Bananas (240g): Must be very ripe (brown spots) and frozen solid for at least 12 hours.
- 2 tbsp (32g) Natural Peanut Butter: Look for brands where the only ingredients are “peanuts and salt.”
- 2 tbsp (15g) Raw Cacao Powder: For a deep, antioxidant-rich chocolate flavor.
- 1/4 cup (60ml) Unsweetened Almond Milk: Or any plant-based milk of choice.
- 1/2 tsp Vanilla Extract: To enhance the sweetness of the bananas.
- A Pinch of Sea Salt: To make the chocolate flavors “pop.”
Ingredient Substitutions
- Nut-Free: Swap peanut butter for Sunflower Seed Butter (SunButter).
- Low-Sugar: Replace one banana with 1/2 a frozen avocado for a keto-friendly creaminess.
9. Step-by-Step Instructions
- Prep the Liquid: Pour your almond milk and vanilla extract into the blender first. Adding liquid at the bottom helps the blades spin more freely initially.
- Add the Dry Ingredients: Add the cacao powder and salt. Placing them before the frozen fruit prevents the powder from “poffing” up and sticking to the lid.
- Add the Frozen Mass: Add your frozen banana coins and the peanut butter.
- The Low-Speed Start: Start your blender on its lowest setting. Use the tamper to aggressively push the frozen bananas down into the blades.
- The “X” Pattern: As the mixture thickens, you will see four “mounds” form at the top (the “vortex”). When it looks like thick soft-serve and the vortex is consistent, stop immediately. Over-blending creates heat, which melts the bowl.
- The Scrape: Use your spatula to transfer the mixture into your chilled bowl.
- Artistic Topping: Add your garnishes immediately before the edges begin to soften.
10. Frequently Asked Questions (FAQ)
Q: Can I use cocoa powder instead of cacao? A: Yes. Cacao is less processed and more bitter; cocoa is more mellow. Both work perfectly.
Q: My blender isn’t moving. What do I do? A: Stop the blender. Use a spoon to stir the mixture and remove any air pockets around the blade. Add 1 tablespoon of milk and try again.
Q: Is this bowl healthy enough for every day? A: Absolutely. It is high in fiber and healthy fats. To make it even more balanced, ensure you include a protein source like chia seeds or protein powder.
Q: How do I get my bananas to freeze without sticking together? A: Freeze them in a single layer on a parchment-lined tray first, then move them to a bag once they are frozen solid.
Q: Can I make this a “green” smoothie bowl? A: Yes! A handful of baby spinach blends in perfectly. The dark cacao will hide the green color, making it a great “stealth health” option.


