Table of Contents
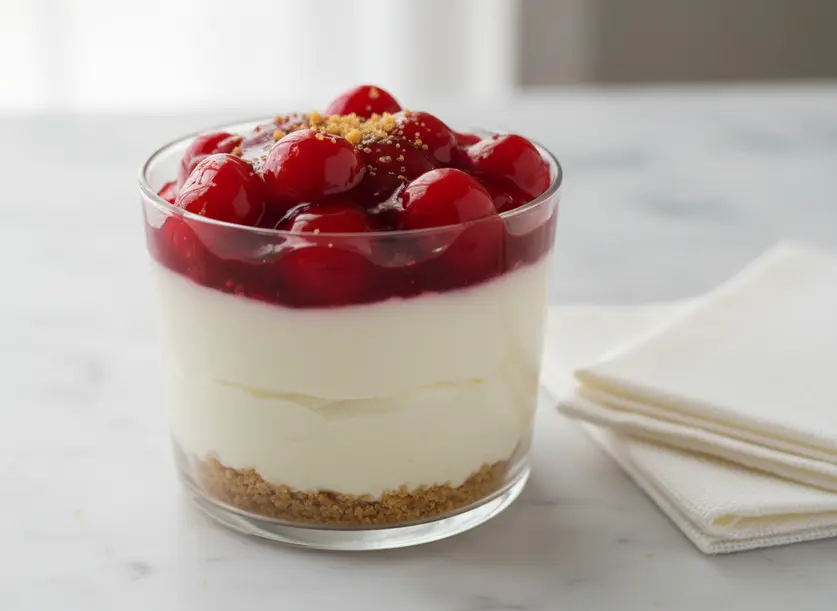
There’s something truly magical about a dessert that looks impressive but takes minimal effort. That’s exactly what you get with these delightful no-bake cherry cheesecake cups. Imagine layers of buttery graham cracker crumbs, a luscious, tangy cream cheese filling, and vibrant cherry pie topping, all nestled in individual servings. These cheesecake cups are a fantastic dessert option for any gathering, whether it’s a casual BBQ or a more formal get-together. They offer all the classic flavors of a beloved cheesecake without any of the fuss or baking time. Get ready to impress everyone with this simple yet sensational treat that comes together in a flash!
What Makes This Dish Worth Making
These individual cherry cheesecake cups are truly a dessert champion. First and foremost, they are no-bake, which means you avoid turning on your oven and dealing with fussy water baths or cracked tops. This makes them perfect for hot summer days or when you just don’t have time for a lengthy baking project. The convenience factor is huge; you can whip up a batch of these cheesecake cups in under an hour, including chill time, making them an ideal last-minute dessert.
Another huge benefit is their individual portioning. No need to slice and serve a full cheesecake, which can often get messy. Each person gets their own perfectly sized treat, ready to grab and enjoy. This also makes them incredibly portable, excellent for potlucks, picnics, or school events. Plus, the clear cups make for a beautiful presentation, showcasing all those delicious layers. They combine the best parts of a creamy cheesecake and a fruity cherry pie into one irresistible package, making them a definite crowd-pleaser every single time. You’ll love how simple yet elegant these cheesecake cups are.
Ingredients You Will Need
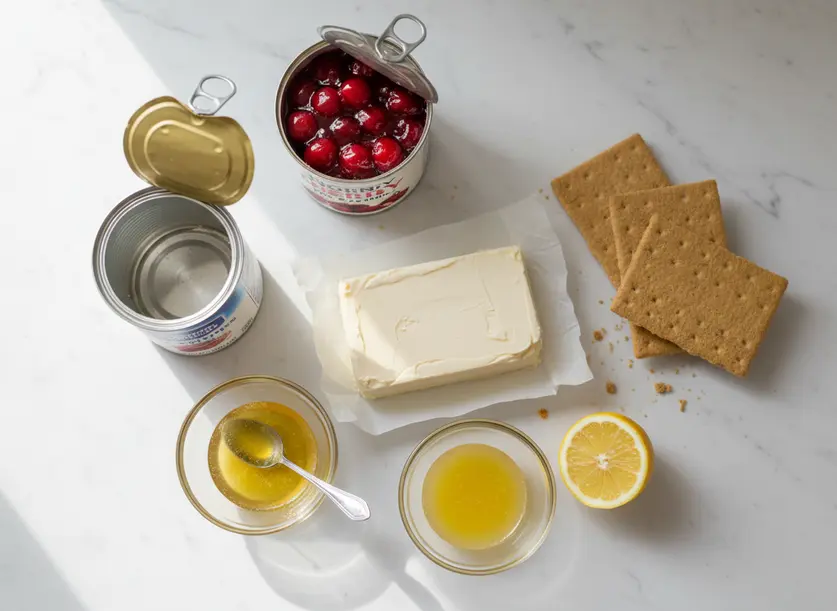
Making these simple cheesecake cups requires just a handful of readily available ingredients. For the crust, you will need nine sheets of graham crackers, which you will crush into fine crumbs. If you don’t have graham crackers, Nilla wafers, Oreos (without the cream filling), or even gingersnap cookies make excellent substitutes for a different flavor profile. You’ll also need a quarter cup of granulated sugar and three tablespoons of melted butter to bind the crumbs together. For the creamy cheesecake filling, make sure you have one eight-ounce block of cream cheese, softened to room temperature. This is crucial for a smooth mixture, but if you’re in a hurry, you can use whipped cream cheese from a tub. A fourteen-ounce can of sweetened condensed milk provides the sweetness and creamy texture, and a quarter cup of lemon juice, preferably fresh from about half a lemon, adds a vital tangy counterpoint to the sweetness. Finally, for the topping, grab one twenty-one-ounce can of cherry pie filling. Feel free to swap this with blueberry, strawberry, or even a homemade fruit compote if you prefer, just ensure it’s cooled before use.
How to Make It Step by Step
Let’s walk through creating these amazing no-bake cherry cheesecake cups. It’s a straightforward process that anyone can master.
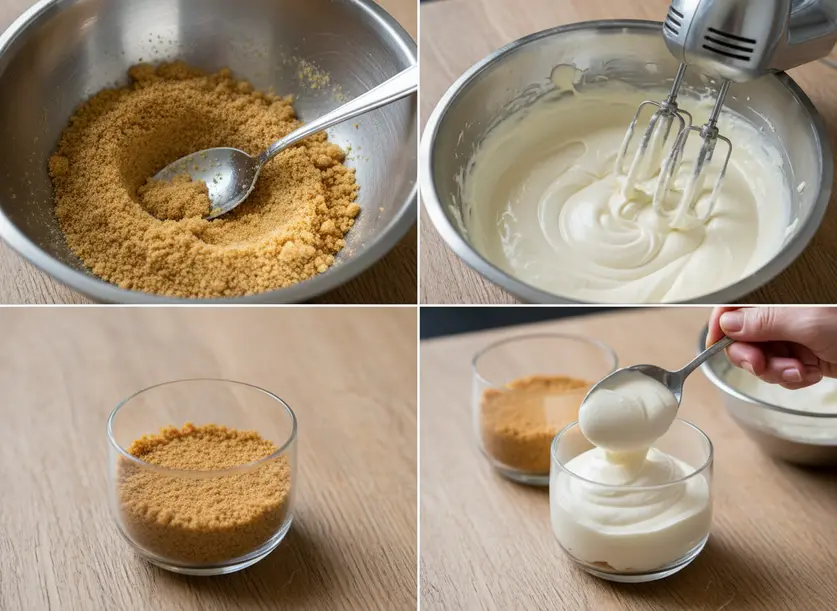
- Begin by preparing your crust. In the bowl of a food processor, combine the graham cracker sheets, granulated sugar, and melted butter. Pulse these ingredients until the mixture forms fine crumbs that resemble wet sand. If you don’t have a food processor, place the crackers in a large zip-top bag and crush them with a rolling pin, then stir in the sugar and butter in a bowl.
- Next, prepare the cheesecake filling. In a large mixing bowl, combine your softened cream cheese, the entire can of sweetened condensed milk, and the lemon juice. Using an electric mixer on medium speed, beat these ingredients together until the mixture is completely smooth and creamy. Ensure there are no lumps of cream cheese remaining.
- Now it’s time to assemble your cheesecake cups. Grab your chosen individual cups, ideally clear nine-ounce cups for a beautiful visual effect. Start by spooning a layer of the graham cracker crumbs into the bottom of each cup. Gently press the crumbs down to form an even crust.
- Follow with a layer of the creamy cheesecake mixture. Use a spoon or a triggered cookie scoop for even distribution. Smooth the top slightly with the back of the spoon.
- Then, add a layer of cherry pie filling over the cheesecake mixture. Spread it out gently to cover the cheesecake layer.
- Repeat the layering process one more time: another layer of graham cracker crumbs, followed by another layer of cheesecake mixture, and then another layer of cherry pie filling. Top it all off with a final sprinkle of graham cracker crumbs for garnish.
- Once all your cups are assembled, place them in the refrigerator. Chill for at least one hour, or until you are ready to serve and enjoy them. Chilling allows the cheesecake filling to set and the flavors to meld beautifully.
Tips for the Best Results
Achieving perfect no-bake cheesecake cups is simple when you know a few key tricks. Firstly, always ensure your cream cheese is completely softened to room temperature before you start mixing. This is critical for a smooth, lump-free filling. If your cream cheese is cold, it will be difficult to incorporate and can leave undesirable chunks in your cheesecake mixture. You can speed up softening by cutting the block into smaller pieces.
Secondly, use an electric mixer for your cheesecake filling. While you can technically mix by hand, an electric mixer whips more air into the mixture, resulting in an incredibly light, airy, and ultra-smooth consistency. This enhances the overall texture of your cheesecake cups significantly. Don’t skimp on the mixing time; beat until everything is perfectly combined.
Thirdly, don’t rush the chill time. Refrigerating your cheesecake cups for at least one hour allows the filling to set properly and the flavors to fully develop. If you serve them too soon, the filling might be too soft. For best results, consider chilling them for two to four hours, or even overnight, especially if you are making them for a party. If you are making them more than two hours ahead, cover them tightly with plastic wrap to prevent the top layer from drying out or forming a crust. These cheesecake cups store wonderfully in the refrigerator for up to five days, making them an excellent make-ahead dessert.
Variations to Try
While cherry cheesecake cups are a classic, there are so many ways to customize this recipe to your taste. One popular variation is Berry Cheesecake Cups. Instead of cherry pie filling, use strawberry, blueberry, or mixed berry pie filling. You can also use fresh berries tossed with a little sugar and lemon juice for a lighter, brighter flavor. Consider a Nilla wafer crust for a different twist with berry fillings. You can even layer different berries for a colorful presentation.
For the chocolate lovers, try Chocolate Cheesecake Cups. Swap out the graham cracker crust for an Oreo cookie crust (simply crush whole Oreos, cream filling and all, and mix with melted butter). You can also mix a tablespoon of cocoa powder into your cheesecake filling, or swirl in some melted chocolate before chilling. Top with chocolate fudge sauce or chocolate shavings instead of fruit for an indulgent treat that will satisfy any chocolate craving. A chocolate drizzle over the top also adds an elegant touch.
If you prefer something tart and zesty, go for Key Lime Cheesecake Cups. Increase the lemon juice to half a cup or substitute it entirely with fresh key lime juice. You can also add a teaspoon of lime zest to the cream cheese mixture for an extra burst of citrus flavor. The classic graham cracker crust works perfectly here, and you can garnish with a thin slice of lime before serving. These variations keep the no-bake cheesecake cups ease but offer a fresh take on the traditional recipe.
FAQ
Can I make cheesecake cups ahead of time?
Absolutely! These cheesecake cups are fantastic for making ahead. You can prepare them up to five days in advance and store them covered tightly in the refrigerator. This makes them a perfect dessert for entertaining, as you can have them ready to go when your guests arrive, reducing last-minute stress.
What if I don’t have a food processor for the crust?
No problem at all! You can easily crush graham crackers by placing them in a large, sturdy zip-top bag. Seal the bag, then use a rolling pin or the bottom of a heavy pan to crush the crackers into fine crumbs. Once crushed, transfer them to a bowl and mix in the granulated sugar and melted butter as directed in the recipe.
Why is my cheesecake filling lumpy?
A lumpy cheesecake filling usually indicates that your cream cheese wasn’t soft enough when you started mixing. Cold cream cheese doesn’t blend smoothly with other ingredients. To avoid this, always make sure your cream cheese is at room temperature. If it’s already lumpy, try beating it for an additional minute or two with your electric mixer to smooth out any remaining lumps, or pass it through a fine-mesh sieve if necessary.