1. Introduction
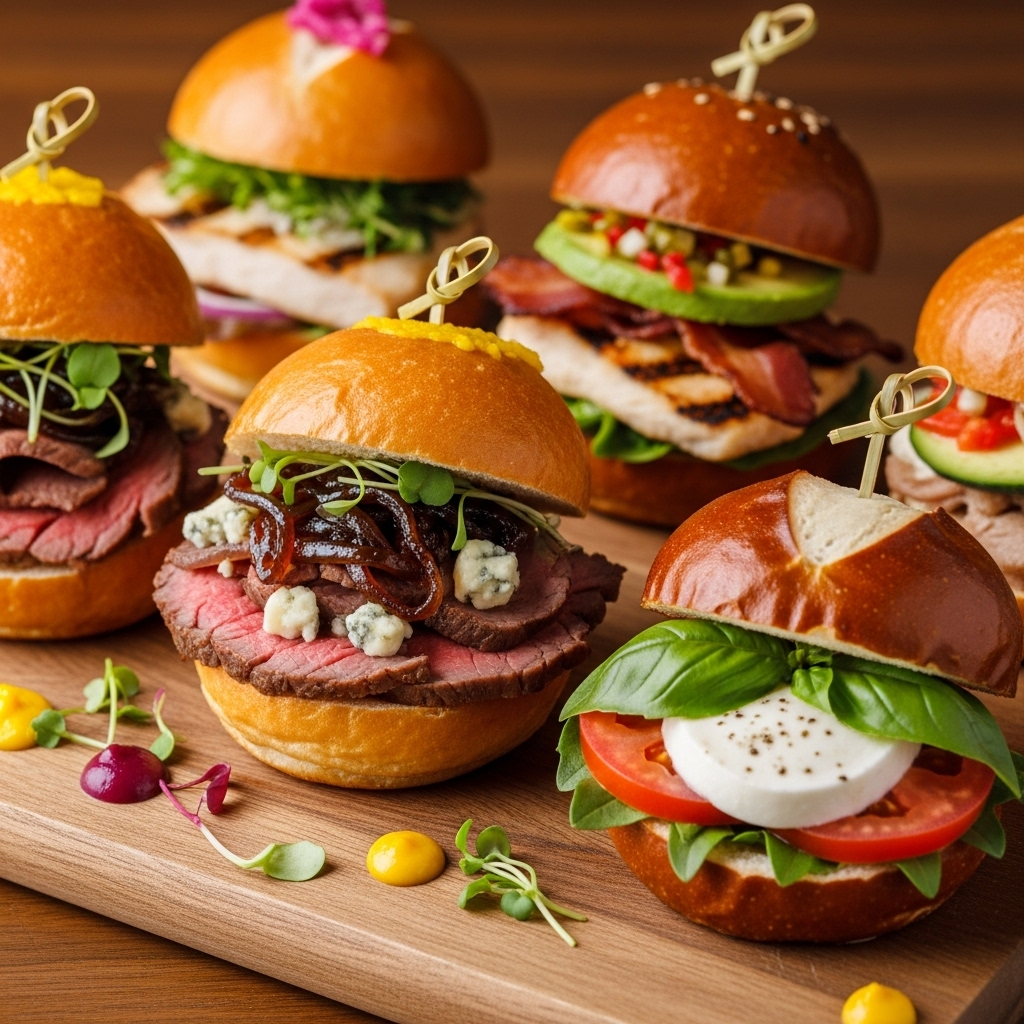
There is something inherently joyful about a tray of golden-brown, buttery Sandwich Sliders. Whether you call them “party sandwiches,” “funeral rolls,” or simply “those amazing little melts,” these mini-sandwiches have become a staple of American social gatherings. From game-day tailgates to holiday brunches and casual weeknight dinners, sliders offer a unique combination of convenience and indulgence.
The magic of the slider lies in its construction. Unlike a traditional sandwich where each slice of bread is toasted individually, sliders are typically prepared “en masse.” By using a slab of joined rolls—most famously Hawaiian sweet rolls—you can assemble twelve or twenty-four sandwiches at once. The entire tray is then drenched in a savory butter glaze and baked until the cheese is gooey and the tops are delightfully crisp.
Historically, the term “slider” referred specifically to small, steam-grilled burgers (pioneered by chains like White Castle). However, the modern slider has evolved into a versatile canvas. It bridges the gap between a snack and a meal, offering a sophisticated way to serve classic flavor profiles like Ham and Swiss, Roast Beef and Provolone, or Turkey and Cranberry in a format that encourages sharing.
2. Recipe Overview
- Cuisine Type: American Fusion / Appetizer
- Difficulty Level: Easy
- Total Preparation Time: 15 minutes
- Total Cooking Time: 20–25 minutes
- Dietary Classifications: Meat-based (Can be adapted for Vegetarians)
3. Equipment and Tools
To ensure your sliders cook evenly and achieve that signature buttery bottom, the right equipment is essential:
- Baking Sheet or Casserole Dish: A 9×13-inch rectangular baking dish is ideal for a standard 12-pack of rolls. It helps keep the rolls snug so the edges don’t dry out.
- Serrated Bread Knife: Crucial for slicing the entire slab of rolls horizontally in one clean motion without squishing the bread.
- Small Saucepan or Microwave-Safe Bowl: For melting the butter and whisking the glaze ingredients.
- Pastry Brush: For evenly distributing the glaze over the tops and sides of the rolls.
- Aluminum Foil: To cover the sliders during the first half of baking, preventing the tops from burning before the cheese melts.
- Offset Spatula: Useful for lifting the hot sliders out of the pan.
4. Serving Suggestions
Sliders are the ultimate social food. To elevate the experience, consider these pairings:
Plating and Garnish
Arrange the sliders on a large wooden board or a white ceramic platter. Garnish with a sprinkle of fresh parsley or chives for a pop of color. For a “deli-style” feel, place a few dill pickle spears around the edges.
Complementary Side Dishes
- Creamy Coleslaw: The acidity cuts through the richness of the butter glaze.
- Sweet Potato Fries: A great match for the sweetness of Hawaiian rolls.
- Potato Salad: A classic picnic accompaniment.
Beverage Pairings
- Beer: An Amber Ale or a crisp Pilsner balances the salty-sweet notes.
- Wine: A chilled Rosé or a light-bodied Pinot Noir works beautifully with ham or turkey sliders.
- Non-Alcoholic: Sparkling apple cider or a classic iced tea with lemon.
5. Nutritional Information
(Estimated per slider, based on Ham and Swiss)
Health Note: These are high-energy treats. To make them lighter, use low-sodium deli meats and swap the butter glaze for a light olive oil brush.
6. Storage and Reheating
Refrigeration
Store leftover sliders in an airtight container in the refrigerator for up to 3 days.
Freezing
You can freeze unbaked sliders! Assemble them (without the glaze), wrap tightly in plastic wrap and foil, and freeze for up to 1 month. Thaw in the fridge before glazing and baking.
Reheating
- Oven (Recommended): Wrap in foil and bake at 350°F (175°C) for 10 minutes. This restores the crispness of the bread.
- Air Fryer: 325°F for 3–5 minutes for a quick, crunchy result.
- Microwave: Avoid if possible, as it makes the bread chewy/soggy.
7. Expert Tips and Variations
Professional Chef Tips
- Don’t pull the rolls apart: Keep the slab intact while slicing horizontally. This makes assembly much faster.
- The “Soggy Bottom” Fix: If you worry about soggy bread, lightly toast the inner faces of the rolls under the broiler for 1 minute before adding toppings.
- Let them rest: Wait 5 minutes after taking them out of the oven. This allows the cheese to set slightly, making the sliders easier to cut.
Creative Variations
- Breakfast Sliders: Use scrambled eggs, crispy bacon, and cheddar cheese.
- Pizza Sliders: Layer pepperoni, marinara sauce, and mozzarella. Brush the top with garlic butter and Italian seasoning.
- Buffalo Chicken Sliders: Use shredded rotisserie chicken tossed in buffalo sauce with ranch dressing and provolone.
8. Ingredients Section
For the Sliders
- 1 package (12 count) Hawaiian Sweet Rolls (approx. 340g)
- 1 lb (450g) Thinly sliced deli ham or smoked turkey
- 8-10 slices Swiss or Provolone cheese
- Optional: 1/4 cup Dijon mustard or mayonnaise
For the Savory Glaze
- 1/2 cup (115g) Unsalted butter, melted
- 1 tbsp Dijon mustard
- 1 tbsp Worcestershire sauce
- 1 tbsp Poppy seeds
- 1 tsp Onion powder
- 1/4 tsp Garlic salt
9. Step-by-Step Instructions
- Prep the Oven: Preheat your oven to 350°F (175°C). Grease a 9×13-inch baking dish lightly with cooking spray.
- Slice the Rolls: Without pulling the rolls apart, use a long serrated knife to slice the entire block of rolls in half horizontally. Place the bottom half into the prepared baking dish.
- Layer the Fillings: Spread a thin layer of mustard or mayo on the bottom half (optional). Layer the deli meat evenly, followed by a layer of cheese. Place the top half of the rolls back on.
- Whisk the Glaze: In a small bowl, whisk together the melted butter, Dijon mustard, Worcestershire sauce, poppy seeds, onion powder, and garlic salt.
- Apply the Glaze: Using a pastry brush, liberally coat the tops of the rolls with the butter mixture. Ensure the glaze seeps down the sides.
- Bake (Phase 1): Cover the dish tightly with aluminum foil. Bake for 15 minutes. This melts the cheese without over-browning the bread.
- Bake (Phase 2): Remove the foil and bake for an additional 5–10 minutes, or until the tops are golden brown and slightly crunchy.
- Serve: Use a sharp knife to cut along the natural lines of the rolls. Serve warm.
10. Frequently Asked Questions (FAQ)
Q: Can I use different types of bread? A: Absolutely. While Hawaiian rolls are traditional, brioche rolls or savory slider buns work well. Just ensure they are connected in a slab for ease of assembly.
Q: How do I prevent the bottom from getting soggy? A: Avoid using high-moisture ingredients like fresh tomatoes inside the slider before baking. Also, placing the meat on the bottom and the cheese on top (or both) creates a barrier for the bread.
Q: Can I make these ahead of time? A: You can assemble the sandwiches a few hours early. However, wait to add the butter glaze until just before you put them in the oven to prevent the bread from becoming mushy.
Q: What is the best cheese for melting? A: Provolone, Swiss, Gruyère, and Monterey Jack are the champions of the “cheese pull.”
Q: Are these kid-friendly? A: Yes! For picky eaters, simply omit the poppy seeds and onion powder from the glaze and use plain melted butter.