SEO Optimization
- Title: Best Flourless Chocolate Cake Recipe: Rich, Fudgy & Gluten-Free
- Meta Description: Indulge in this decadent, naturally gluten-free flourless chocolate cake. A 5-ingredient recipe for a rich, silky dessert that melts in your mouth.
1. Introduction: A Love Letter to Dark Cacao
There is a specific kind of magic that happens when you strip away the filler and focus entirely on the essence of an ingredient. In the world of baking, the Flourless Chocolate Cake (often known by its elegant Italian cousin, Torta Caprese) stands as the ultimate testament to this philosophy.
This isn’t just a cake; it is an experience. Unlike traditional sponges that rely on flour for structure, this cake relies on the emulsion of high-quality fats and aerated eggs. The result is a texture that sits somewhere between a dense, fudgy brownie and a delicate chocolate truffle.
Historically, the flourless chocolate cake gained massive popularity in the 20th century, particularly within Jewish culinary traditions during Passover and across high-end European patisseries. It carries an air of effortless sophistication—the kind of dessert that looks like it took hours of professional training to master, yet requires only a handful of pantry staples. Whether you are hosting a formal dinner party or looking for the perfect “naturally gluten-free” treat that doesn’t taste like a compromise, this recipe is your new gold standard.
2. Recipe Overview
- Cuisine Type: French/Italian Fusion
- Difficulty Level: Intermediate (requires careful egg aeration)
- Prep Time: 20 minutes
- Cook Time: 35–40 minutes
- Total Time: 1 hour (plus cooling time)
- Dietary Classifications: Gluten-Free, Vegetarian, Nut-Free (optional)
3. Equipment and Tools
To achieve the perfect “crackled” top and fudgy center, precision is key. Ensure you have the following:
- 9-inch Springform Pan: This is non-negotiable. Because the cake is so delicate and moist, you cannot flip it out of a standard cake tin. A springform pan with a depth of at least 2.5 inches is required.
- Parchment Paper: Used to line the bottom to prevent sticking.
- Double Boiler (Bain-Marie): A heat-proof glass bowl set over a saucepan of simmering water.
- Stand Mixer or Electric Hand Mixer: To achieve the necessary volume in the eggs.
- Rubber Spatula: For gentle folding.
- Fine-Mesh Sieve: For dusting the final product.
4. Serving Suggestions
This cake is incredibly rich, so it benefits from accompaniments that offer acidity or lightness.
- Plating: Serve a thin wedge at room temperature or slightly chilled.
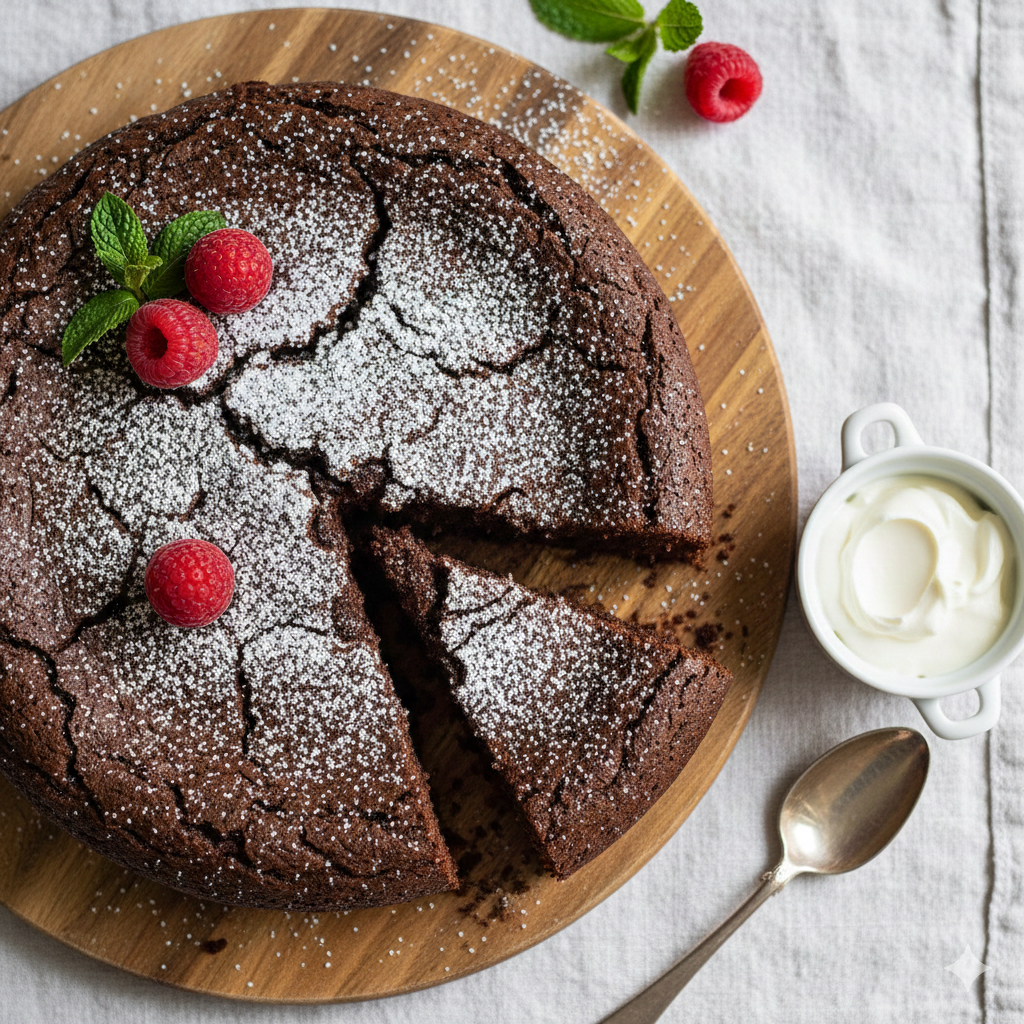
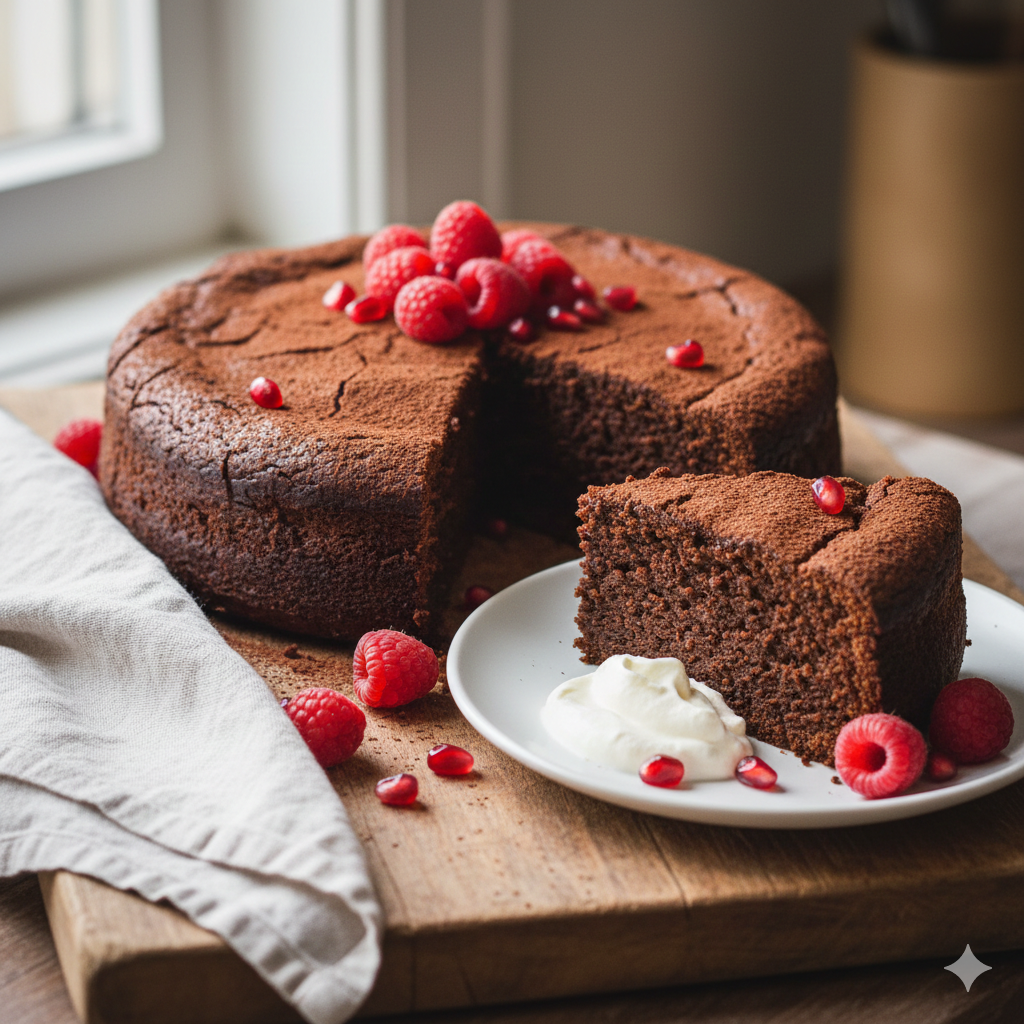
- Garnish: A heavy dusting of Dutch-process cocoa powder or powdered sugar. Fresh raspberries or tart pomegranate seeds provide a beautiful color contrast.
- The “Cream” Element: A dollop of unsweetened Crème Fraîche or chantilly cream helps cut through the density of the cacao.
- Beverage Pairings: * Coffee: A double shot of espresso.
- Wine: A late-harvest Port or a bold Cabernet Sauvignon.
- Tea: Earl Grey, as the bergamot notes complement dark chocolate beautifully.

5. Nutritional Information (Per Serving)
Based on 12 servings.
| Nutrient | Amount |
| Calories | 340 kcal |
| Total Fat | 24g |
| Saturated Fat | 14g |
| Cholesterol | 115mg |
| Total Carbohydrates | 28g |
| Dietary Fiber | 4g |
| Sugars | 22g |
| Protein | 5g |
Health Benefits: High-quality dark chocolate (70%+) is rich in flavonoids and antioxidants, which support heart health and can improve mood.
6. Storage and Reheating
- Refrigeration: Wrap tightly in plastic wrap or store in an airtight container for up to 5 days. The texture becomes denser and more truffle-like when cold.
- Freezing: This cake freezes beautifully. Wrap individual slices in parchment, then foil. Store for up to 3 months. Thaw in the fridge overnight.
- Reheating: If you prefer it molten-style, microwave a slice for 15 seconds. Do not overheat, or the fats will separate.
7. Expert Tips and Variations
The Golden Rule: Use the best chocolate you can afford. Since there is no flour to hide behind, the flavor of the chocolate is the flavor of the cake. Look for a cocoa content between 60% and 72%.
- Common Mistake: Over-beating the eggs once the chocolate is added. This can cause the cake to rise too high and then collapse into a crater.
- Variation – The “Mocha” Lift: Add 1 tablespoon of instant espresso powder to the melting chocolate to intensify the depth of the cacao.
- Variation – Salted Caramel: Drizzle homemade salted caramel over the top before serving.
8. Ingredients Section
- 8 oz (225g) High-Quality Dark Chocolate: Roughly chopped. (Bittersweet or Semi-sweet).
- 1 cup (225g) Unsalted Butter: Cut into 1-inch cubes.
- 1 ½ cups (300g) Granulated Sugar: Fine caster sugar works best for dissolving.
- 6 Large Eggs: At room temperature (this is vital for volume).
- 1 tsp Pure Vanilla Extract: Or the seeds of one vanilla bean.
- ½ cup (45g) Dutch-Process Cocoa Powder: Plus extra for dusting.
- ½ tsp Sea Salt: To balance the sweetness.
9. Step-by-Step Instructions
- Prep the Oven and Pan: Pre-heat your oven to 375°F (190°C). Grease your springform pan with butter and line the bottom with a circle of parchment paper.
- Melt the Base: Place the chopped chocolate and cubed butter in your double boiler. Stir gently until completely smooth. Remove from heat and let cool for 5–10 minutes.
- Whisk the Eggs: In a large bowl (or stand mixer), beat the eggs and sugar together on medium-high speed for about 5 minutes. You are looking for the “ribbon stage”—where the mixture is pale, thick, and falls back into the bowl in a slow ribbon.
- Incorporate Flavor: Whisk the vanilla, salt, and cocoa powder into the melted chocolate mixture.
- The Fold: Gently fold 1/3 of the egg mixture into the chocolate to lighten it. Then, fold the remaining egg mixture in using a large spatula. Be careful not to deflate the air bubbles.
- Bake: Pour the batter into the prepared pan. Bake for 35–40 minutes.
- The Visual Cue: The edges should be set and the top should have a thin, papery crust. The center should still have a very slight jiggle.
- Cooling: Allow the cake to cool in the pan for at least 30 minutes. Run a thin knife around the edge before releasing the springform sides.
10. Frequently Asked Questions (FAQ)
Q: Can I make this dairy-free?
A: Yes. Substitute the butter with high-quality coconut oil or a vegan butter alternative. Note that coconut oil will add a slight tropical flavor profile.
Q: My cake cracked on top! Did I ruin it?
A: Not at all! A cracked, “meringue-like” top is a signature characteristic of a true flourless chocolate cake. It adds a lovely textural contrast.
Q: Why did my cake sink in the middle?
A: Some sinking is normal as the air bubbles cool. However, drastic sinking usually means the eggs were over-beaten or the oven door was opened too frequently during baking.
Q: Is “Dutch-process” cocoa powder necessary?
A: It is recommended for its darker color and smoother, less acidic flavor, but regular natural cocoa powder will work in a pinch.