1. Introduction: A Nostalgic Journey to the Perfect Bowl
There is a specific kind of culinary magic found in the humble Tuna Pasta Salad. For many, it evokes memories of sun-drenched backyard potlucks, mid-summer picnics by the lake, or the reliable comfort of a glass bowl pulled from a grandmother’s refrigerator. It is a dish that occupies a unique space in the culinary world: it is simultaneously a budget-friendly staple and a sophisticated canvas for high-quality Mediterranean ingredients.
The origins of pasta salad are as intertwined as the noodles themselves. While cold pasta dishes have existed in Italy for centuries—often as a way to utilize leftovers—the specific “Tuna Pasta Salad” we recognize today gained massive popularity in mid-20th century America. It represented the “modern” kitchen’s ability to combine pantry staples (canned tuna and dried pasta) with fresh produce.
What makes this recipe significant isn’t just its convenience; it’s the balance. A truly great Tuna Pasta Salad must navigate the delicate line between creamy and crunchy, savory and bright. We aren’t just making a side dish; we are constructing a meal that celebrates the “pantry-to-table” movement with professional techniques that elevate it from “cafeteria food” to a gourmet experience.
2. Recipe Overview
- Cuisine Type: American-Mediterranean Fusion
- Difficulty Level: Beginner to Intermediate
- Total Time: 25 minutes (12 mins prep, 13 mins cooking/cooling)
- Dietary Classifications: Pescatarian, Nut-Free, Soy-Free (depending on mayo choice). Can be adjusted for Gluten-Free.
3. Equipment and Tools
To achieve professional-grade results, the right gear is essential. Precision in cooking the pasta and emulsion in the dressing make all the difference.
- Large Stockpot: A 6-quart (5.7L) capacity pot is recommended. This ensures the pasta has enough room to move, preventing starch buildup and sticking.
- Stainless Steel Colander: For immediate draining and “shocking” the pasta with cold water.
- Large Glass or Ceramic Mixing Bowl: At least 4 quarts in volume to allow for vigorous tossing without spilling.
- Small Balloon Whisk: For creating a stable emulsion for the dressing.
- Chef’s Knife (8-inch): For uniform dicing—consistency in vegetable size is key to a perfect bite.
- Digital Kitchen Scale: For precise weight measurements (metric and imperial).
- Silicone Spatula: For folding the tuna gently to maintain “chunks” rather than a paste.
4. Serving Suggestions
Presentation is the final step in culinary excellence.
- Plating: Serve in chilled wide-rimmed bowls. For a summer party, a large wooden salad bowl provides a rustic, communal feel.
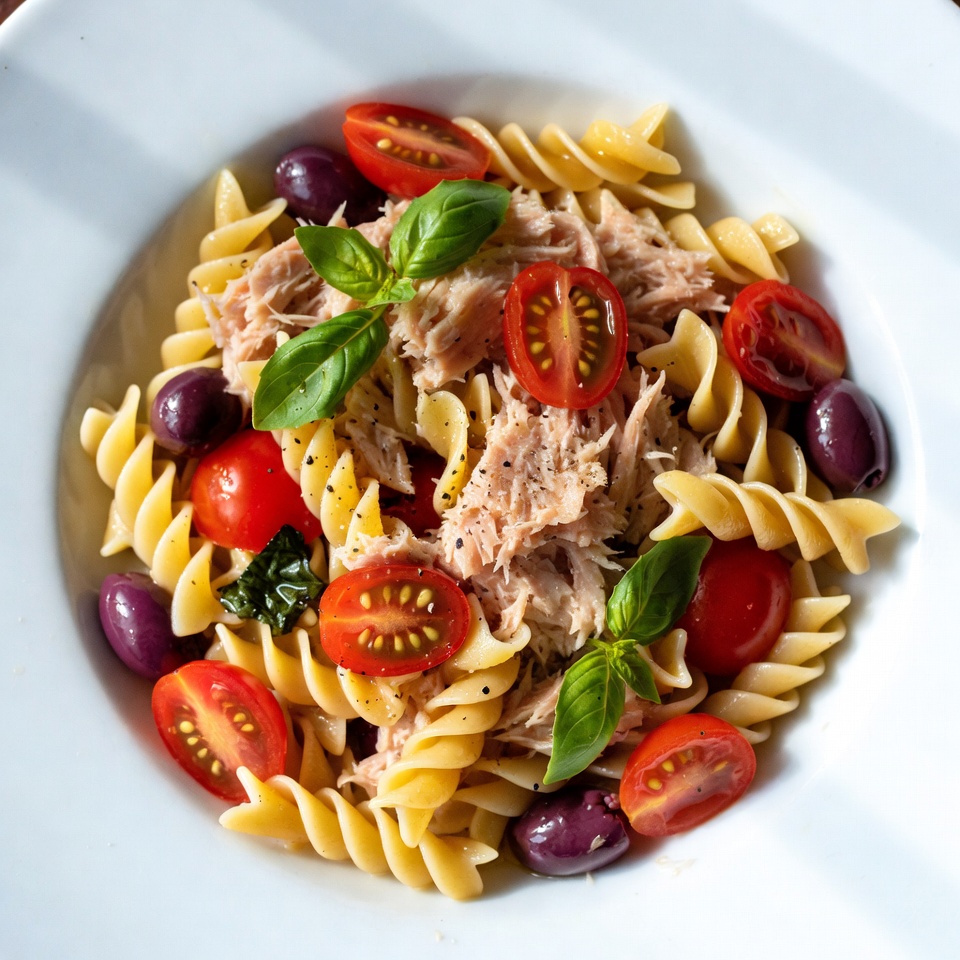
- Garnish: A heavy sprinkle of fresh micro-greens, a dusting of smoked paprika for color, or a few thin slices of lemon to signal freshness.
- Side Dishes: Pairs beautifully with a crisp green salad, a chilled gazpacho, or crusty sourdough bread.
- Beverage Pairings: * Wine: A high-acidity white like a Sauvignon Blanc or a dry Rosé cuts through the creaminess of the mayo.
- Non-Alcoholic: A sparkling cucumber-lime water or a cold-brewed iced tea with mint.
5. Nutritional Information
Note: Values are based on a standard 1.5-cup serving.
| Nutrient | Amount |
| Calories | 410 kcal |
| Protein | 22g |
| Total Fat | 16g |
| Carbohydrates | 44g |
| Fiber | 3g |
| Omega-3s | High |
Potential Health Benefits: This dish is a powerhouse of lean protein and essential fatty acids. The tuna provides Vitamin D and Selenium, while the inclusion of raw vegetables offers a boost of Vitamin C and antioxidants.
6. Storage and Reheating
- Refrigeration: Store in an airtight container for up to 3–5 days. The flavor often improves after 24 hours as the pasta absorbs the dressing.
- Freezing: Not recommended. Mayonnaise-based dressings will separate and become oily upon thawing, and the pasta texture will degrade.
- Pro-Tip for Leftovers: If the salad looks “dry” the next day, fold in a single tablespoon of Greek yogurt or a splash of olive oil to “revive” the glossiness.
7. Expert Tips and Variations
Professional Chef Tips
- Overcook slightly: Unlike hot pasta, salad pasta should be cooked about 1 minute past al dente. Cold pasta firms up significantly, and “perfect” hot pasta often feels too hard once chilled.
- The “Shock” Method: Rinse the pasta in cold water immediately after draining. This stops the cooking and removes excess starch that makes salads “gummy.”
Creative Variations
- The Mediterranean: Swap mayo for Extra Virgin Olive Oil, add Kalamata olives, feta cheese, and sundried tomatoes.
- The Spicy Kick: Add diced jalapeños and a teaspoon of Sriracha to the dressing.
- The Crunch Factor: Add 1/4 cup of toasted sunflower seeds or slivered almonds just before serving.
8. Ingredients Section
The Base
- Pasta: 1 lb (454g) of Short Pasta (Fusilli, Rotini, or Bowtie).
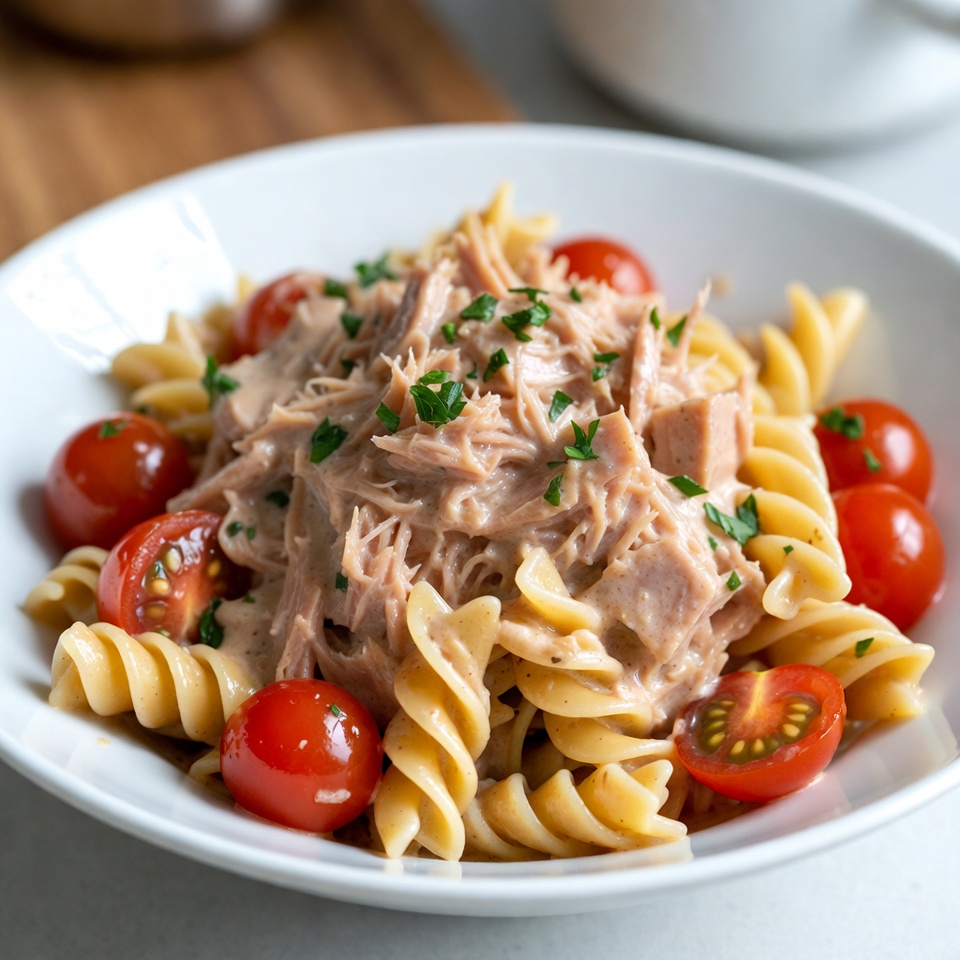
- Tuna: 2 cans (5 oz / 142g each) of Solid White Albacore in Water.
The Fresh Components
- Celery: 2 stalks, finely diced (approx. 100g).
- Red Onion: 1/2 small onion, minced (approx. 50g).
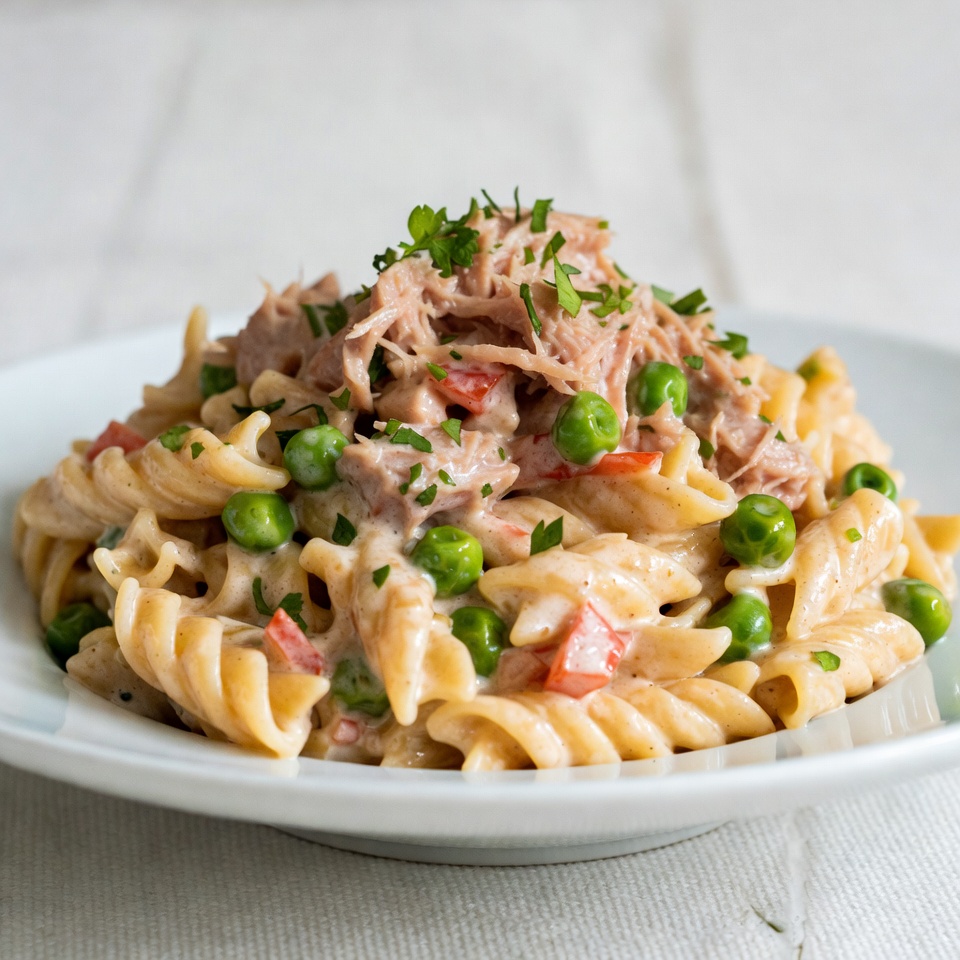
- Sweet Peas: 1 cup (150g) frozen (thawed) or fresh.
- Fresh Dill: 3 tbsp, finely chopped.
The Signature Dressing
- Mayonnaise: 3/4 cup (175ml) high-quality real mayo.
- Greek Yogurt: 1/4 cup (60ml) for tang and lightness.
- Dijon Mustard: 1 tbsp.
- Lemon Juice: 1 tbsp (approx. half a lemon).
- Salt & Pepper: To taste.
9. Step-by-Step Instructions
- Prepare the Pasta: Bring 4 quarts of heavily salted water to a rolling boil. Add pasta and cook for approximately 10–11 minutes. Taste for a “tender-firm” bite.
- Drain and Cool: Drain in your colander. Rinse under cold running water for 60 seconds. Shake vigorously and let sit to dry. Moisture is the enemy of a good dressing.
- The “Macerated” Onion Hack: Place minced red onions in a small bowl with the lemon juice for 5 minutes. This “pickles” them slightly, removing the harsh sulfurous bite.
- Emulsify the Dressing: In your small whisking bowl, combine mayo, yogurt, mustard, and spices. Whisk until it reaches a silky, uniform consistency.
- Flake the Tuna: Drain the tuna cans thoroughly. In your large bowl, use a fork to break the tuna into bite-sized chunks. Avoid over-mashing.
- The Assembly: Add the cooled, dry pasta to the tuna. Add celery, peas, and the onion/lemon mixture.
- The Fold: Pour the dressing over the top. Use your silicone spatula to gently fold (not stir) the ingredients. This ensures even coating without breaking the delicate pasta or tuna chunks.
- The Chill Factor: Cover and refrigerate for at least 30 minutes. Cold temperatures allow the flavors to marry and stabilize.
10. Frequently Asked Questions (FAQ)
Q: Can I use tuna in oil?
A: Yes, but ensure you drain it very well. Tuna in oil provides a richer flavor but adds significant calories and can make the dressing feel heavier.
Q: How do I make this Gluten-Free?
A: Simply substitute the wheat pasta for a high-quality Chickpea or Brown Rice pasta. Note that GF pasta often has a shorter “window” of perfect texture, so check it frequently while boiling.
Q: Why is my pasta salad bland?
A: Most often, it’s a lack of salt in the boiling water or not enough acidity. Add an extra squeeze of lemon or a dash of pickle juice to brighten the flavor.
Q: Can I add hard-boiled eggs?
A: Absolutely. Diced hard-boiled eggs are a classic addition that adds creaminess and extra protein.
Q: What is the best type of tuna to use?
A: For this specific salad, Solid White Albacore is king. It holds its shape better than “Chunk Light” tuna, which tends to turn into a paste when mixed.


