Table of Contents
The smell of warm vanilla and sweet batter hitting a hot griddle is, for me, the ultimate invitation to a cozy morning. If you’re craving light, airy, and truly fluffy pancakes for breakfast, you’re in the right place. This recipe is my go-to for achieving those perfect stacks every single time, even on a busy morning. Forget those sad, flat pancakes you sometimes end up with. We’re going for restaurant-quality fluffiness right in your own kitchen.
This isn’t just another recipe; it’s a guide to understanding the simple secrets behind truly irresistible fluffy pancakes. I’ve learned a few tricks over the years that guarantee success, and I’m sharing them all. Get ready to impress yourself and anyone lucky enough to share your breakfast table. Let’s make some magic happen with flour, milk, and a little love. You’ll be amazed at how quickly and easily you can whip up this classic comfort food from scratch.
What Makes These Fluffy Pancakes Worth Making
There are so many reasons to make these particular fluffy pancakes. First, they are incredibly quick to prepare. You can have a stack on your plate in under 15 minutes, making them perfect for those spontaneous weekend breakfasts or even a treat before a busy workday. The texture is what really sets them apart; they’re unbelievably light and airy, melting in your mouth with every bite. You won’t find that dense, heavy texture here.
This recipe also relies on simple, everyday ingredients you probably already have in your pantry. No fancy specialty items needed! This means you can whip them up anytime the craving strikes without a special trip to the grocery store. Plus, making them from scratch gives you full control over the sweetness and flavor profile, allowing you to customize them exactly how you like. Trust me, once you taste these homemade fluffy pancakes, you’ll never go back to a boxed mix. They’re a real game-changer for breakfast.
Ingredients You Will Need for Fluffy Pancakes
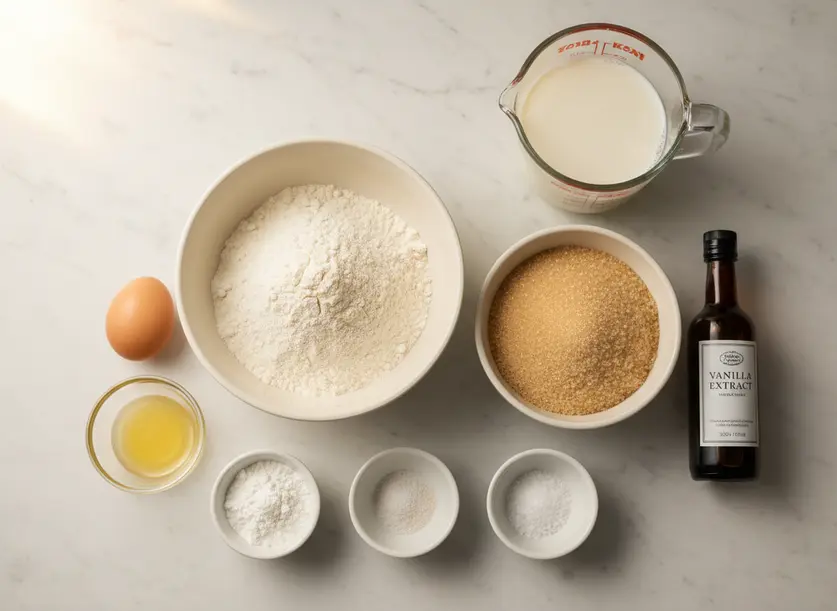
Gathering your ingredients is the first step to deliciousness. You’ll need all-purpose flour, which gives the pancakes their structure. If you only have self-rising flour, omit the baking powder and baking soda, and reduce the salt slightly. Granulated sugar adds just enough sweetness; brown sugar can be used for a deeper, molasses-like flavor. Baking powder and baking soda are your secret weapons for achieving that incredible lift, so make sure they’re fresh. A pinch of salt balances the flavors beautifully. For the wet ingredients, you’ll need milk – whole milk works best for richness, but any dairy or non-dairy milk like almond or oat milk will do. One large egg binds everything together and adds richness. Melted unsalted butter contributes moisture and flavor; vegetable oil or coconut oil are good substitutes if you don’t have butter on hand. Finally, a splash of vanilla extract adds that comforting, classic pancake aroma and taste. These simple components combine to create something truly extraordinary.
How to Make Fluffy Pancakes Step by Step
Making perfect fluffy pancakes is easier than you think, especially when you follow these clear steps. Precision helps, but don’t stress too much – cooking should be fun!
- Combine Dry Ingredients: In a large mixing bowl, whisk together your all-purpose flour, granulated sugar, baking powder, baking soda, and salt. Whisking ensures that the leavening agents are evenly distributed throughout the flour, which is crucial for uniform rise. Make sure there are no lumps in the dry mix.
- Whisk Wet Ingredients: In a separate medium bowl, whisk together the milk, egg, and melted butter. Add the vanilla extract here too. Whisk until the mixture is well combined and slightly frothy. This separation helps prevent overmixing when you bring them together.
- Combine Mixtures: Pour the wet ingredients into the bowl with the dry ingredients. Stir gently with a spoon or spatula until just combined. It’s okay, and even desirable, for there to be a few lumps in the batter. Overmixing develops the gluten in the flour, which results in tough, flat pancakes instead of our desired fluffy ones. Stop stirring as soon as you don’t see any dry flour streaks.
- Rest the Batter: This is a crucial step for achieving maximum fluffiness. Let the batter rest at room temperature for 5 to 10 minutes. During this time, the gluten relaxes, and the baking powder and soda start reacting, creating tiny air pockets. You’ll notice small bubbles forming on the surface of the batter.
- Heat Your Griddle: While the batter rests, heat a non-stick griddle or a large non-stick skillet over medium-low heat. You want it hot enough to cook the pancakes evenly without burning them. Test the temperature by flicking a few drops of water onto the surface; if they sizzle and evaporate immediately, it’s ready. Lightly grease the griddle with a tiny bit of butter or oil, wiping off any excess.
- Pour and Cook: Using a ¼ cup measuring cup, pour portions of batter onto the hot griddle. Leave some space between each pancake for spreading and easy flipping. Cook for 2 to 3 minutes, or until you see bubbles forming on the surface of the pancake and the edges look set and slightly dry. The underside should be golden brown.
- Flip and Finish: Gently slide a spatula under each pancake and carefully flip it over. Cook for another 1 to 2 minutes on the second side, or until it’s golden brown and cooked through. You can press lightly on the center to check for firmness; it shouldn’t feel raw or gooey.
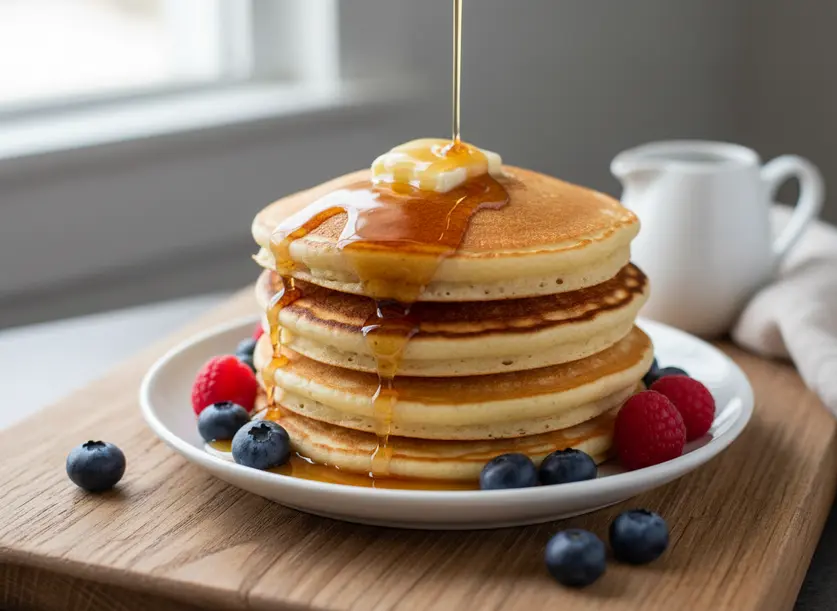
- Serve Immediately: Transfer the cooked fluffy pancakes to a plate and serve warm with your favorite toppings. A warm stack is always best! If cooking multiple batches, you can keep finished pancakes warm in a low oven (around 200°F or 90°C) on a wire rack set over a baking sheet.

Tips for the Best Fluffy Pancakes
Getting truly fluffy pancakes consistently comes down to a few key techniques. These tips will elevate your pancake game significantly.
- Do Not Overmix the Batter: This is the golden rule of pancake making. Lumps are your friend! When you combine the wet and dry ingredients, stir just until the dry streaks disappear. Overmixing develops the gluten in the flour, which leads to tough, chewy pancakes instead of light, airy ones. The less you stir, the fluffier they’ll be.
- Allow the Batter to Rest: After mixing, let your batter sit for 5 to 10 minutes. This resting period allows the gluten to relax and the baking powder and soda to activate, creating more air bubbles. You’ll notice the batter thickens slightly and gets bubbly on top, which is a good sign for ultimate fluffiness. Don’t skip this step.
- Use Fresh Leavening Agents: Baking powder and baking soda lose their potency over time. If yours have been sitting in the pantry for ages, they might not provide the lift needed for truly fluffy pancakes. Check the expiry dates and ensure they are active. You can test baking soda by adding a little vinegar to it; it should fizz immediately. For baking powder, mix with hot water; it should also bubble up.
- Get Your Griddle Temperature Right: A consistent, medium-low heat is essential. If the griddle is too hot, the outside will burn before the inside cooks through. Too cool, and the pancakes will spread too much and won’t brown properly. Test with a small dollop of batter. It should sizzle gently and turn golden brown in a couple of minutes. Cooking too slowly also prevents maximum fluffiness.
- Proper Storage: If you have leftover cooked pancakes, let them cool completely on a wire rack. Then, stack them with small pieces of parchment paper in between to prevent sticking. Store them in an airtight container in the refrigerator for up to 3-4 days or freeze them for up to 2 months. They reheat beautifully in a toaster, microwave, or oven.
Variations to Try with Your Fluffy Pancakes
Once you master the basic fluffy pancakes, the possibilities for customization are endless. Get creative with these delicious variations.
- Berry Bliss Pancakes: Gently fold in about ½ cup of fresh blueberries, raspberries, or sliced strawberries into the batter just before cooking. The berries burst as they cook, adding a wonderful tartness and juiciness. You can also sprinkle them on top of the pancake once it’s on the griddle for even distribution.
- Chocolate Chip Dream: For a sweeter treat, add ½ to ¾ cup of chocolate chips to the batter. Mini chocolate chips work especially well as they distribute evenly. The chocolate melts into gooey pockets of deliciousness as the pancakes cook, creating a comforting dessert-like breakfast. White chocolate chips are also a great option.
- Lemon Ricotta Perfection: Add the zest of one lemon and ½ cup of ricotta cheese to the wet ingredients before combining with the dry. The ricotta adds an incredible richness and moisture, while the lemon zest brightens the flavor profile, creating a sophisticated and extra-tender pancake. These are surprisingly light despite the added ingredients.
Fluffy Pancake FAQ
Here are some common questions about making fluffy pancakes, along with my best advice.
Can I make the batter ahead of time?
You can make the batter a few hours in advance and store it in an airtight container in the refrigerator. While the freshest batter yields the fluffiest results, pre-mixing is a great option for convenience. If you do this, give it a gentle stir before cooking, but avoid overmixing.
Why are my fluffy pancakes not fluffy?
There are a few culprits for flat pancakes. Overmixing the batter is the most common reason, as it develops gluten, making them tough. Another cause is old or inactive baking powder or baking soda. Ensure your leavening agents are fresh, and always let the batter rest for a few minutes before cooking to allow them to activate fully. A griddle that’s too cool can also prevent proper rise.
How do I store leftover fluffy pancakes?
To store leftover cooked pancakes, allow them to cool completely on a wire rack to prevent sogginess. Stack them with parchment paper in between each pancake to prevent sticking. Place them in an airtight container or a freezer-safe bag. They will keep in the refrigerator for 3-4 days or in the freezer for up to 2 months. Reheat them in a toaster, microwave, or a warm oven until heated through.