1. Introduction
There is an undeniable magic that happens when rich, deep cocoa meets the pillowy, nostalgic sweetness of marshmallows. For many of us, this combination instantly conjures memories of warming up by a crackling fireplace, hands wrapped tightly around a mug of hot cocoa after a long day in the winter chill. But what happens when you want that exact flavor profile on a warm summer afternoon, or as a decadent midday pick-me-up? Enter the Chocolate Marshmallow Smoothie—a velvety, chilled masterpiece that bridges the gap between a classic childhood treat and a modern, refreshing beverage.
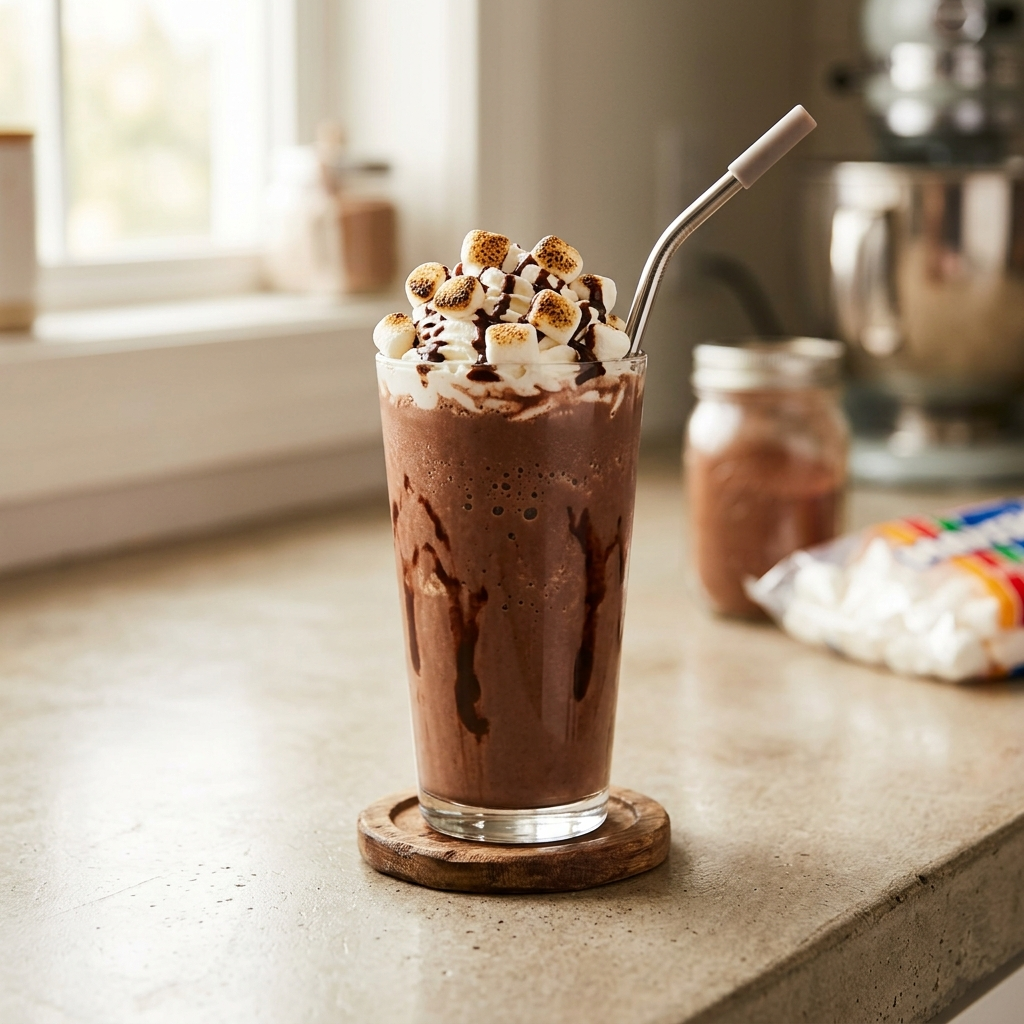
This recipe takes the soul of a traditional campfire s’more and the comforting essence of hot chocolate, transforming them into a thick, frost-kissed drink. Unlike heavy milkshakes that can leave you feeling weighed down, this smoothie strikes a balance by utilizing a creamy milk base, frozen elements for natural thickness, and a touch of genuine marshmallow fluff or toasted marshmallows for that authentic, gooey sweetness. It is a celebration of textures and temperatures, offering a sophisticated nod to nostalgia. Whether you are serving it as a fun weekend breakfast for the family, a dessert alternative, or a sweet reward after a long day, this smoothie is bound to become a staple in your recipe repertoire.
2. Recipe Overview
Before diving into the blending process, let’s look at the foundational elements of this delightful beverage:
- Cuisine Type: American / Dessert Smoothie
- Difficulty Level: Easy (Beginner-friendly)
- Prep Time: 5 minutes
- Cook Time: 0 minutes (Optional 2 minutes if toasting marshmallows)
- Total Time: 5 to 7 minutes
- Servings: 2 servings
- Dietary Classifications: Vegetarian, Gluten-Free (ensure marshmallow and chocolate brands are certified GF), Egg-Free (if using egg-free marshmallow fluff).
3. Equipment and Tools
To achieve the perfectly smooth, emulsified texture that separates an average smoothie from a professional café-style drink, having the right tools is essential.
- High-Speed Blender: A blender with a motor rating of at least 1000 to 1200 watts (such as a Vitamix, Ninja, or Blendtec) is highly recommended. This ensures that the frozen ingredients and sticky marshmallow fluff are thoroughly pulverized and integrated without leaving icy chunks.
- Blender Jar Capacity: Minimum 48-ounce (approx. 1.4 liters) volume measurement to allow proper vortex formation during blending.
- Measuring Cups and Spoons: A standard set of imperial/metric measuring cups and spoons for precise ingredient scaling.
- Silicone Spatula: A flexible silicone spatula is crucial for scraping down the sides of the blender jar, ensuring every bit of the sticky marshmallow fluff is incorporated.
- Kitchen Torch (Optional): For those who want to elevate the presentation with an authentic campfire aroma, a small culinary butane torch is excellent for charring the garnish marshmallows.
- Serving Glasses: Two highball glasses or classic milkshake glasses with a capacity of 12 to 16 ounces (350 to 470 ml) and a depth of at least 6 inches (15 cm) to accommodate layers and toppings.
4. Serving Suggestions
Presentation elevates a simple smoothie into an experience. Here is how you can serve this chocolate marshmallow dream:
Plating and Glassware
To create a stunning visual contrast, take your chilled serving glasses and drizzle high-quality chocolate syrup along the inside walls while rotating the glass. This creates a beautiful marble effect once the pale chocolate smoothie is poured in.
Garnish Ideas
- The Campfire Classic: Top the smoothie with a generous dollop of whipped cream, a few mini marshmallows lightly toasted with a kitchen torch, and a sprinkle of crushed graham crackers.
- The Chocoholic: Shave dark chocolate curls over the top using a vegetable peeler, alongside a dust of premium cocoa powder.
Complementary Side Dishes
If you are serving this as part of a brunch or a dessert spread, it pairs beautifully with:
- Freshly baked, salty soft pretzels (the salt cuts through the sweetness).
- A platter of tart fruits like fresh raspberries and strawberries.
- Slices of classic butter pound cake.
Beverage Pairings
Because this smoothie is quite rich, pair it with simple, contrasting beverages if serving a crowd. A shot of hot, bitter espresso poured over the top (affogato style) works wonders. Alternatively, a cold brew coffee or a hot cup of Earl Grey tea provides an excellent bitter counterpoint to the sugary marshmallow profiles.
5. Nutritional Information
While this smoothie leans toward the indulgent side, understanding its nutritional breakdown allows you to fit it seamlessly into your dietary lifestyle.
The following values are estimations per single serving (based on using whole milk and standard chocolate cocoa powder):
| Nutrient | Amount Per Serving | % Daily Value |
|---|---|---|
| Calories | 340 kcal | 17% |
| Total Fat | 8g | 10% |
| Saturated Fat | 4.5g | 23% |
| Cholesterol | 24mg | 8% |
| Sodium | 115mg | 5% |
| Total Carbohydrates | 58g | 21% |
| Dietary Fiber | 3g | 11% |
| Sugars | 42g | * |
| Protein | 9g | 18% |
| Calcium | 280mg | 22% |
Health Benefits & Dietary Insights
- Calcium Boost: Thanks to the milk base, this drink offers a substantial amount of your daily calcium intake, supporting bone health.
- Antioxidants: Utilizing pure, unsweetened cocoa powder introduces flavonoids, which are known to support heart health and reduce inflammation.
- Energy Management: The carbohydrates provide a rapid source of energy, making it an excellent indulgence after high-intensity physical activity.
6. Storage and Reheating
Smoothies are inherently best enjoyed immediately after blending to experience their ideal frosty, aerated texture. However, if you find yourself with leftovers, follow these specific guidelines:
Refrigeration
You can store the remaining smoothie in an airtight container or a mason jar with a tight lid in the refrigerator for up to 24 hours.
- Note: The ingredients will naturally separate over time, and the frozen texture will melt into a thinner liquid fluid. Before consuming, pour it back into the blender with two or three ice cubes and flash-blend for 15 seconds to restore its creamy emulsion.
Freezing
For longer storage, pour the smoothie into silicone ice cube trays and freeze completely. Once frozen, transfer the cubes to a zip-top freezer bag. When a craving strikes, simply toss these chocolate-marshmallow cubes back into your blender with a splash of fresh milk and blend until smooth.
Warning: Do not microwave or apply direct heat to this beverage to thaw it, as this will curdle the dairy bases and ruin the delicate structure of the marshmallow fluff.
7. Expert Tips and Variations
Professional Chef Tips
- Freeze Your Bananas/Milk: To avoid watering down your smoothie with regular ice cubes, use frozen bananas or freeze your choice of milk into ice cubes ahead of time. This guarantees an ultra-thick, creamy consistency.
- Order of Ingredients Matters: Always add your liquids first, followed by your powders and spreads, and place the heavy frozen ingredients at the very top. This draws the ingredients down into the blades smoothly, preventing the blender from stalling.
- Emulsify the Fluff: Marshmallow fluff can be stubborn. Blend your liquid, cocoa, and fluff together first before adding the frozen elements to ensure the marshmallow fully dissolves into the base.
Common Mistakes to Avoid
- Using Low-Quality Cocoa: Avoid cheap, sugary chocolate mixes. Use a high-quality Dutch-processed cocoa powder for a deep, complex chocolate flavor that anchors the sweetness of the marshmallow.
- Over-blending: Blending for too long introduces friction heat from the blades, which will quickly melt your smoothie into a warm soup. Keep your total blend time under 60 seconds.
Creative Variations
- The Vegan Adaptation: Swap the dairy milk for creamy oat milk, use a plant-based chocolate protein powder, and utilize certified vegan marshmallows or vegan marshmallow fluff (such as Dandies or Ricemellow).
- The Peanut Butter Twist: Add 2 tablespoons of smooth peanut butter or peanut flour into the blender for a rich, salty-sweet “fluffernutter” chocolate profile.
- Adult Espresso Version: Add 1 shot of chilled espresso or a teaspoon of instant espresso powder to turn this into a sophisticated Mocha Marshmallow Smoothie.
8. Ingredients Section
For the absolute best results, source fresh, high-quality ingredients. Here is your precise checklist, offered in both Imperial and Metric measurements.
Base Ingredients
- Milk (Whole or Plant-Based): 1.5 cups / 360 ml
- Sourcing: Whole milk gives the richest mouthfeel, but creamy oat milk or unsweetened almond milk work beautifully as alternatives.
- Frozen Banana: 1 medium / approx. 120g (peeled, sliced, and frozen)
- Preparation: Ensure the banana is ripe (speckled with brown spots) before freezing to provide natural sweetness and a velvety texture without an overwhelming banana flavor.
- Premium Unsweetened Cocoa Powder: 3 tablespoons / 22 grams
- Sourcing: Look for Dutch-processed cocoa powder for a smoother, less acidic chocolate punch.
- Marshmallow Fluff (or Mini Marshmallows): 1/3 cup / 75 grams
- Substitution: If you cannot find fluff, you can melt 1 cup of mini marshmallows in the microwave with a teaspoon of water for 20 seconds, letting it cool slightly before adding to the blender.
- Pure Vanilla Extract: 1 teaspoon / 5 ml
- Sourcing: Avoid artificial vanillin; real vanilla extract rounds out the marshmallow notes flawlessly.
- Pinch of Fine Sea Salt: Approx. 1/16 teaspoon
- Note: Do not skip this; salt acts as a flavor enhancer that cuts through the intense sweetness of the marshmallow.
Optional Toppings & Garnishes
- Whipped Cream: 1/4 cup / 60 ml
- Mini Marshmallows (for toasting): 6-8 pieces
- Graham Cracker Crumbs: 1 tablespoon / 7 grams
9. Step-by-Step Instructions
Follow these exact steps to craft a flawless café-quality Chocolate Marshmallow Smoothie.
Step 1: Prep your Glassware
Before turning on the machine, prepare your presentation. Take your serving glasses and drizzle the inside walls with chocolate syrup in a zigzag pattern. Place the glasses directly into the freezer while you make the smoothie. This chills the glass and sets the syrup so it doesn’t immediately puddle at the bottom.
Step 2: Load the Liquids and Flavor Bases
Remove your blender jar. Pour in the 1.5 cups (360 ml) of milk, followed by the 1 teaspoon (5 ml) of vanilla extract. Next, add the 3 tablespoons (22g) of cocoa powder, the pinch of sea salt, and spoon in the 1/3 cup (75g) of marshmallow fluff.
Step 3: Initial Emulsion
Secure the blender lid firmly. Start the blender on low speed for 10 seconds, then crank it up to medium-high for another 15 seconds.
- Culinary Cue: Look through the lid or side of the jar. You want to see a completely uniform, frothy chocolate liquid with no visible clumps of white marshmallow fluff floating around.
Step 4: Add the Frozen Elements
Stop the blender. Remove the lid and drop in your frozen banana slices. If you prefer an extra icy consistency, you may also add 3 to 4 standard ice cubes at this stage.
Step 5: High-Speed Blitz
Secure the lid again. Start on low speed to allow the blades to catch and break apart the chunks of frozen banana. Slowly ramp the speed up to its absolute maximum setting. Blend on high for 30 to 45 seconds.
- Visual Doneness Cue: Watch for the formation of a “vortex”—a whirlpool shape in the center of the liquid. Once the vortex is stable and the mixture looks perfectly smooth, thick, and velvety, turn off the motor immediately.
Step 6: Pour and Assemble
Retrieve your chilled glasses from the freezer. Divide the thick smoothie evenly between the two glasses.
Step 7: Garnish and Serve
Top each glass with a generous spoonful of whipped cream. Place a few mini marshmallows on top. If using a kitchen torch, carefully pass the flame over the marshmallows for 2-3 seconds until they turn a beautiful golden brown. Sprinkle with graham cracker crumbs and serve immediately with a wide-diameter straw.
10. Frequently Asked Questions (FAQ)
1. Can I make this recipe completely banana-free?
Yes, absolutely. While the banana adds a fantastic, creamy texture, it can be replaced. To keep the same thickness without altering the flavor profile, swap the frozen banana for 1/2 cup of frozen avocado chunks or 1/2 cup of frozen greek yogurt cubes. If using avocado, you may need to add an extra tablespoon of maple syrup or honey to account for the loss of the banana’s natural sweetness.
2. My smoothie turned out too thin. How can I fix it?
If your smoothie resembles chocolate milk rather than a thick shake, it is usually because the liquid-to-frozen ratio was slightly off. To fix this instantly, add a handful of ice cubes or another half of a frozen banana to the blender and blitz on high for 15 seconds. For future batches, ensure your banana is completely rock-hard frozen before blending.
3. Is marshmallow fluff gluten-free?
Most commercial brands of marshmallow fluff (such as the classic Marshmallow Fluff brand) are inherently gluten-free, as they are primarily made from corn syrup, sugar, water, and egg whites. However, always double-check the ingredient labels if you have a severe allergy or Celiac disease, as formulations can vary by brand and region.
4. Can I use regular large marshmallows instead of fluff inside the blender?
Regular marshmallows do not break down smoothly in a cold liquid environment; they will leave you with chewy, rubbery bits at the bottom of your glass. If you do not have fluff, it is best to melt regular marshmallows in a microwave-safe bowl with a splash of water for 15–20 seconds until they expand and liquefy, letting them cool down slightly before blending.
5. How can I lower the sugar content of this smoothie?
To make a lighter version, use unsweetened almond milk or coconut milk milk bases. Cut the marshmallow fluff down to 1.5 tablespoons, and compensate for the sweetness by using a few drops of liquid stevia or monk fruit sweetener alongside a sugar-free chocolate syrup.
6. Can I make this ahead of time for a morning breakfast?
While you can store it in the fridge overnight, it will lose its icy, frozen texture. A better make-ahead method is to prep your cocoa powder, salt, and marshmallow fluff inside the blender jar the night before and leave it on the counter (without liquids or frozen items). In the morning, simply add your milk and frozen banana, and blend fresh in under 60 seconds!


