1. Introduction: The Art of the Glaze
There is a specific kind of magic that happens when salty soy sauce, sweet mirin, and sharp ginger meet a screaming hot pan. This is the essence of Teriyaki, a Japanese cooking technique that has become a global phenomenon. While many of us first encountered this dish in a mall food court or a plastic takeout container, the true Teriyaki Chicken Rice Bowl—or Tori Don—is a sophisticated balance of textures and flavors that is surprisingly easy to replicate at home.
The word “teriyaki” is derived from the Japanese nouns teri (luster/glaze) and yaki (grill/broil). Traditionally, it refers to a method where meat is dipped in or brushed with sauce multiple times during cooking to create a shimmering, lacquered finish.
This recipe isn’t just about feeding yourself; it’s about mastering the “Maillard reaction”—that beautiful browning of proteins—and learning how to reduce a sauce until it coats a spoon like liquid velvet. Whether you are a busy professional looking for a 20-minute weeknight savior or a culinary enthusiast seeking to perfect your Japanese pantry staples, this bowl is your canvas. It is soulful, vibrant, and infinitely better than anything you’ll find in a cardboard box.
2. Recipe Overview
- Cuisine Type: Japanese-Fusion
- Difficulty Level: Easy to Intermediate
- Prep Time: 15 minutes
- Cook Time: 15 minutes
- Total Time: 30 minutes
- Dietary Classifications: Can be made Gluten-Free (substitute Tamari) and Dairy-Free.
3. Equipment and Tools
To achieve the signature “teri” (gloss), you need tools that can handle high heat and facilitate evaporation.
- Large Skillet or Wok: 12-inch (30 cm) diameter is ideal. Cast iron or heavy-bottomed stainless steel is preferred for superior heat retention and browning.
- Rice Cooker or Medium Pot: A 2-quart heavy-bottomed pot with a tight-fitting lid for steaming rice.
- Chef’s Knife: A sharp 8-inch blade for precise dicing of chicken and aromatics.
- Whisk and Small Bowl: For emulsifying the cornstarch slurry and sauce.
- Fine-Mesh Strainer: Essential for rinsing rice until the water runs clear—the secret to non-mushy grains.
- Instant-Read Meat Thermometer: To ensure chicken reaches an internal temperature of 165°F (74°C).
4. Serving Suggestions
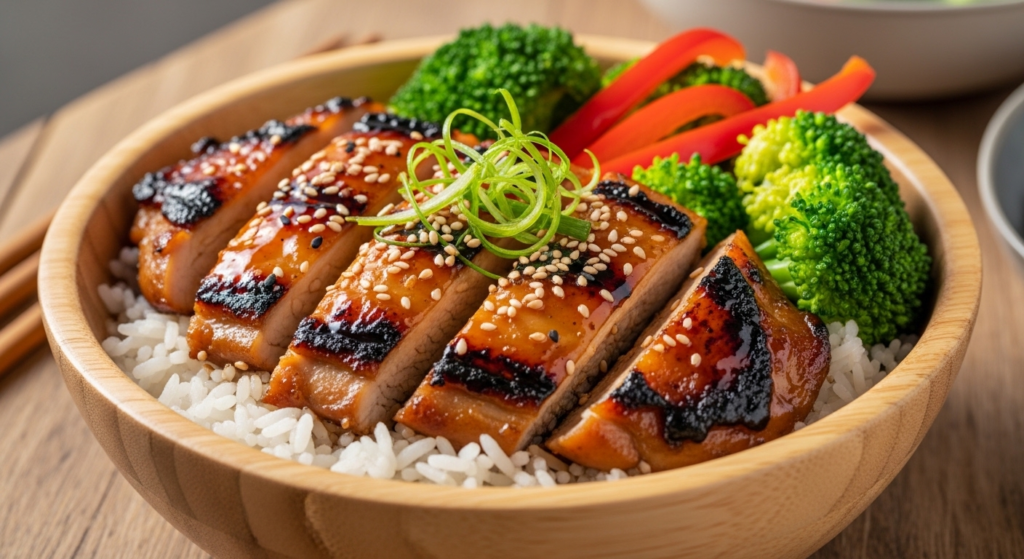
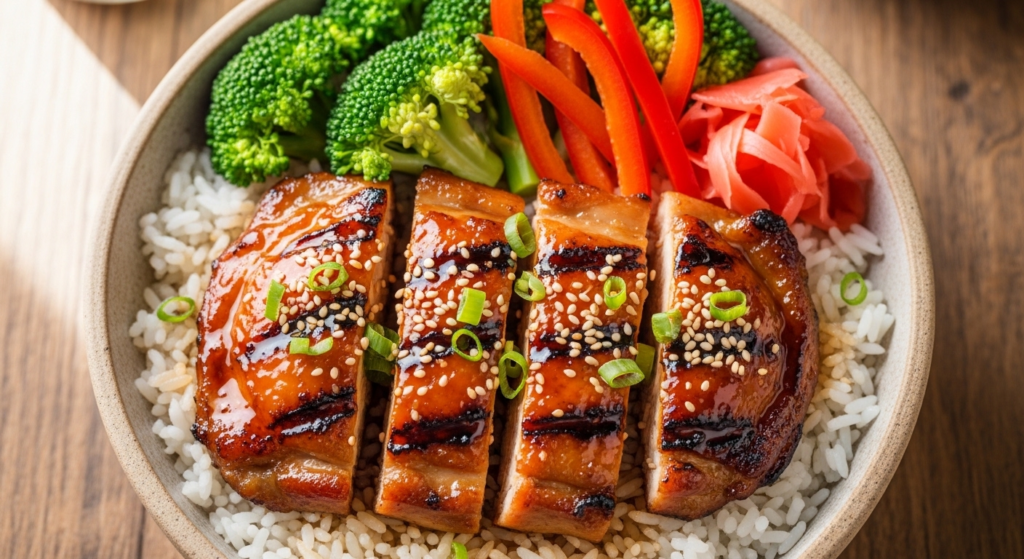
The beauty of a rice bowl is in the assembly. A well-composed bowl should be a feast for the eyes before the first bite.
- Plating: Start with a generous base of fluffy white rice. Position the chicken on one side, leaving room for vibrant vegetables.
- Garnish: A heavy sprinkle of toasted white sesame seeds and thinly sliced scallions (cut on a sharp bias) adds crunch and freshness.
- Sides: Serve alongside a quick Smashed Cucumber Salad with rice vinegar or a bowl of salty Edamame.
- Beverage Pairing: * Alcoholic: A crisp, dry Japanese Lager (like Asahi or Sapporo) or a chilled Junmai Sake.
- Non-Alcoholic: Iced roasted green tea (Hojicha) or a sparkling yuzu lemonade.
5. Nutritional Information
(Per Serving – based on 4 servings)
Health Benefits: This dish is a powerhouse of lean protein. Ginger and garlic provide anti-inflammatory properties, while using skinless thighs reduces saturated fat without sacrificing the moisture essential to the dish.
6. Storage and Reheating
- Refrigeration: Store the chicken and rice in separate airtight containers for up to 4 days. Keeping them separate prevents the rice from absorbing all the sauce and becoming soggy.
- Freezing: You can freeze the cooked chicken in its sauce for up to 2 months. We do not recommend freezing the cooked rice, as it tends to become grainy upon thawing.
- Reheating: * Stovetop: Add a splash of water or chicken broth to a pan and heat the chicken over medium until bubbling.
- Microwave: Cover with a damp paper towel to trap steam, heating in 45-second intervals.
7. Expert Tips and Variations
Professional Chef Tips
- The “Velveting” Technique: Toss your raw chicken in a teaspoon of cornstarch before searing. This creates a thin barrier that keeps the meat succulent and helps the sauce cling.
- Don’t Crowd the Pan: If the chicken pieces are touching, they will steam rather than sear. Cook in batches if necessary to get those crispy, charred edges.
- The Rice Rinse: Always wash your rice 3–4 times. Removing excess surface starch is the only way to get individual, pearly grains.
Variations
- Spicy Teriyaki: Add 1 tablespoon of Gochujang or Sriracha to the sauce base.
- Vegetarian: Swap chicken for extra-firm tofu (pressed and pan-fried) or cauliflower florets.
- Low-Carb: Replace white rice with cauliflower rice or a bed of shredded cabbage.
8. Ingredients Section
The Chicken
- 1.5 lbs (680g) Boneless, skinless chicken thighs, cut into 1-inch bite-sized pieces. (Thighs are superior to breasts here as they remain juicy under high heat).
The Homemade Teriyaki Sauce
- 1/2 cup (120ml) Soy sauce (Use Tamari for GF).
- 1/4 cup (60ml) Water.
- 1/4 cup (60ml) Mirin (Japanese sweet rice wine).
- 3 tbsp Brown sugar or honey.
- 1 tbsp Freshly grated ginger.
- 3 cloves Garlic, minced.
- 1 tsp Toasted sesame oil.
- 1 tbsp Cornstarch mixed with 2 tbsp cold water (Slurry).
The Base and Garnish
- 2 cups Uncooked Jasmine or Short-grain Japanese rice.
- 2 cups Steamed broccoli florets or snap peas.
- 2 Green onions, sliced.
- 1 tbsp Toasted sesame seeds.
9. Step-by-Step Instructions
Step 1: Prepare the Rice
Rinse the rice in a fine-mesh strainer until the water runs clear. Combine with water (usually a 1:1.25 ratio for jasmine) in a pot. Bring to a boil, then reduce to the lowest heat, cover, and simmer for 15 minutes. Let it sit, covered, for 5 minutes before fluffing with a fork.
Step 2: Whisk the Sauce
In a medium bowl, combine the soy sauce, water, mirin, brown sugar, ginger, garlic, and sesame oil. Whisk until the sugar is mostly dissolved. Set the cornstarch slurry aside in a separate small ramekin.
Step 3: Sear the Chicken
Heat 1 tablespoon of neutral oil (like canola or grapeseed) in your skillet over medium-high heat. Once the oil shimmers, add the chicken in a single layer. Let it sit undisturbed for 3–4 minutes to develop a deep golden crust. Flip and cook for another 2 minutes.
Step 4: The Glazing Process
Pour the teriyaki sauce mixture directly into the skillet with the chicken. Let the liquid come to a vigorous simmer. Once simmering, whisk your cornstarch slurry once more (it settles quickly!) and pour it into the pan.
Step 5: Reduce and Coat
Stir constantly as the sauce thickens. In about 1–2 minutes, the sauce will transform from a thin liquid to a glossy, dark glaze that coats the chicken perfectly. Remove from heat immediately to prevent the sugar from burning.
Step 6: Assembly
Scoop a generous portion of rice into bowls. Top with a heap of teriyaki chicken, ensuring you drizzle extra sauce from the pan over the rice. Add your steamed greens to the side.
10. Frequently Asked Questions (FAQ)
Q: Can I use chicken breast instead of thighs? A: Yes, but be careful. Chicken breast dries out quickly. Reduce the searing time by 1 minute per side to ensure the meat remains tender.
Q: What if I don’t have Mirin? A: You can substitute Mirin with dry sherry or sweet marsala wine. Alternatively, use rice vinegar mixed with an extra teaspoon of sugar.
Q: My sauce is too salty. How do I fix it? A: Soy sauce brands vary in sodium content. If it’s too salty, add a splash of water and a squeeze of lime juice; the acidity will help balance the sodium.
Q: Why is my sauce cloudy instead of clear? A: This usually happens if the cornstarch slurry wasn’t fully incorporated or if the sauce didn’t reach a high enough boil. Ensure the sauce bubbles vigorously for at least 30 seconds to “activate” the cornstarch and clear the cloudiness.
Q: Can I make the sauce ahead of time? A: Absolutely. You can whisk the sauce (minus the slurry) and keep it in a jar in the fridge for up to 2 weeks. Just shake well before using.


