1. Introduction
There is a specific kind of magic in the sizzle of a hot pan when a sweet, soy-based glaze hits the surface. The Teriyaki Chicken Bowl is more than just a staple of Japanese-American “fast-casual” dining; it is a masterclass in the balance of umami, sweetness, and acidity.
Originating from the Japanese cooking technique teriyaki—where teri refers to the lacquer-like shine of the sauce and yaki refers to the grilling or broiling method—this dish has evolved into a global comfort food. My first encounter with a truly authentic version wasn’t in a shopping mall food court, but in a small, steam-filled kitchen in Seattle, where the “Seattle-style” teriyaki movement began. The secret wasn’t just the sugar; it was the ginger-garlic punch and the way the sauce clings to charred, juicy chicken thighs.
This recipe is designed to bridge the gap between high-end culinary technique and weeknight convenience. We aren’t just making dinner; we’re creating a bowl of vibrant colors, contrasting textures, and deep, soulful flavors.
2. Recipe Overview
- Cuisine Type: Japanese-Fusion
- Difficulty Level: Easy to Intermediate
- Prep Time: 15 minutes
- Cook Time: 15 minutes
- Total Time: 30 minutes
- Dietary Classifications: Dairy-Free, High-Protein (Can be made Gluten-Free with Tamari)
3. Equipment and Tools
To achieve the perfect “glaze” without burning the sugars in the sauce, having the right gear is essential.
- Large Non-Stick Skillet or Carbon Steel Wok: Recommended size is 12 inches (30 cm) in diameter with a depth of at least 2 inches. This allows for even heat distribution and enough surface area to sear the chicken without crowding.
- Mixing Bowls: One medium bowl for marinating and one small whisking bowl for the sauce.
- Chef’s Knife: A sharp 8-inch blade for clean cuts of chicken and precise vegetable julienning.
- Rice Cooker or Heavy-Bottomed Pot: For perfectly fluffy jasmine or short-grain rice.
- Measuring Tools: Full set of dry measuring cups and liquid measuring spoons (Metric/Imperial).
- Meat Thermometer: To ensure chicken reaches an internal temperature of 165°F (74°C).
4. Serving Suggestions
A bowl is only as good as its presentation. To make this feel like a restaurant-quality meal, consider the following:
Plating Recommendations
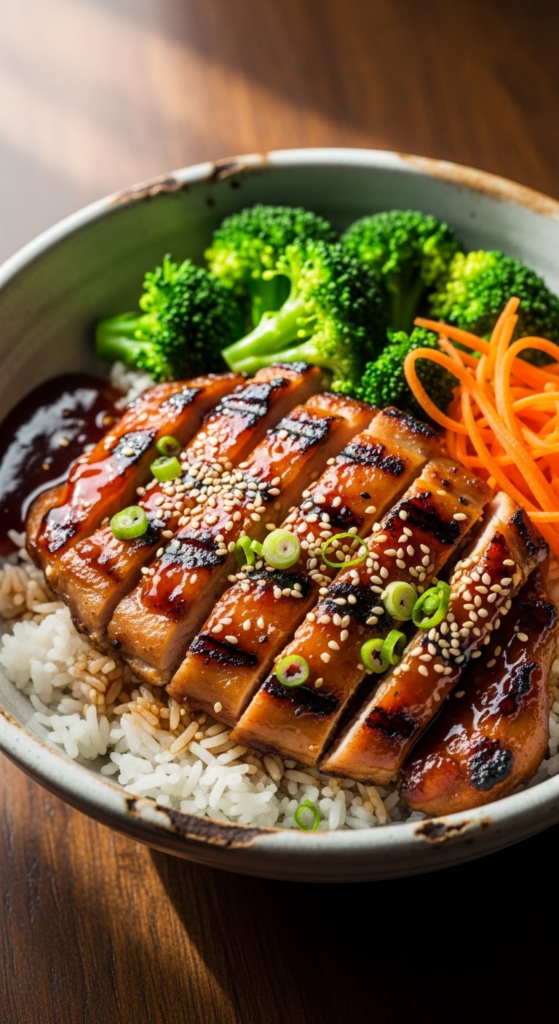
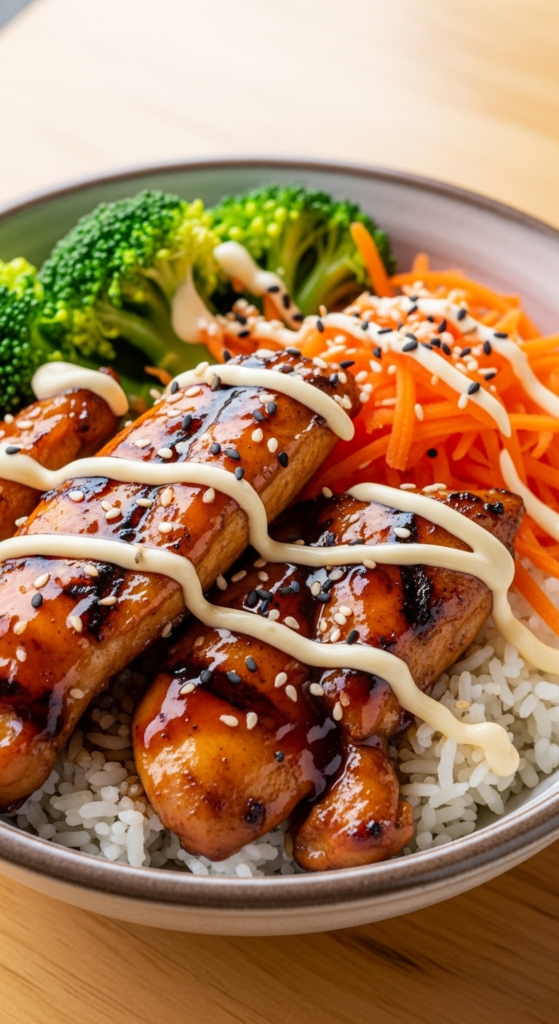
Start with a generous base of steamed rice. Arrange the chicken on one side, steamed broccoli on the other, and a pile of shredded carrots or pickled ginger in the center for a pop of color.
Garnish Ideas
- Toasted Sesame Seeds: Adds a nutty crunch.
- Thinly Sliced Scallions: Use both the white and green parts for sharp freshness.
- Red Chili Flakes: If you prefer a “Spicy Teriyaki” kick.
Beverage Pairings
- Non-Alcoholic: A cold Sparkling Yuzu juice or a hot Genmaicha (brown rice green tea).
- Alcoholic: A crisp, dry Riesling or a light Japanese Lager (like Asahi or Sapporo) to cut through the sweetness of the glaze.
5. Nutritional Information (Per Serving)
Estimate based on 4 servings.
| Metric | Amount |
|---|---|
| Calories | 540 kcal |
| Protein | 38g |
| Total Fat | 12g |
| Carbohydrates | 68g |
| Fiber | 4g |
| Sugars | 14g |
Health Benefits: This dish is packed with lean protein and cruciferous vegetables. Ginger and garlic provide anti-inflammatory properties, while the fermentation in soy sauce offers complex amino acids.
6. Storage and Reheating
This recipe is a “Meal Prep” champion.
- Refrigeration: Store in airtight containers for up to 4 days. Keep the sauce-coated chicken and rice together so the rice absorbs the extra flavor.
- Freezing: You can freeze the cooked chicken and sauce for up to 3 months. However, I recommend freezing the rice separately to maintain texture.
- Reheating: * Microwave: Add a teaspoon of water over the rice, cover with a damp paper towel, and heat for 2 minutes.
- Stovetop: Reheat in a skillet over medium-low heat with a splash of chicken broth to loosen the glaze.
7. Expert Tips and Variations
Professional Chef Tips
- The Cornstarch Slurry: Never add dry cornstarch to a hot pan; it will clump. Always mix it with cold water first.
- Don’t Crowd the Pan: If you put too much chicken in at once, it will steam rather than sear. Cook in batches if necessary to get those crispy, browned edges.
Variations
- The “Low-Carb” Bowl: Swap rice for cauliflower rice or a bed of sautéed cabbage.
- The “Tropical” Bowl: Add grilled pineapple chunks to the skillet during the last 2 minutes of cooking.
- The Vegan Swap: Use extra-firm pressed tofu or seitan instead of chicken. Use agave nectar instead of honey.
8. Ingredients Section
For the Chicken & Marinade
- Chicken: 1.5 lbs (680g) Boneless, skinless chicken thighs (cut into 1-inch bite-sized pieces). Note: Thighs stay juicier than breasts.
- Salt & Pepper: To taste.
- Oil: 2 tbsp Avocado or Grapeseed oil (high smoke point).
For the Homemade Teriyaki Sauce
- Soy Sauce: 1/2 cup (120ml) Low-sodium preferred.
- Water: 1/4 cup (60ml).
- Honey or Brown Sugar: 1/4 cup (50g) for that essential stickiness.
- Rice Vinegar: 1 tbsp for acidity.
- Fresh Ginger: 1 tbsp, finely grated.
- Fresh Garlic: 3 cloves, minced.
- Sesame Oil: 1 tsp for aroma.
- Cornstarch Slurry: 1 tbsp cornstarch dissolved in 1 tbsp cold water.
9. Step-by-Step Instructions
Step 1: Prepare the Base
Start your rice according to package instructions. Whether using a rice cooker or stovetop, ensure the rice is steaming hot when the chicken is finished.
Step 2: Whisk the Liquid Gold
In a small bowl, combine the soy sauce, water, honey, rice vinegar, ginger, garlic, and sesame oil. Whisk until the honey is fully incorporated. Set aside.
Step 3: The Sear
Pat the chicken pieces dry with paper towels (moisture is the enemy of a good sear). Season lightly with salt and pepper. Heat your skillet over medium-high heat with the oil. Once shimmering, add the chicken. Let it sit undisturbed for 3 minutes to develop a golden-brown crust, then toss and cook for another 4–5 minutes until nearly cooked through.
Step 4: The Glaze Transformation
Lower the heat to medium. Pour the sauce mixture into the skillet with the chicken. Let it come to a gentle simmer for 2 minutes.
Step 5: Thicken and Coat
Give your cornstarch slurry a quick stir and pour it into the bubbling sauce. Stir constantly. Within 30–60 seconds, the sauce will transform from a thin liquid into a thick, glossy glaze that coats every piece of chicken.
Step 6: Final Assembly
Steam your broccoli or snap peas (you can do this in the microwave or a separate pot). Scoop a generous portion of rice into a bowl, top with the glistening teriyaki chicken, add your greens, and finish with a heavy sprinkle of scallions and sesame seeds.
10. Frequently Asked Questions (FAQ)
Q: Can I use chicken breast instead of thighs? A: Yes! However, breasts dry out quickly. Reduce the searing time by 1-2 minutes and ensure you don’t overcook them before adding the sauce.
Q: Is Teriyaki sauce gluten-free? A: Traditional soy sauce contains wheat. To make this gluten-free, substitute the soy sauce with Tamari or Coconut Aminos.
Q: How do I get my sauce extra shiny? A: The “gloss” comes from the sugar content and the cornstarch. If it’s not shiny enough, add a teaspoon more honey or mirin at the end.
Q: Can I make the sauce in advance? A: Absolutely. It stays fresh in the fridge for up to 2 weeks. Just whisk it well before adding it to the pan.
Q: My sauce is too thick, how do I fix it? A: Simply whisk in a tablespoon of water or chicken broth at a time until you reach your desired consistency.


