1. Introduction
There is a specific kind of magic that happens in a kitchen when the scent of caramelizing bananas meets the sizzle of a hot griddle. Mini Banana Pancakes—often called “Silver Dollar” pancakes or, more recently, “Pancake Cereal”—have transcended their status as a simple breakfast side dish to become a global culinary phenomenon.
The story of the banana pancake is one of resourcefulness. In many tropical cultures, where bananas are a staple crop, incorporating overripe fruit into batters was a natural way to reduce waste while adding moisture and natural sugars. In the West, the “silver dollar” pancake gained popularity in the mid-20th century, prized for its elegant, bite-sized presentation. Today, these minis are a favorite for parents seeking toddler-friendly finger foods and brunch enthusiasts looking for a whimsical, Instagram-worthy spread.
What makes this specific recipe significant is the balance of textures. Because they are small, each pancake boasts a higher ratio of crispy, golden-brown edges to fluffy, tender centers. They are a canvas for creativity, a nostalgic comfort food, and arguably the most charming way to start your day.
2. Recipe Overview
- Cuisine Type: American / Fusion
- Difficulty Level: Easy (Beginner-friendly)
- Prep Time: 10 minutes
- Cook Time: 15 minutes
- Total Time: 25 minutes
- Dietary Classifications: Vegetarian (Can be easily adapted for Vegan or Gluten-Free diets)
3. Equipment and Tools
To achieve the uniform, professional look of a high-end bistro, you’ll need a few specific items:
- Non-Stick Griddle or Skillet: A large, flat surface is best. A 12-inch diameter allows you to cook 8–10 minis at once.
- Mixing Bowls: One large for dry ingredients, one medium for wet.
- The “Secret” Tool: A squeeze bottle or a small cookie scoop (approx. 1 tablespoon capacity). This ensures perfectly round, uniform shapes.
- Thin Silicone Spatula: Essential for flipping small cakes without damaging the edges.
- Whisk and Fork: A whisk for the flour to prevent clumps, and a sturdy fork for mashing the bananas.
- Wire Cooling Rack: If you are making a large batch, placing them on a rack prevents the bottoms from becoming soggy due to steam.
4. Serving Suggestions
How you serve these minis can change the entire mood of the meal:
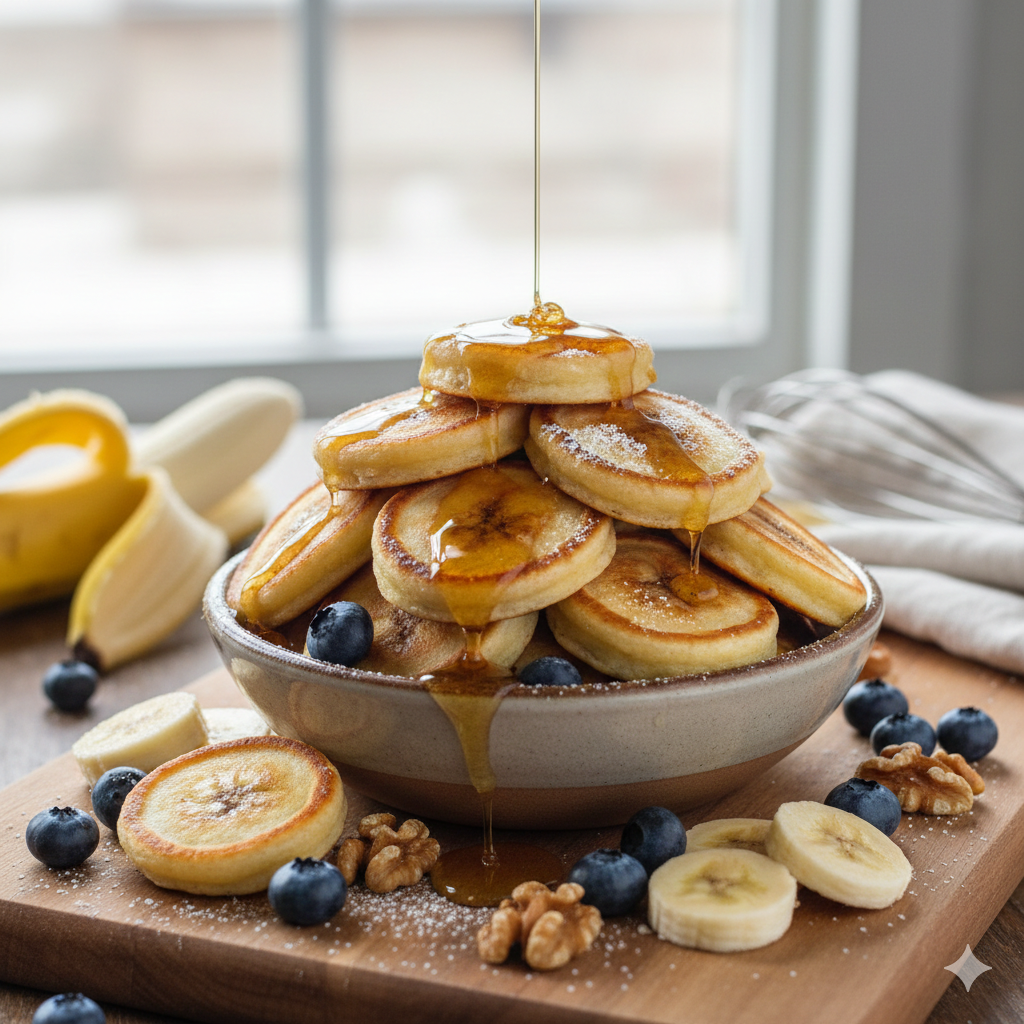
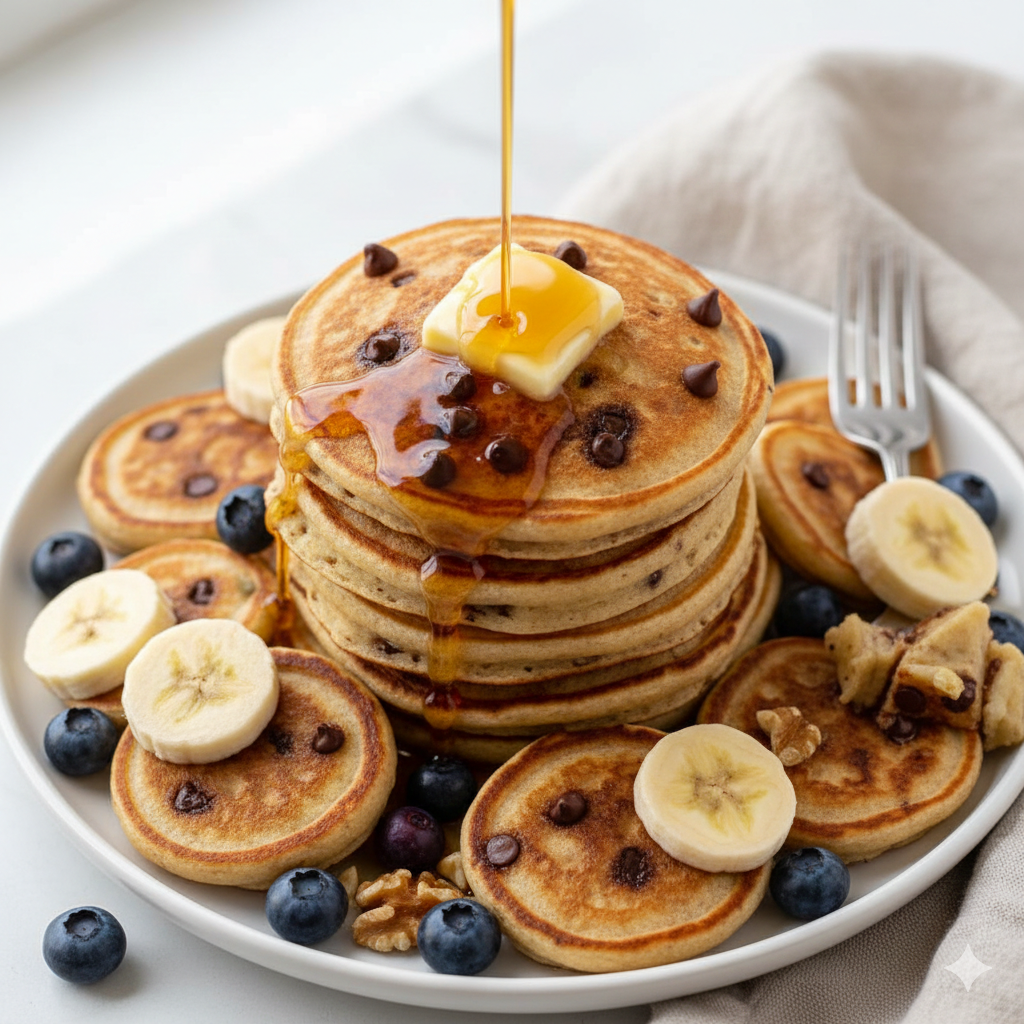
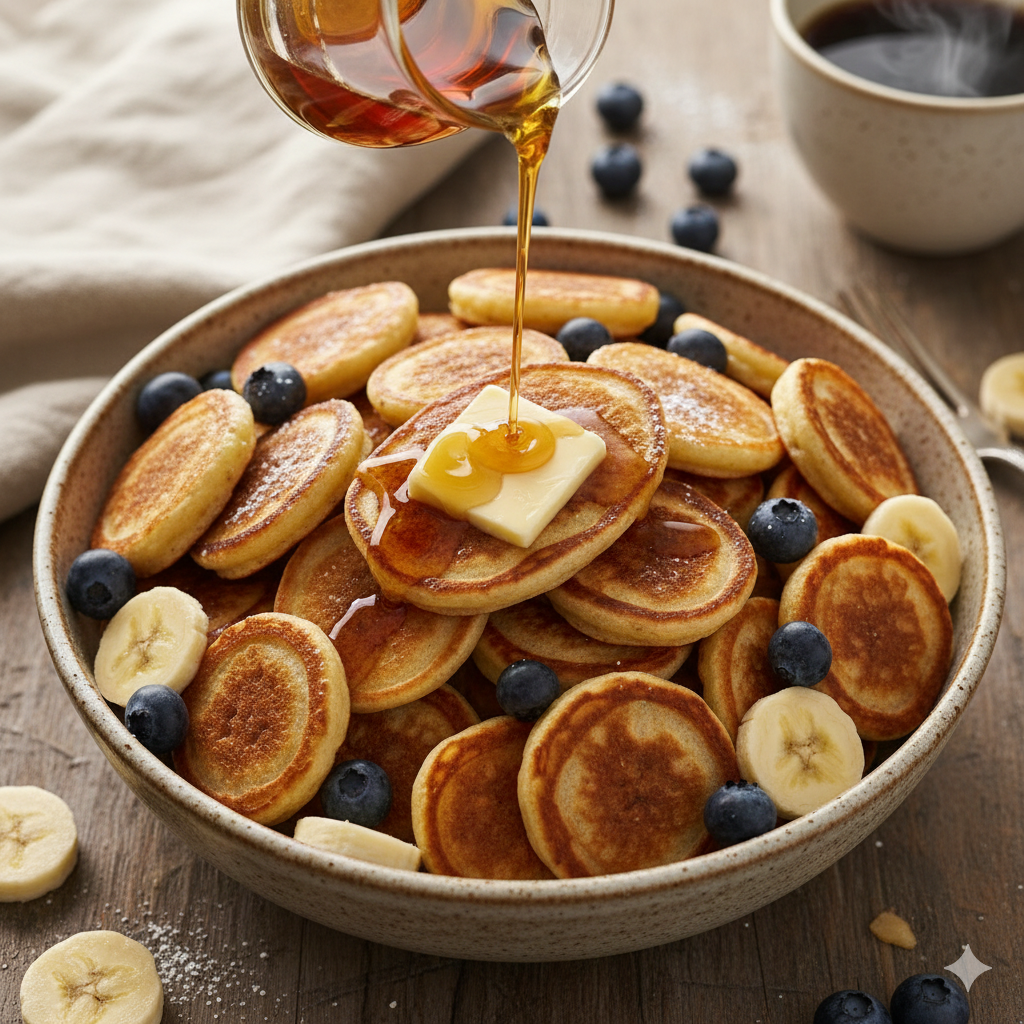
- The “Cereal Bowl”: Fill a deep bowl with 20–30 mini pancakes. Top with a knob of salted butter, a splash of milk (optional), and a generous drizzle of maple syrup.
- Brunch Skewers: Thread a mini pancake, a slice of fresh strawberry, and a banana coin onto a bamboo skewer. Drizzle with honey for a sophisticated appetizer.
- Plating: Arrange them in a circular “shingle” pattern on a flat white plate, garnished with fresh mint leaves and a dusting of powdered sugar.
- Beverage Pairings: * Coffee: A medium-roast Colombian coffee balances the sweetness.
- Tea: Earl Grey with a hint of lemon.
- Juice: Freshly squeezed orange juice or a mango-pineapple blend.
5. Nutritional Information
(Estimated per serving of 8–10 mini pancakes)
| Nutrient | Amount | % Daily Value* |
| Calories | 240 kcal | 12% |
| Total Fat | 6g | 8% |
| Saturated Fat | 3g | 15% |
| Cholesterol | 45mg | 15% |
| Sodium | 210mg | 9% |
| Total Carbohydrates | 42g | 15% |
| Dietary Fiber | 3g | 11% |
| Sugars | 14g | – |
| Protein | 7g | 14% |
Health Benefits: Bananas provide a significant boost of potassium and Vitamin B6. By using whole-grain flour, you can increase the fiber content, which aids in digestion and provides sustained energy throughout the morning.
6. Storage and Reheating
Mini pancakes are the “holy grail” of breakfast meal prep because they hold their structure remarkably well.
- Refrigeration: Store in an airtight container for up to 4 days.
- Freezing: This is the preferred method for long-term storage. Lay the pancakes in a single layer on a baking sheet and freeze for 1 hour (this prevents sticking). Transfer to a freezer-safe zip bag for up to 2 months.
- Reheating:
- Toaster Oven: 3–4 minutes at 350°F (175°C) for a “just-cooked” crispiness.
- Microwave: 20–30 seconds on high for a soft, pillowy texture.
- Skillet: Re-warm on a dry pan over medium heat for 1 minute per side.
7. Expert Tips and Variations
Professional Chef Tips
- The “Rest” Period: Let your batter sit for 5–10 minutes before cooking. This allows the flour to hydrate and the baking powder to activate, leading to much fluffier results.
- Temperature Control: If your pancakes are dark brown on the outside but raw in the middle, your pan is too hot. Mini pancakes require a “low and slow” approach because the banana sugars burn easily.
- Wipe the Pan: Use a paper towel to wipe the pan between batches to prevent burnt butter residue from sticking to your next round.
Creative Variations
- Tropical Mini: Add 2 tablespoons of shredded coconut to the batter and top with macadamia nuts.
- Chocolate Chip: Use mini chocolate chips (regular ones are too heavy for these tiny cakes).
- Protein Style: Substitute half the flour for vanilla-flavored whey or plant protein powder.
- Seasonal Spice: In autumn, add $1/2$ teaspoon of pumpkin spice or nutmeg to the dry mix.
8. Ingredients Section
Yields: Approx. 40 mini pancakes (Serves 4)
The Dry Mix:
- All-Purpose Flour: $1 \frac{1}{2}$ cups ($190g$). For a nuttier flavor, use half whole-wheat.
- Baking Powder: $2$ teaspoons. Ensure it is fresh for maximum lift.
- Cinnamon: $1$ teaspoon.
- Salt: $1/4$ teaspoon to enhance the banana flavor.
The Wet Mix:
- Overripe Bananas: $2$ medium (The spottier the skin, the better the flavor).
- Egg: $1$ large, room temperature.
- Milk: $1$ cup ($240ml$). Whole milk is best, but oat or almond milk works perfectly.
- Melted Butter: $2$ tablespoons (Unsalted).
- Vanilla Extract: $1$ teaspoon.
9. Step-by-Step Instructions
- Sift and Whisk: In a large bowl, whisk the flour, baking powder, cinnamon, and salt. Sifting is optional but recommended if your flour is clumped.
- The Banana Base: In a separate medium bowl, mash the bananas until they reach a pudding-like consistency. It’s okay if a few small lumps remain.
- Emulsify: Add the egg, milk, melted butter, and vanilla to the mashed bananas. Whisk vigorously until the mixture is uniform.
- The Folding Technique: Pour the wet ingredients into the dry. Using a spatula, fold the mixture. Stop as soon as the flour disappears. Warning: Overmixing will result in tough, rubbery pancakes.
- Heat Preparation: Place your griddle over medium-low heat. Lightly coat with butter or a neutral oil (like grapeseed).
- The Pour: Using your squeeze bottle or scoop, drop $1$-tablespoon portions of batter onto the griddle. Leave about an inch of space between each.
- Identify the Flip: Wait for small bubbles to form on the surface and the edges to look dry and matte ($90$–$120$ seconds).
- The Golden Flip: Gently flip. The underside should be a deep golden brown. Cook the second side for $60$ seconds.
- Keep Warm: Transfer finished pancakes to a wire rack or a warm oven ($200^\circ F$) while you repeat with the remaining batter.
10. Frequently Asked Questions (FAQ)
Q: Can I make these without eggs?
A: Yes! You can substitute the egg with a “flax egg” (1 tbsp ground flaxseed mixed with 3 tbsp water) or simply add an extra half-banana for binding.
Q: My pancakes are flat. What happened?
A: Your baking powder might be expired, or you may have overmixed the batter, which deflates the air bubbles needed for lift.
Q: Can I use frozen bananas?
A: Absolutely. Thaw them completely in a bowl and include the liquid that leaches out; it’s full of concentrated banana sugar!
Q: Why do they stick to my non-stick pan?
A: This usually happens if the pan wasn’t preheated properly or if there isn’t enough fat (butter/oil). Ensure the pan is hot before the first drop of batter hits.
Q: Are these suitable for baby-led weaning (BLW)?
A: They are excellent for babies! Just omit the salt and sugar/syrup and ensure they are cool enough before serving.


