1. Introduction: The Timeless Charm of Vanilla
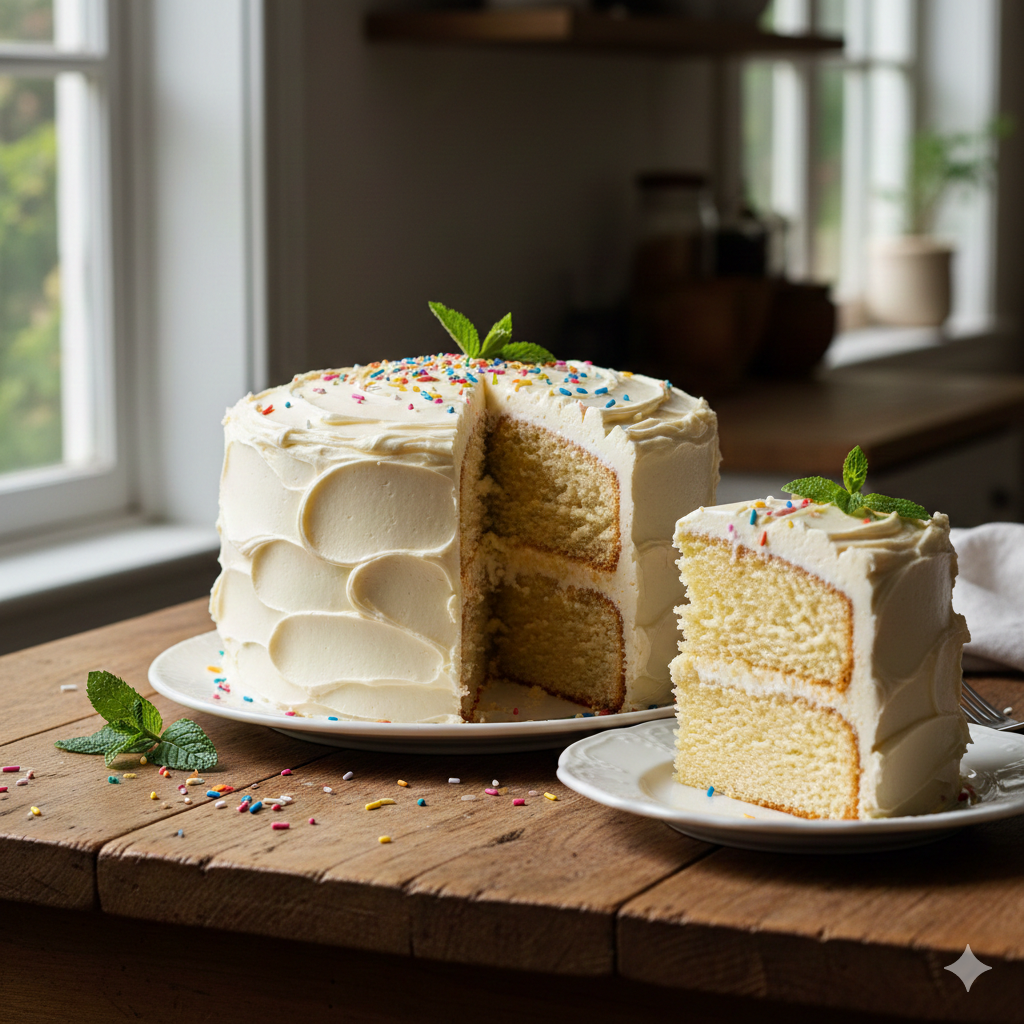
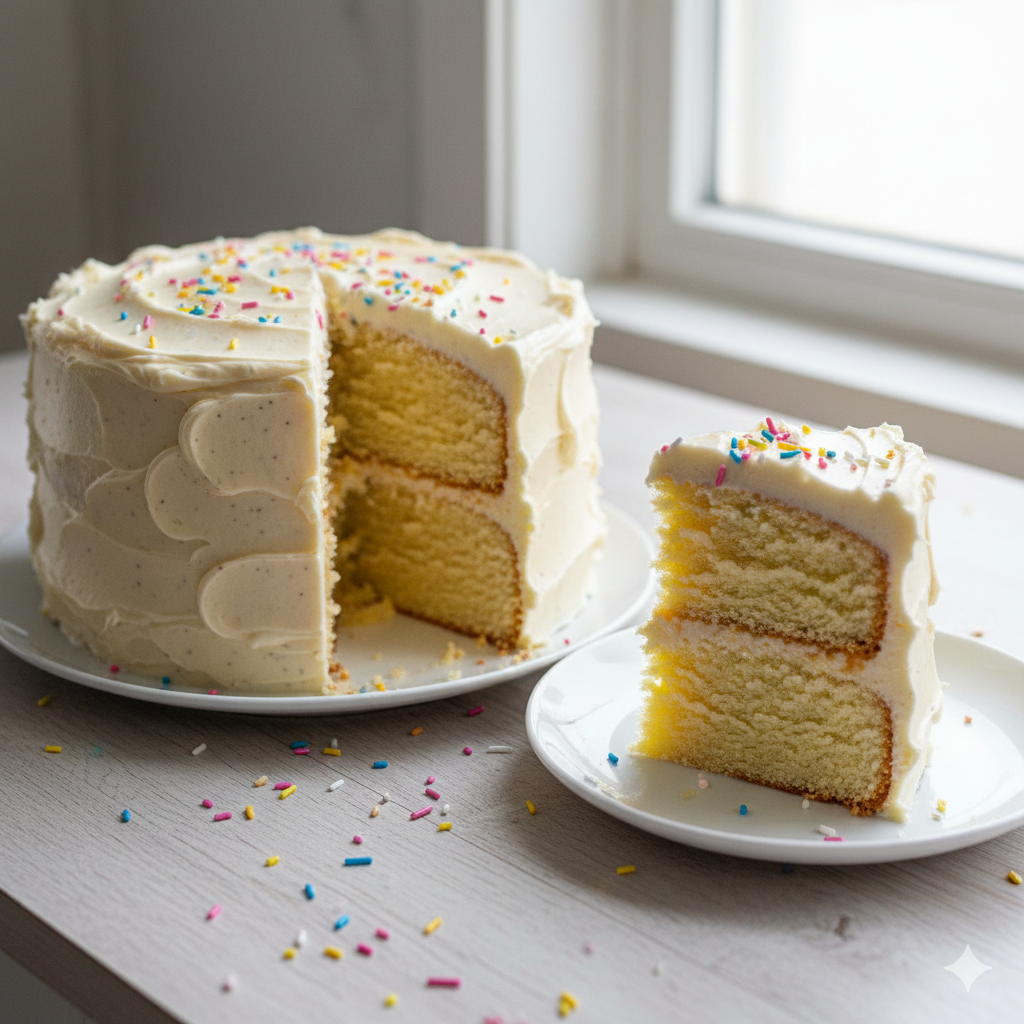
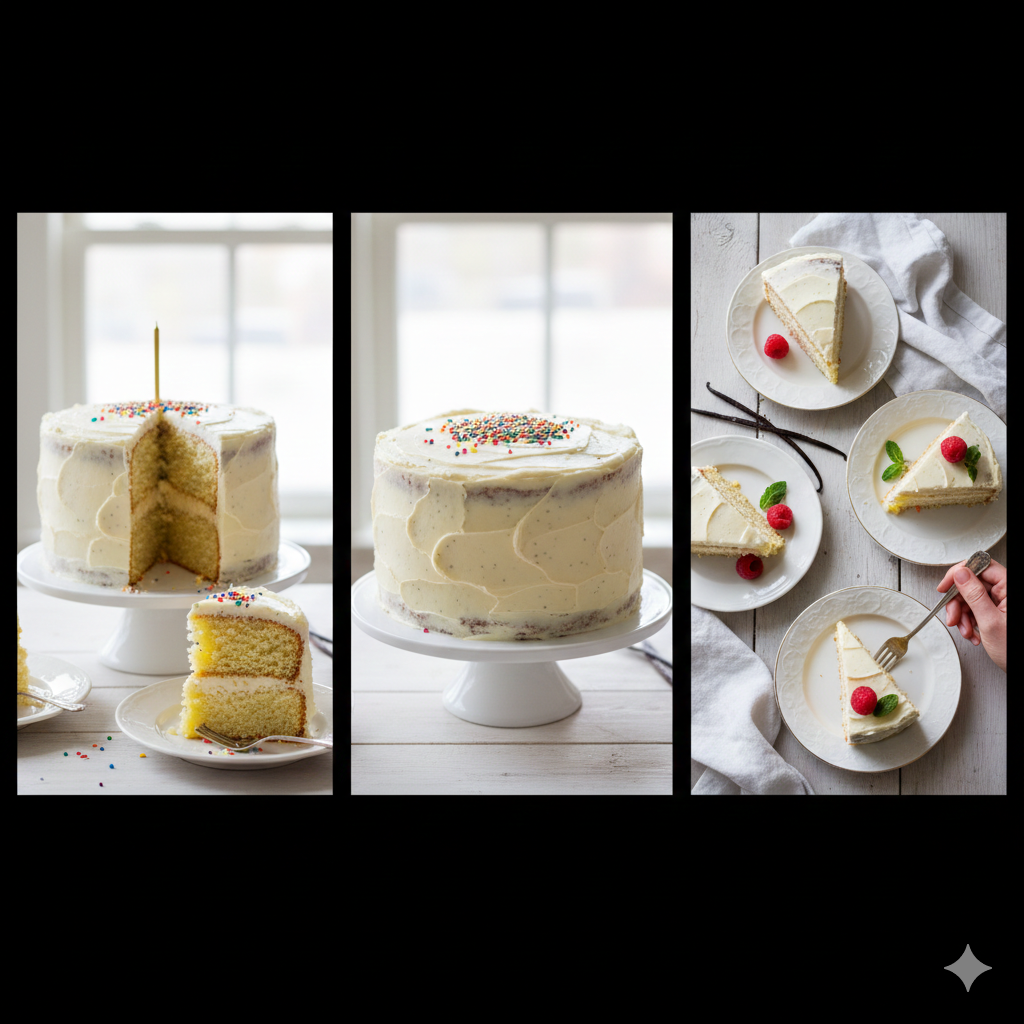
There is a profound, almost magical simplicity in a perfect slice of vanilla cake. While chocolate may be indulgent and fruit cakes may be sophisticated, the Vanilla Birthday Cake remains the undisputed monarch of celebrations. It is the blank canvas upon which memories are painted—the smell of butter and sugar wafting through a kitchen, the soft glow of candles, and the first “clean” cut into a pale, golden crumb.
Culturally, vanilla represents the “gold standard” of baking. Originating from the orchids of Mexico and later refined through French patisserie techniques, vanilla was once so rare it was reserved for royalty. Today, it serves as the backbone of the baking world. This specific recipe isn’t just about mixing flour and eggs; it’s about the Reverse Creaming Method, a professional secret that ensures a velvety, tight-crumbed texture that never turns out dry or bready. Whether it’s a toddler’s first birthday or a grandmother’s eightieth, this cake is designed to be the reliable, delicious heart of the party.
2. Recipe Overview
- Cuisine Type: American / Contemporary Bakery
- Difficulty Level: Intermediate (Requires precision)
- Total Prep Time: 30 minutes
- Total Cook Time: 35–40 minutes
- Dietary Classifications: Vegetarian, Nut-Free (can be adapted for Gluten-Free)
3. Equipment and Tools
To achieve bakery-quality results, the right tools are non-negotiable. Precision in volume and temperature is the difference between a sunken center and a level masterpiece.
- Baking Pans: Two 8-inch (20cm) round cake pans with a minimum depth of 2 inches.
- Mixer: Stand mixer with a paddle attachment (preferred) or a high-powered hand mixer.
- Measuring Tools: A digital kitchen scale (grams are more accurate than cups) and a set of nesting measuring spoons.
- Sifter: A fine-mesh sieve for aerating dry ingredients.
- Spatulas: Silicone offset spatula for frosting and a flexible rubber spatula for folding.
- Cooling Rack: Wire rack for even air circulation.
- Parchment Paper: Pre-cut circles or a roll to line the bottom of your pans.
4. Serving Suggestions
A cake this beautiful deserves a grand entrance.
- Plating: Serve on a chilled ceramic pedestal. Use a sharp, thin-bladed knife dipped in hot water (and wiped dry) between each slice for clean edges.
- Garnish: Fresh organic raspberries or a sprig of mint provide a color contrast. For a classic look, use high-quality rainbow sprinkles or edible gold leaf.
- Pairings: * Beverage: A crisp, cold glass of whole milk or a floral Earl Grey tea.
- Adult Pairing: A demi-sec Champagne or a sweet Moscato d’Asti complements the vanilla notes without overpowering them.
5. Nutritional Information (Per Serving)
Serving size: 1 slice (based on 12 slices per cake)
| Nutrient | Amount |
| Calories | 480 kcal |
| Total Fat | 22g |
| Saturated Fat | 14g |
| Cholesterol | 85mg |
| Sodium | 310mg |
| Total Carbohydrates | 68g |
| Sugars | 45g |
| Protein | 5g |
Note: This cake is a celebratory treat. For a lighter version, the frosting can be substituted with a simple whipped cream and fresh berries.
6. Storage and Reheating
- Room Temperature: The frosted cake can stay at room temperature in a cake dome for up to 2 days.
- Refrigeration: If using cream cheese or fresh fruit fillings, refrigerate. Cover exposed cake surfaces with plastic wrap to prevent the fridge from “drinking” the moisture.
- Freezing: Wrap unfrosted layers tightly in double layers of plastic wrap and foil. They stay fresh for up to 3 months.
- Reheating: Vanilla cake is best enjoyed at room temperature. If cold, let it sit out for 30–60 minutes before serving.
7. Expert Tips and Variations
Professional Chef Tips
- Room Temperature Everything: Ensure your eggs, butter, and buttermilk are at room temperature (approx. 20°C/68°F). This allows for a stable emulsion.
- The “Drop” Test: Tap your filled cake pans firmly on the counter three times before sliding them into the oven to release large air bubbles.
Creative Variations
- The Funfetti Twist: Fold 1/2 cup of high-quality jimmies into the batter at the very last second.
- Lemon-Vanilla: Add the zest of two lemons to the sugar and rub it in with your fingers before mixing to release the oils.
- Gluten-Free: Swap the flour for a high-quality 1:1 gluten-free baking blend containing xanthan gum.
8. Ingredients Section
The Cake Layers
- Cake Flour: 375g (3 cups). Note: Cake flour is essential for a tender crumb due to lower protein content.
- Granulated Sugar: 400g (2 cups).
- Baking Powder: 1 tbsp.
- Salt: 1 tsp fine sea salt.
- Unsalted Butter: 225g (1 cup), softened and cubed.
- Large Eggs: 4, room temperature.
- Whole Milk Buttermilk: 240ml (1 cup).
- Vanilla Bean Paste: 2 tsp (or high-quality extract).
- Vegetable Oil: 60ml (1/4 cup) for extra moisture.
The Vanilla Bean Buttercream
- Unsalted Butter: 450g (2 cups), slightly cool but pliable.
- Powdered Sugar: 750g (6 cups), sifted.
- Heavy Cream: 3–4 tbsp.
- Salt: A pinch to cut the sweetness.
9. Step-by-Step Instructions
Step 1: Prep and Sift
Preheat your oven to 350°F (175°C). Grease two 8-inch pans, line the bottoms with parchment, and grease the parchment. Sift the cake flour, sugar, baking powder, and salt into the bowl of your stand mixer. Mix on low for 30 seconds to combine.
Step 2: The Reverse Creaming Method
Add the cubed, softened butter to the dry ingredients. Mix on low speed until the mixture resembles coarse sand or wet crumbs. This coats the flour in fat, inhibiting gluten development for a more tender cake.
Step 3: The Liquid Phase
In a separate jug, whisk together the buttermilk, oil, eggs, and vanilla. With the mixer on low, slowly pour in half of the liquid mixture. Increase speed to medium and beat for 90 seconds to develop the cake’s structure.
Step 4: Finishing the Batter
Scrape down the sides of the bowl. Add the remaining liquid in two stages, mixing on low for about 30 seconds after each addition until just combined. Do not overmix!
Step 5: The Bake
Divide the batter equally between the two pans. Bake for 33–38 minutes. The cakes are done when a wooden skewer inserted into the center comes out with only a few moist crumbs, and the edges have slightly pulled away from the pan.
Step 6: Cooling
Cool in the pans for 10 minutes, then invert onto a wire rack. Remove the parchment paper immediately and allow them to cool completely before frosting.
Step 7: The Frosting
Beat the butter for 5 minutes until pale and fluffy. Gradually add powdered sugar, followed by the cream and vanilla. Whip on high for another 3 minutes until it reaches a “cloud-like” consistency.
10. Frequently Asked Questions (FAQ)
Q: Can I use All-Purpose flour instead of Cake Flour?
A: Yes, but the texture will be slightly heavier. To DIY cake flour, remove 2 tablespoons of AP flour for every cup used and replace it with 2 tablespoons of cornstarch.
Q: Why did my cake sink in the middle?
A: This usually happens if the oven door was opened too early or if the baking powder is expired. Ensure your leavening agents are fresh (less than 6 months old).
Q: Can I make this into cupcakes?
A: Absolutely. This recipe makes approximately 24-28 cupcakes. Bake at the same temperature for 18–22 minutes.
Q: How do I get white frosting instead of yellow?
A: Use a tiny drop of purple food coloring (on the tip of a toothpick) to neutralize the yellow tones of the butter, or use clear vanilla extract.
Q: My buttercream is too runny. How do I fix it?
A: Add more sifted powdered sugar 1/4 cup at a time, or refrigerate the bowl for 15 minutes before whipping again.