1. Introduction
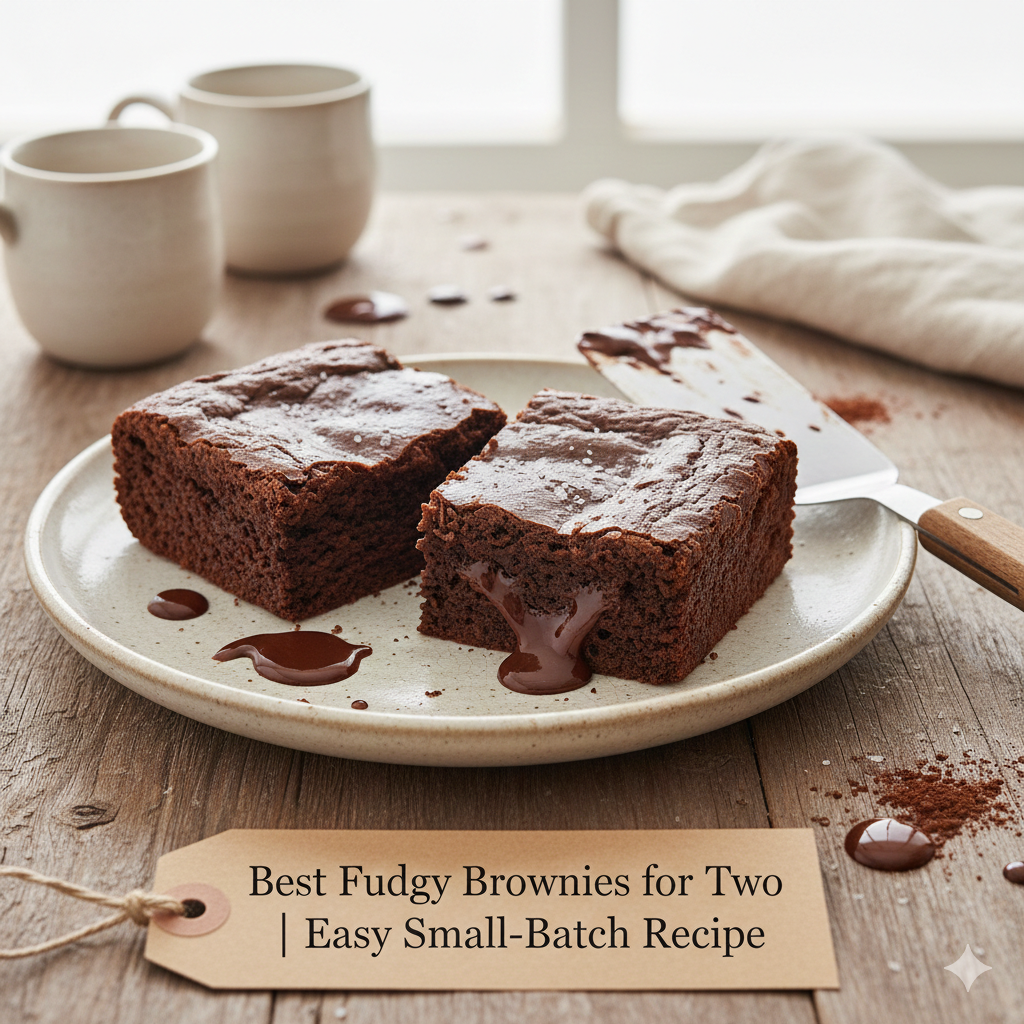
There is a specific kind of magic found in the quiet moments of a shared dessert. While a towering chocolate cake or a massive tray of cookies has its place at a party, the Small-Batch Fudgy Brownie is designed for intimacy. It is the culinary equivalent of a whispered secret—intense, rich, and meant for a party of two.
The brownie itself is a quintessential American invention, dating back to the late 19th century. Legend has it that a socialite in Chicago requested a dessert that was smaller than a piece of cake but still possessed the richness of a chocolate confection. Over the decades, the brownie has diverged into two warring camps: the “cakey” and the “fudgy.”
Our recipe firmly plants its flag in the fudgy territory. By carefully balancing the ratio of fat to flour and omitting chemical leaveners like baking powder, we create a dense, truffle-like consistency that melts on the tongue. This specific “for two” version was perfected to solve the age-old problem of the “leftover temptation.” When you only have enough for a couple of generous squares, every bite becomes more intentional. Whether it’s for a Valentine’s Day treat, a weekend date night, or a cozy evening in, these brownies deliver a high-end bakery experience from the comfort of your own toaster oven.
2. Recipe Overview
- Cuisine Type: American Dessert
- Difficulty Level: Very Easy
- Total Time: 25–30 minutes (5 mins prep, 20 mins baking)
- Dietary Classifications: Vegetarian. Can be made Gluten-Free (use 1:1 GF flour) or Dairy-Free (use vegan butter and dairy-free chips).
3. Equipment and Tools
Small-batch baking requires a slight shift in your kitchen inventory. Since we aren’t using a standard 9×13 inch pan, precision in container size is key to achieving that thick, fudgy height.
- Baking Dish: A standard 6×6 inch (15×15 cm) square pan or a small 4×6 inch rectangular glass dish. You can even use two large ramekins for individual portions.
- Mixing Bowl: A medium heat-safe glass bowl (Pyrex) for melting the butter and chocolate.
- Whisk & Spatula: A small balloon whisk for emulsifying and a rubber spatula for folding.
- Parchment Paper: Crucial for lifting the brownies out of a small dish without them crumbling.
- Kitchen Scale: Highly recommended for such small measurements to ensure the perfect fudgy-to-cakey ratio.
4. Serving Suggestions
Because these brownies are so intensely chocolatey, they benefit from a contrast in temperature or texture.
Plating Recommendations:
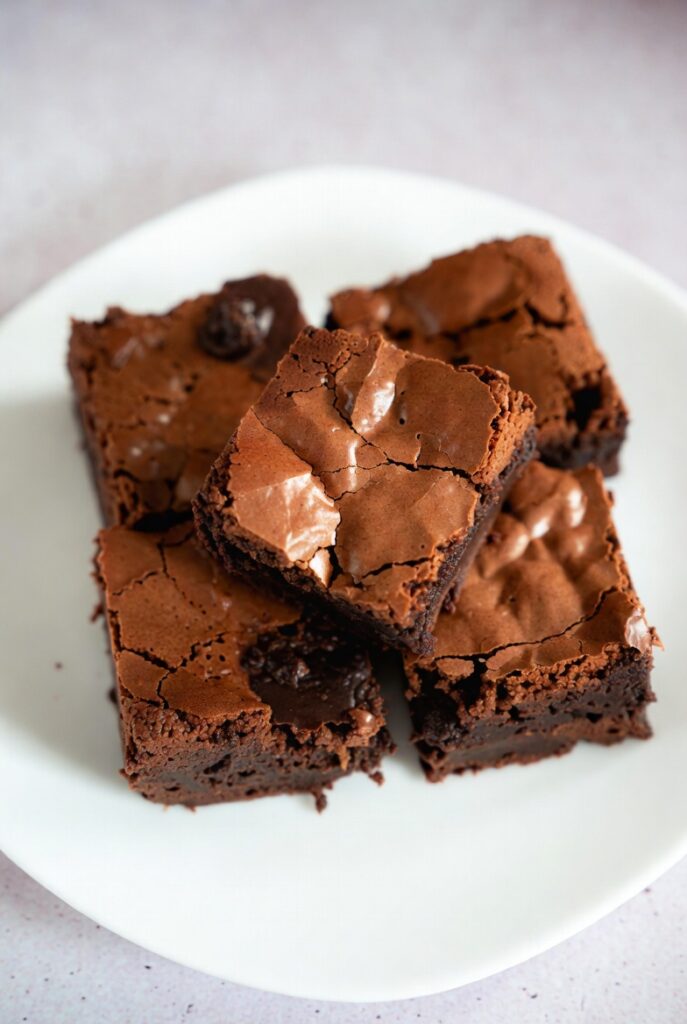
Serve warm directly from the pan if you’re keeping it casual, or lift them out and place them in the center of a shallow white bowl.
Garnish Ideas:
- The Classic Scoop: A single ball of high-quality Madagascar vanilla bean ice cream.
- Flaky Sea Salt: A sprinkle of Maldon salt highlights the dark chocolate notes.
- Fresh Raspberries: The tartness cuts through the richness of the cocoa butter.
Beverage Pairings:
- Espresso: The bitterness of a short pull of espresso mirrors the depth of the dark chocolate.
- Cold Milk: The traditionalist’s choice.
- Red Wine: A glass of Cabernet Sauvignon or a Ruby Port handles the sugar and fat beautifully.
5. Nutritional Information
Per Serving (1 large brownie square):
| Nutrient | Amount |
| Calories | 340 kcal |
| Total Fat | 19g |
| Saturated Fat | 11g |
| Carbohydrates | 38g |
| Dietary Fiber | 3g |
| Sugars | 28g |
| Protein | 4g |
Health Insight: Dark chocolate (at least 70% cocoa) contains flavonoids and antioxidants. While this is a dessert, using high-quality cacao provides a more “clean” energy boost compared to milk-chocolate alternatives.
6. Storage and Reheating
- Room Temperature: These are best eaten fresh, but can be kept in an airtight container for 2 days.
- Refrigeration: Storing them in the fridge makes them extra dense and fudgy—almost like a fudge bar.
- Freezing: Wrap in foil and freeze for up to 1 month.
- Reheating: To regain that “molten” center, microwave for 10–15 seconds. Do not overdo it, or the chocolate will seize and become dry.
7. Expert Tips and Variations
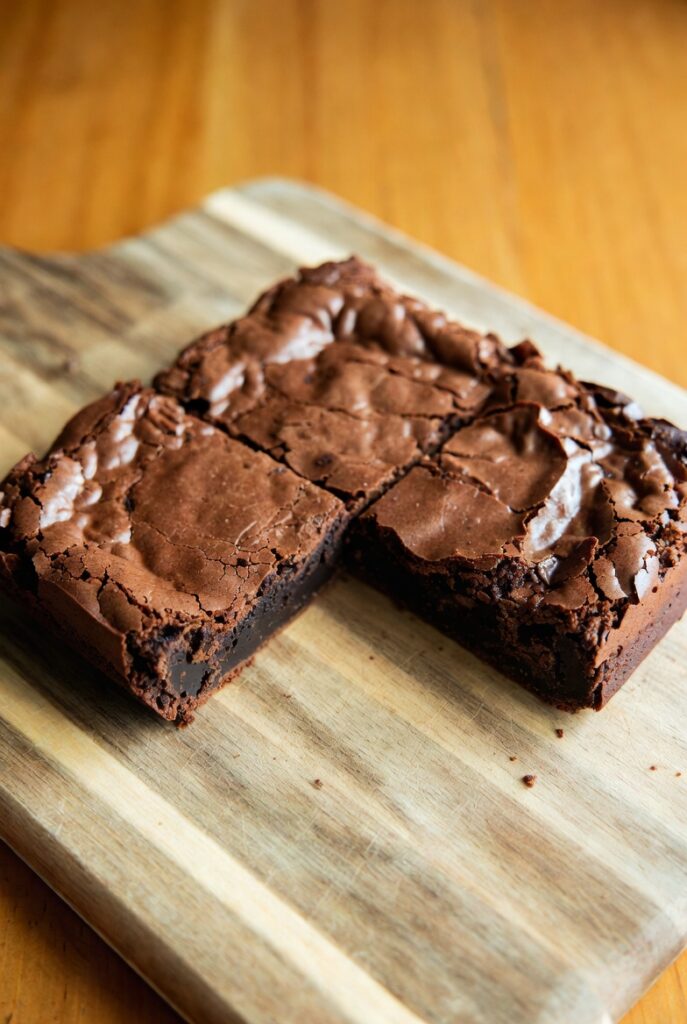
- The “Shiny Crust” Secret: Whisk the sugar and the egg vigorously for at least 1-2 minutes. This dissolves the sugar and creates that delicate, crackly meringue-like top.
- Measure Flour Carefully: If you don’t have a scale, use the “spoon and level” method. Too much flour will turn these into dry biscuits.
- Variations:
- Peanut Butter Swirl: Drop two teaspoons of peanut butter on top and swirl with a toothpick before baking.
- The “Double Shot”: Add a half-teaspoon of espresso powder to the batter to intensify the chocolate flavor.
- Nutty Treat: Fold in 2 tablespoons of chopped toasted walnuts or pecans.
8. Ingredients Section
The Base:
- Unsalted Butter: 3 tbsp (42g).
- Chocolate Chips or Chopped Bar: 1/4 Cup (45g) — Use semi-sweet or dark.
- Granulated Sugar: 1/3 Cup (65g).
- Light Brown Sugar: 1 tbsp (12g) — For extra chewiness.
The Binding:
- Large Egg: 1 (Room temperature).
- Vanilla Extract: 1/2 tsp.
The Dry Ingredients:
- All-Purpose Flour: 3 tbsp (25g).
- Unsweetened Cocoa Powder: 2 tbsp (10g) — Dutch-processed for a deeper color.
- Salt: a tiny pinch.
9. Step-by-Step Instructions
- Preparation: Preheat your oven to 175°C (350°F). Grease your small baking dish and line it with a strip of parchment paper.
- Melt the Chocolate: In a microwave-safe bowl, combine the butter and half of the chocolate chips. Heat in 20-second bursts, stirring in between, until completely smooth.
- Sugars: Whisk in the granulated and brown sugars while the butter is still warm.
- The Egg: Add the egg and vanilla. Whisk vigorously by hand for about 90 seconds. You want the batter to look glossy and slightly pale.
- Fold Dry Ingredients: Sift in the flour, cocoa powder, and salt. Use your spatula to gently fold the mixture together. Stop the moment you see no more flour streaks.
- Final Additions: Fold in the remaining chocolate chips.
- Bake: Spread the batter into the prepared dish. Bake for 18–22 minutes.
- Visual Cue: The edges should be set, but the center should still have a very slight “jiggle” when the pan is moved. A toothpick should come out with a few moist crumbs (not wet batter).
- The Hard Part: Let them cool for at least 15 minutes. Fudgy brownies need time to set their internal structure!
10. Frequently Asked Questions (FAQ)
Q: Can I use oil instead of butter?
A: Yes, but oil won’t give you that rich, buttery flavor. If using oil, use a neutral one like canola and reduce the amount to 2.5 tablespoons.
Q: Why did my brownies come out dry?
A: You likely overbaked them. Even 2 minutes too long in a small batch can dry them out. Start checking at the 17-minute mark.
Q: Can I double this recipe?
A: Absolutely! Just double everything and use a standard 8×8 inch baking pan, increasing the bake time to 25–30 minutes.
Q: My brownies don’t have the shiny top. Why?
A: This is usually because the sugar wasn’t fully dissolved into the egg. Make sure to whisk the egg and sugar well before adding the dry ingredients.
Q: Can I use a toaster oven?
A: Yes! Toaster ovens are perfect for this size. Just ensure the pan is at least 2 inches away from the heating elements to prevent burning the top.