1. Introduction: A Slice of Cloud-Like Decadence
There are few desserts that command as much universal adoration as the No-Bake Peanut Butter Pie. It is the undisputed heavyweight champion of potlucks, summer barbecues, and holiday sideboards. But what is it about this specific combination of salty legumes and sweet cream that triggers such an immediate Pavlovian response?
The history of the peanut butter pie is deeply rooted in American “icebox” dessert culture. Emerging prominently in the mid-20th century, these recipes gained popularity alongside the widespread adoption of home refrigeration. While the Southern United States often claims the dish as a regional staple—frequently served in diners from Georgia to Virginia—its appeal has transcended borders.
This recipe represents the pinnacle of dessert engineering: a high-reward, low-effort masterpiece. We aren’t just making a “pudding in a shell.” We are creating a sophisticated mousse-like texture that balances the dense, earthy fats of high-quality peanut butter with the airy lightness of folded whipped cream. Whether you’re a novice baker looking for a “win” or a seasoned pro needing a reliable crowd-pleaser, this pie is your secret weapon.
2. Recipe Overview
- Cuisine Type: American (Southern/Icebox Style)
- Difficulty Level: Easy (Beginner-friendly)
- Total Preparation Time: 20 minutes active; 4–6 hours chilling
- Dietary Classifications: Vegetarian, Egg-free. (Can be made Gluten-Free with specific crust substitutions).
3. Equipment and Tools
To achieve the professional silkiness required for this dish, you will need the following kitchen arsenal:
Primary Equipment
- Electric Stand Mixer or Hand Mixer: Essential for aerating the cream cheese and whipping the heavy cream to stiff peaks.
- 9-inch (23cm) Deep-Dish Pie Plate: Ideally glass or ceramic. Ensure it has a depth of at least 2 inches to accommodate the voluminous filling.
- Large Mixing Bowls: One for the peanut butter base and a chilled stainless steel bowl for the whipped cream.
Precision Tools
- Rubber Spatula: For “folding” the ingredients (a crucial technique to prevent deflation).
- Offset Spatula: For creating that signature smooth top or decorative swirls.
- Measuring Cups and Spoons: For both dry and liquid measurements.
- Food Processor: Optional, but recommended for pulsing the cookies into a fine, uniform crumb for the crust.
4. Serving Suggestions
Plating Recommendations
For a clean slice, use a knife dipped in hot water and wiped dry between every cut. Serve on a chilled dessert plate to maintain the filling’s integrity.
Garnish Ideas
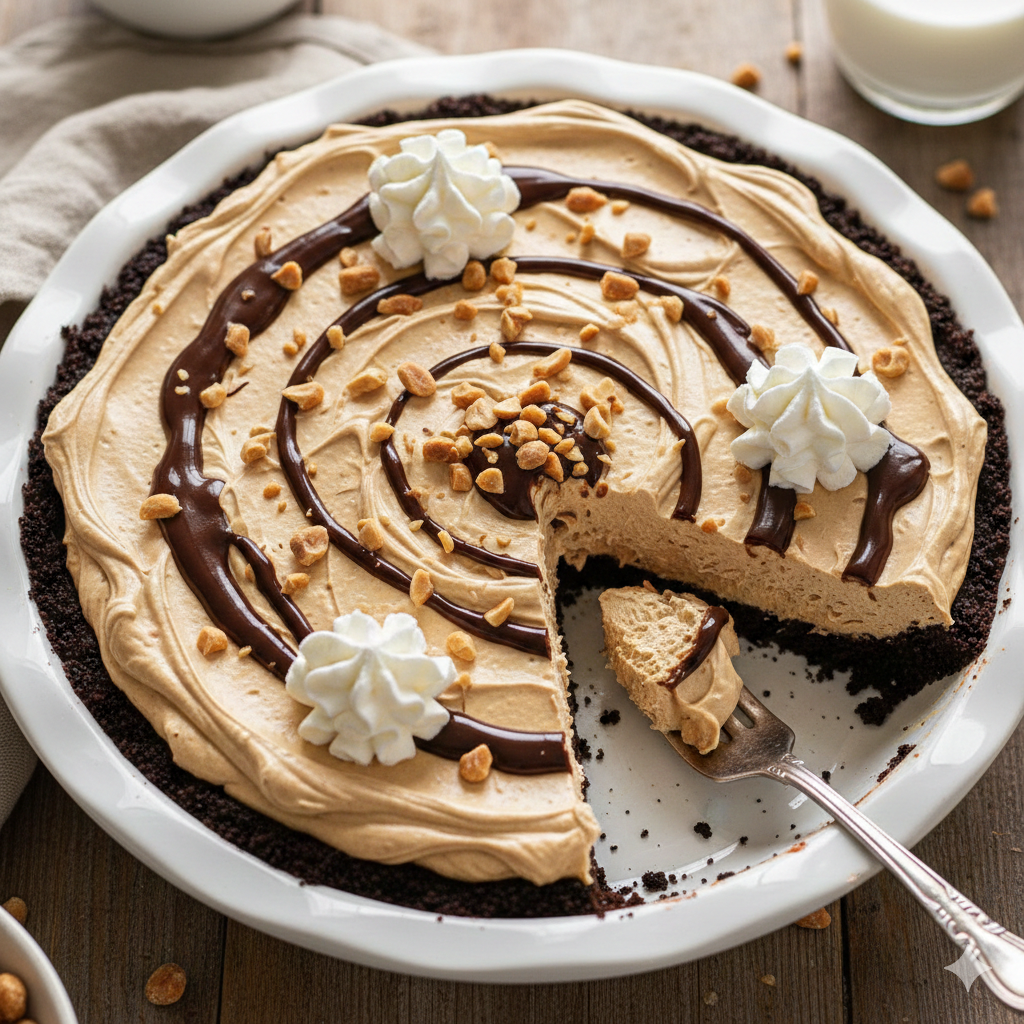
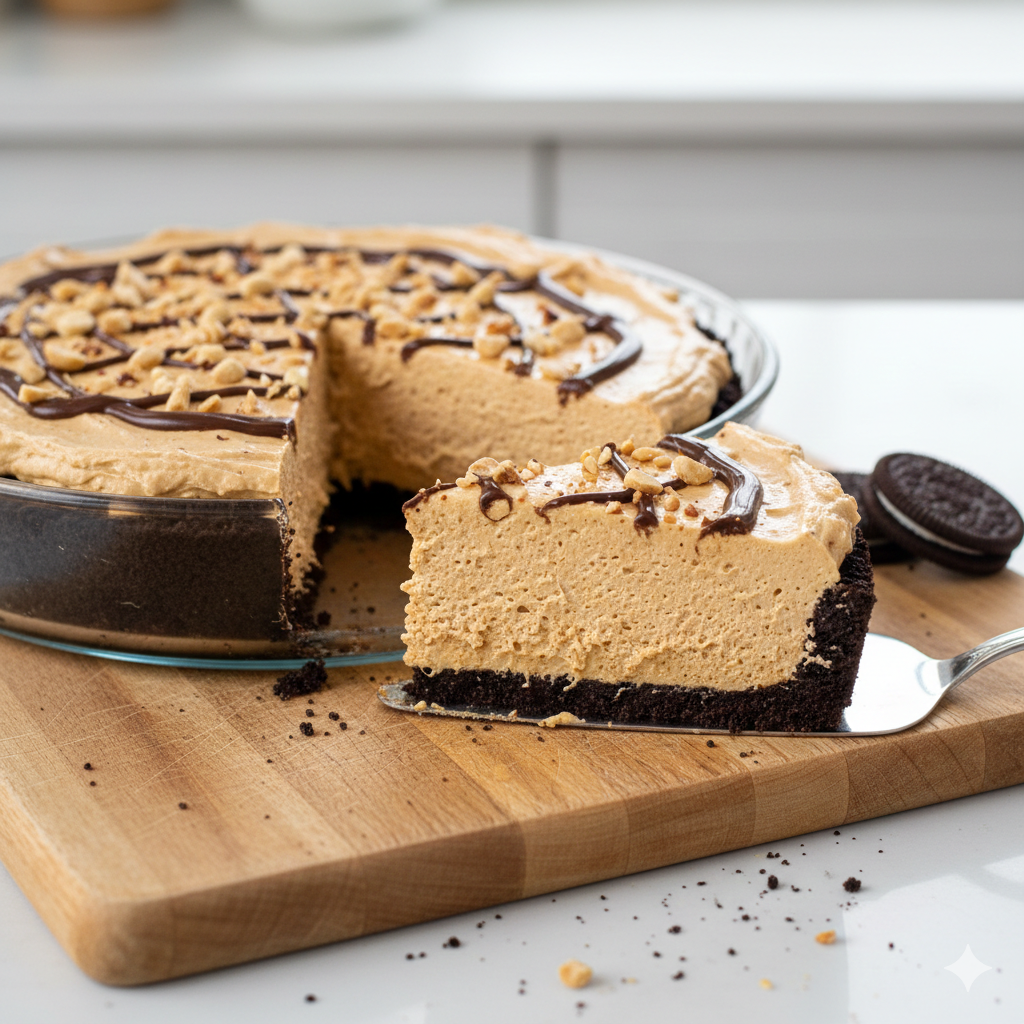
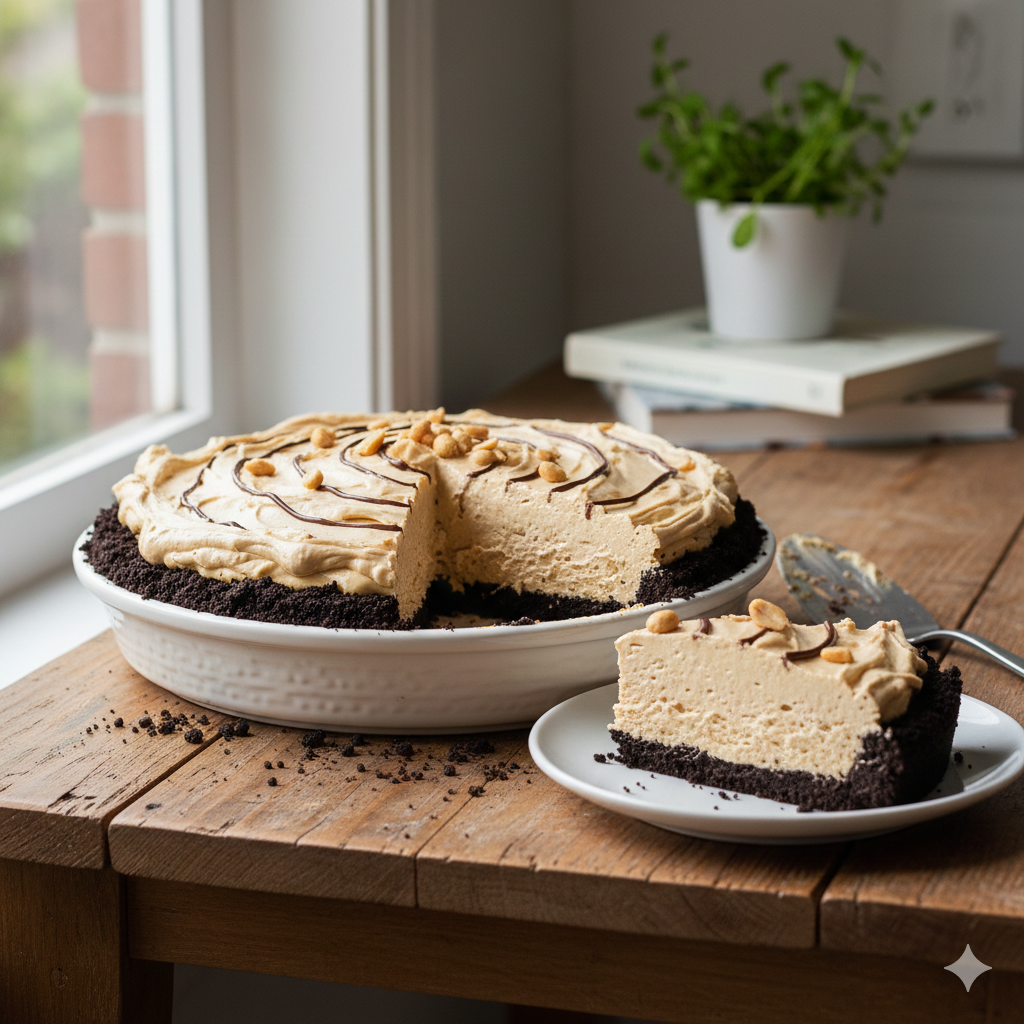
- The Chocolate Drizzle: Melted semi-sweet ganache zigzagged across the top.
- Crushed Peanuts: Honey-roasted peanuts add a delightful salt-crunch contrast.
- Whipped Cream Rosettes: Use a piping bag with a star tip to add elegance.
- Chopped Peanut Butter Cups: For a maximalist approach.
Beverage Pairings
- Coffee: A dark, bold roast or a double espresso cuts through the richness of the fats.
- Milk: A cold glass of whole milk is the classic, nostalgic pairing.
- Wine: A late-harvest Riesling or a nutty Tawny Port complements the peanut profile beautifully.
5. Nutritional Information (Per Serving)
Based on 8 servings per pie.
| Nutrient | Amount per Serving |
| Calories | 540 kcal |
| Total Fat | 38g |
| Saturated Fat | 18g |
| Cholesterol | 65mg |
| Sodium | 310mg |
| Total Carbohydrates | 42g |
| Dietary Fiber | 2g |
| Sugars | 28g |
| Protein | 9g |
Health Note: While indulgent, peanuts provide a good source of heart-healthy monounsaturated fats and plant-based protein. To reduce sugar, consider using a natural peanut butter (oil-separated) and a sugar-free sweetener alternative.
6. Storage and Reheating
Refrigeration
This pie thrives in the cold. Keep it covered with plastic wrap or a pie dome. It will remain fresh and structurally sound for up to 5 days.
Freezing
This recipe freezes exceptionally well, transforming into an “ice cream pie” texture.
- To Freeze: Wrap the entire pie plate tightly in a double layer of plastic wrap followed by aluminum foil.
- Duration: Can be frozen for up to 3 months.
- Thawing: Move to the refrigerator for 1 hour before serving, or eat directly from the freezer for a firmer bite.
7. Expert Tips and Variations
Professional Chef Tips
- Temperature Matters: Ensure your cream cheese is completely at room temperature. If it’s even slightly cold, you will end up with tiny white lumps that are impossible to smooth out later.
- The “Fold” Technique: When combining the whipped cream with the peanut butter mixture, use a “J-motion” with your spatula. Do not stir vigorously, or you will lose the air that makes the pie fluffy.
- Salt Your Crust: Adding a pinch of sea salt to the graham cracker or cookie crust enhances the chocolate flavor exponentially.
Common Mistakes
- Using Natural PB: Some “oil-on-top” natural peanut butters are too runny. For the most stable pie, use a high-quality “no-stir” creamy commercial brand.
- Over-whipping: If you whip the heavy cream too long, it will turn into butter. Stop as soon as you see stiff, standing peaks.
Creative Variations
- Pretzel Crust: Swap the cookies for crushed pretzels for a massive salty-sweet kick.
- Banana Bottom: Slice fresh bananas and layer them on the crust before pouring in the filling (Elvis style!).
8. Ingredients Section
The Crust
- 24 Chocolate Sandwich Cookies (e.g., Oreos): Approximately 260g.
- 5 tbsp (70g) Unsalted Butter: Melted.
The Filling
- 8 oz (225g) Full-Fat Cream Cheese: Softened to room temperature.
- 1 cup (250g) Creamy Peanut Butter: Do not use crunchy unless you want a textured filling.
- 1 cup (120g) Powdered Sugar: Sifted to remove lumps.
- 1 tsp Pure Vanilla Extract.
- 1 ½ cups (350ml) Heavy Whipping Cream: Chilled.
Quality and Sourcing
- Peanut Butter: Look for brands where peanuts and salt are the primary ingredients, but avoid the excessively oily varieties for this specific structural application.
- Cream: Ensure it has at least 36% milkfat for the best stability.
9. Step-by-Step Instructions
Step 1: Prepare the Crust
Pulse the chocolate cookies in a food processor until they resemble fine sand. In a medium bowl, combine the crumbs with the melted butter. Press the mixture firmly into the bottom and up the sides of your 9-inch pie plate.
- Tip: Use the bottom of a flat measuring cup to pack it tightly. Chill in the freezer for 10 minutes to set.
Step 2: Cream the Base
In a large bowl, beat the softened cream cheese and powdered sugar together until completely smooth and aerated. Add the peanut butter and vanilla extract. Beat on medium-high speed until the mixture is uniform in color and texture.
Step 3: Whip the Cream
In a separate, chilled bowl, beat the heavy whipping cream until stiff peaks form.
- Visual Cue: When you lift the beaters, the cream should stand straight up without drooping.
Step 4: The Incorporation
Gently fold one-third of the whipped cream into the peanut butter mixture to lighten it. Once incorporated, fold in the remaining whipped cream until no white streaks remain.
Step 5: Final Assembly
Spoon the filling into the prepared crust. Use an offset spatula to smooth the top or create decorative peaks.
Step 6: The Long Chill
Refrigerate for at least 4 hours, though overnight is best. This allows the fats to solidify and the flavors to marry.
10. Frequently Asked Questions (FAQ)
Q: Can I use store-bought whipped topping (like Cool Whip)?
A: Yes. Substitute 8 oz of whipped topping for the heavy cream/powdered sugar step. It will be slightly sweeter and less rich, but very stable.
Q: How do I make this Gluten-Free?
A: Simply swap the chocolate sandwich cookies for a certified gluten-free brand. The filling is naturally gluten-free!
Q: Why did my pie come out runny?
A: This usually happens if the cream cheese wasn’t beaten enough or if the whipped cream was “folded” too aggressively, causing the air bubbles to collapse.
Q: Can I use crunchy peanut butter?
A: You can, but it changes the “mousse” profile of the dish. If you want crunch, we recommend adding chopped peanuts on top instead.
Q: Do I need to bake the crust?
A: No! Chilling the butter-crumb mixture is sufficient to hold the shape, making this a true no-bake recipe.


