1. Introduction: The Snap, Crackle, and Pop of Nostalgia
There are few scents that transport us back to childhood quite as effectively as the aroma of melting butter and sugar-spun marshmallows. The Rice Krispie Treat is more than just a quick snack; it is a cultural touchstone of the modern kitchen. Born in the late 1930s in the Kellogg’s home economics department, this “puffed rice square” was originally conceived as a fund-raising treat for the Camp Fire Girls. Little did creators Mildred Day and Malitta Jensen know that their simple three-ingredient concoction would become a staple of bake sales, lunchboxes, and late-night cravings for nearly a century.
What makes this recipe truly significant is its accessibility. It is the first “baking” project for many children, yet it possesses a culinary depth that even professional pastry chefs respect. The magic lies in the Maillard reaction (the slight browning of butter) and the chemistry of gelatin-based aeration. When done correctly, the result is a textural symphony: a crisp, airy crunch followed by a soft, elastic pull of marshmallow.
In this guide, we aren’t just making “cereal bars.” We are perfecting a classic, ensuring that every square is thick, stays soft for days, and carries that sophisticated hint of vanilla and salt that elevates a simple snack into a gourmet dessert.
2. Recipe Overview
- Cuisine Type: American / Dessert
- Difficulty Level: Easy (Beginner-friendly)
- Prep Time: 10 minutes
- Cook Time: 5 minutes
- Setting Time: 30–45 minutes
- Total Time: Approx. 1 hour
- Dietary Classifications: Vegetarian, Gluten-Free (if using certified GF cereal), Nut-Free.
3. Equipment and Tools
To achieve the perfect thickness and professional finish, you’ll need the following:
- Large Heavy-Bottomed Pot: A 6-quart Dutch oven or stockpot is ideal. The heavy base prevents the marshmallows from scorching.
- 9×9-inch Square Baking Pan: For those thick, “bakery-style” squares. An 8×8-inch pan works for extra-tall treats, while a 9×13-inch pan produces thinner, party-style bars.
- Silicone Spatula: High-heat resistant and naturally non-stick.
- Parchment Paper: Essential for easy removal and clean slicing.
- Large Mixing Bowl: If you prefer to mix the cereal outside of the hot pot.
- Kitchen Scale: For precise measurement of marshmallows (volume measurements like “cups” can be inconsistent with different marshmallow sizes).
4. Serving Suggestions
Plating Recommendations:
Stack the treats in a pyramid on a rustic wooden board for a communal feel. For individual servings, wrap each square in a strip of parchment paper tied with baker’s twine.
Garnish Ideas:
- A light dusting of Maldon sea salt to cut through the sweetness.
- A drizzle of dark chocolate or salted caramel.
- Edible gold leaf for a high-end “gala” appearance.
Beverage Pairings:
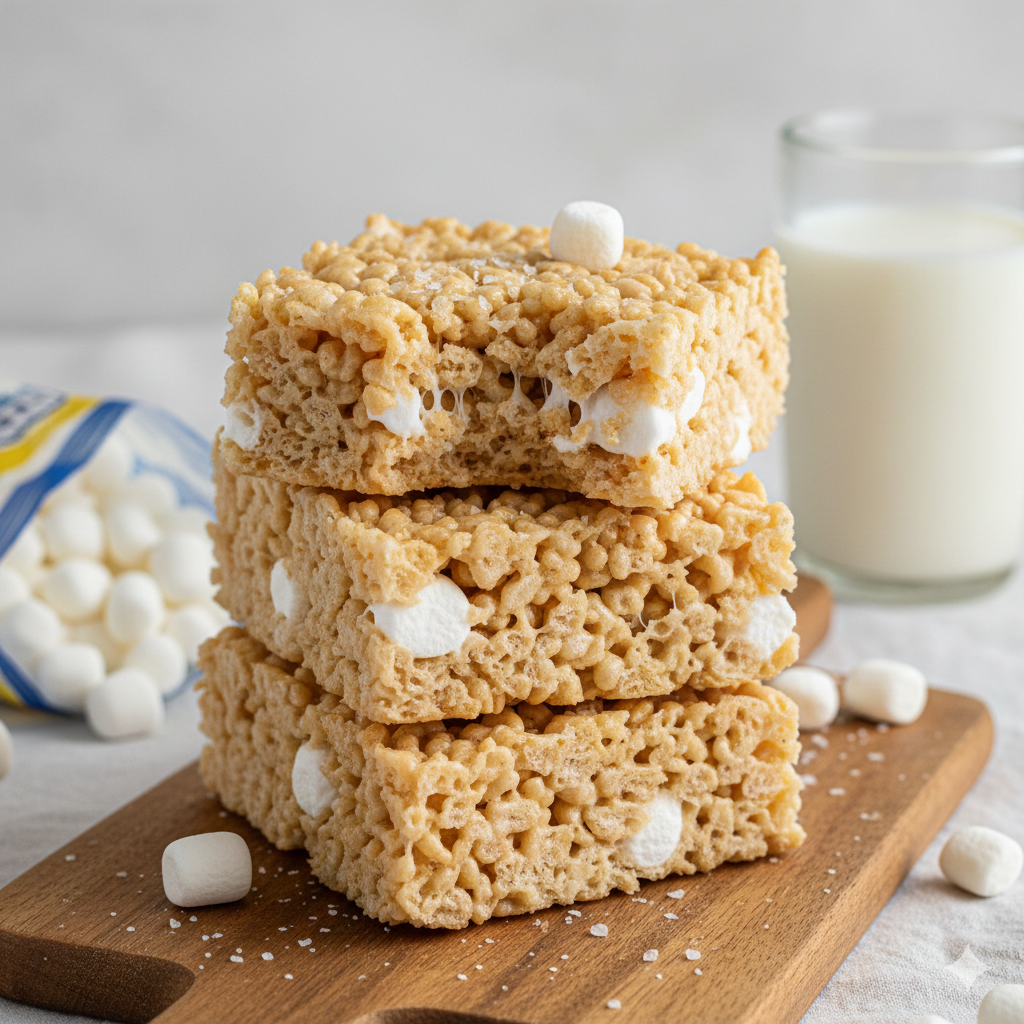
- Cold Milk: The traditional choice.
- Espresso: The bitterness of the coffee beautifully balances the sugary marshmallow.
- Bourbon: For an adult twist, the vanilla notes in the spirit complement the toasted cereal.
5. Nutritional Information
(Per 2-inch square serving)
| Nutrient | Amount |
| Calories | 185 kcal |
| Total Fat | 6g |
| Saturated Fat | 3.5g |
| Carbohydrates | 32g |
| Sugars | 18g |
| Protein | 1.5g |
| Sodium | 145mg |
Health Note: While these are a treat, they are lower in fat than many traditional cookies and are naturally nut-free, making them a safer choice for school environments.
6. Storage and Reheating
Proper Storage:
Never refrigerate Rice Krispie treats! The cold air draws out moisture and turns the cereal stale while hardening the sugar. Store them in an airtight container at room temperature with layers separated by wax paper.
Freezing:
You can freeze these for up to 6 weeks. Wrap individual squares tightly in plastic wrap, then place them in a freezer-safe bag. Thaw at room temperature for 15 minutes before eating.
7. Expert Tips and Variations
Professional Chef Tips
- The “Low and Slow” Rule: Never rush the melting process. High heat makes the marshmallows “seize” and turn hard once they cool. Melt them on the lowest possible setting.
- Don’t Pack Them Down: When transferring to the pan, use a gentle touch. Pressing too hard crushes the air pockets in the cereal, resulting in a dense, brick-like bar.
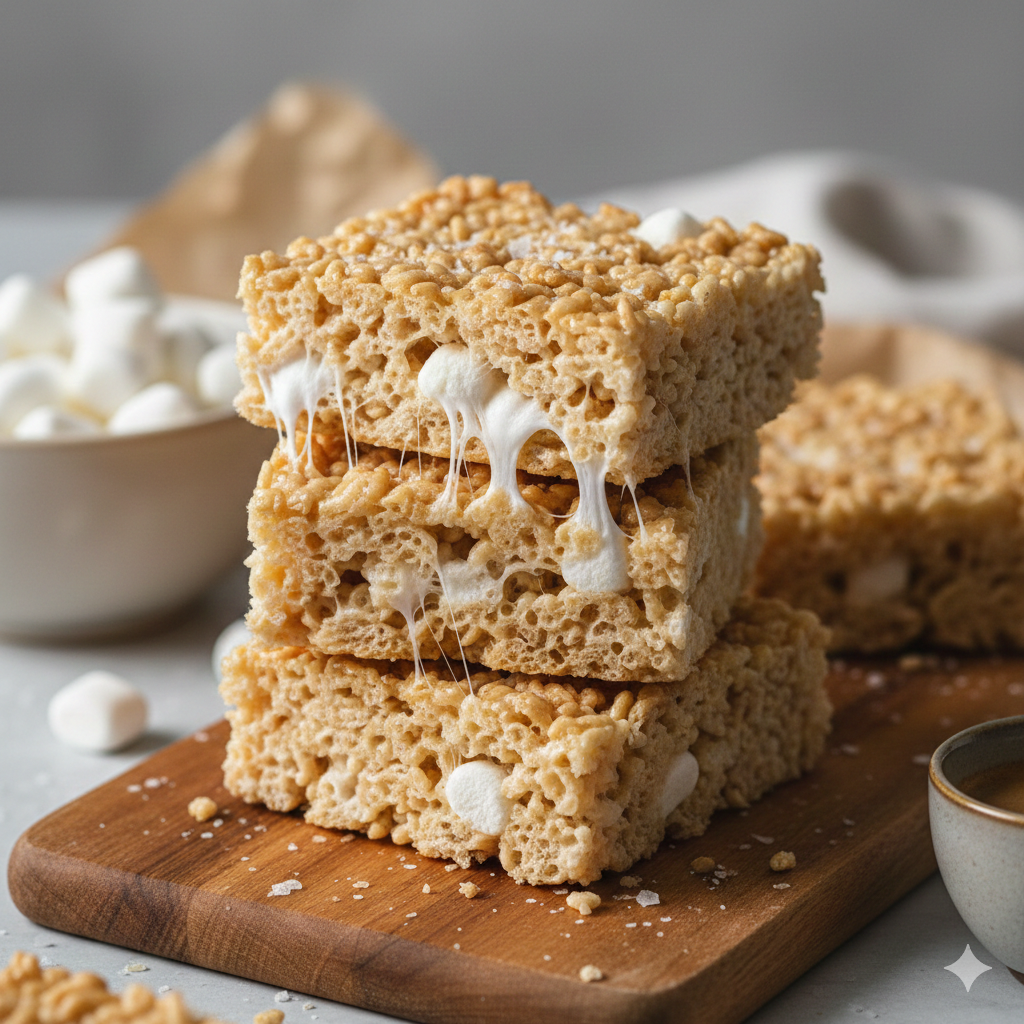
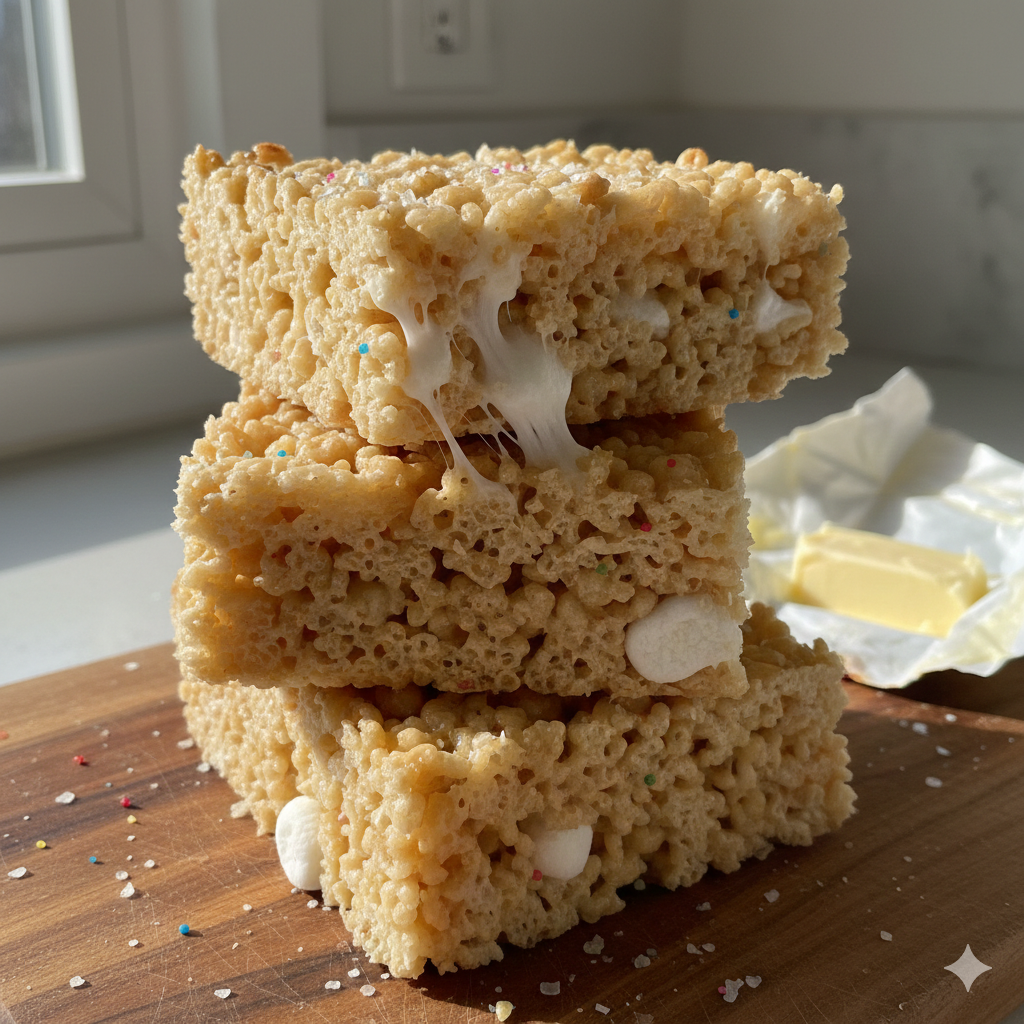
- The Marshmallow Reserve: Save 1–2 cups of whole mini-marshmallows to fold in at the very end with the cereal. This creates beautiful pockets of un-melted marshmallow in every bite.
Creative Variations
- Brown Butter (Beurre Noisette): Cook the butter until it foams and turns golden brown with a nutty aroma before adding marshmallows.
- The “PB & J”: Stir in 1/2 cup of creamy peanut butter to the melted mixture and swirl in strawberry jam at the end.
- Birthday Cake: Add 1/4 cup of rainbow sprinkles and a teaspoon of almond extract.
8. Ingredients Section
| Ingredient | Imperial | Metric | Notes |
| Unsalted Butter | 6 tbsp | 85g | Use high-quality European-style butter if possible. |
| Mini Marshmallows | 10 oz | 285g | Freshness is key! Avoid bags that are stuck together. |
| Vanilla Extract | 1 tsp | 5ml | Pure Madagascar Vanilla is recommended. |
| Sea Salt | 1/4 tsp | 1.5g | Enhances the flavor profile. |
| Rice Cereal | 6 cups | 160g | Crisp, toasted puffed rice. |
9. Step-by-Step Instructions
- Prepare the Pan: Grease your 9×9-inch pan with butter or non-stick spray, then line it with parchment paper, leaving an overhang on two sides (the “sling” method).
- The Butter Foundation: In a large pot over low heat, melt the butter. If you want a deeper flavor, let it sizzle until you see small brown specks and smell a toasted aroma.
- The Melting Phase: Add 8 oz (about 5 cups) of the mini marshmallows. Stir constantly with a silicone spatula. As soon as the mixture is smooth and 90% melted, remove the pot from the heat.
- Emulsify: Stir in the vanilla extract and salt. The residual heat will finish melting any remaining marshmallow lumps.
- The Fold: Add the rice cereal and the remaining 2 oz of whole mini marshmallows. Fold gently from the bottom up until every grain of cereal is coated in a glossy sheen.
- Transfer: Pour the mixture into the prepared pan.
- The Gentle Leveling: Using a buttered spatula (or slightly damp fingers), gently spread the mixture to the corners. Do not press down. 8. The Cure: Let the treats sit at room temperature for at least 30 minutes. This allows the gelatin to set, ensuring a clean cut.
- Slicing: Lift the parchment sling out of the pan. Use a sharp, greased chef’s knife to cut into 9 large squares or 16 bite-sized pieces.
10. Frequently Asked Questions (FAQ)
Q: Why are my Rice Krispie treats hard?
A: This usually happens for two reasons: the marshmallows were melted over too high a heat, or you packed the mixture too firmly into the pan. Low heat and a gentle touch are your best friends.
Q: Can I use large marshmallows instead of mini ones?
A: Yes. A 10 oz bag of large marshmallows is equivalent to a 10 oz bag of minis. However, they take longer to melt, so consider snipping them in half with kitchen shears first.
Q: Are these gluten-free?
A: Most standard rice cereals contain malt flavoring derived from barley, which contains gluten. To make these GF, ensure you buy a cereal specifically labeled “Gluten-Free.”
Q: How do I stop the mixture from sticking to my hands?
A: Lightly coat your hands in butter or spray them with a tiny bit of non-stick cooking oil. Alternatively, use a piece of wax paper to gently pat the top of the treats.
Q: Can I make these in the microwave?
A: You can, but it’s harder to control the temperature. If you must, microwave butter and marshmallows in 30-second intervals, stirring in between, until just melted.


