1. Introduction: The Nostalgia of the Campfire, Perfected
There is a universal magic in the sound of a crackling fire and the sticky, sweet reward of a perfectly toasted s’more. For many, the “Graham Cracker, Chocolate, Marshmallow” trifecta is the official flavor of childhood summers. However, the traditional campfire method comes with its own set of logistics: the smoky hair, the unpredictable weather, and the inevitable “oops, my marshmallow is on fire” moment.
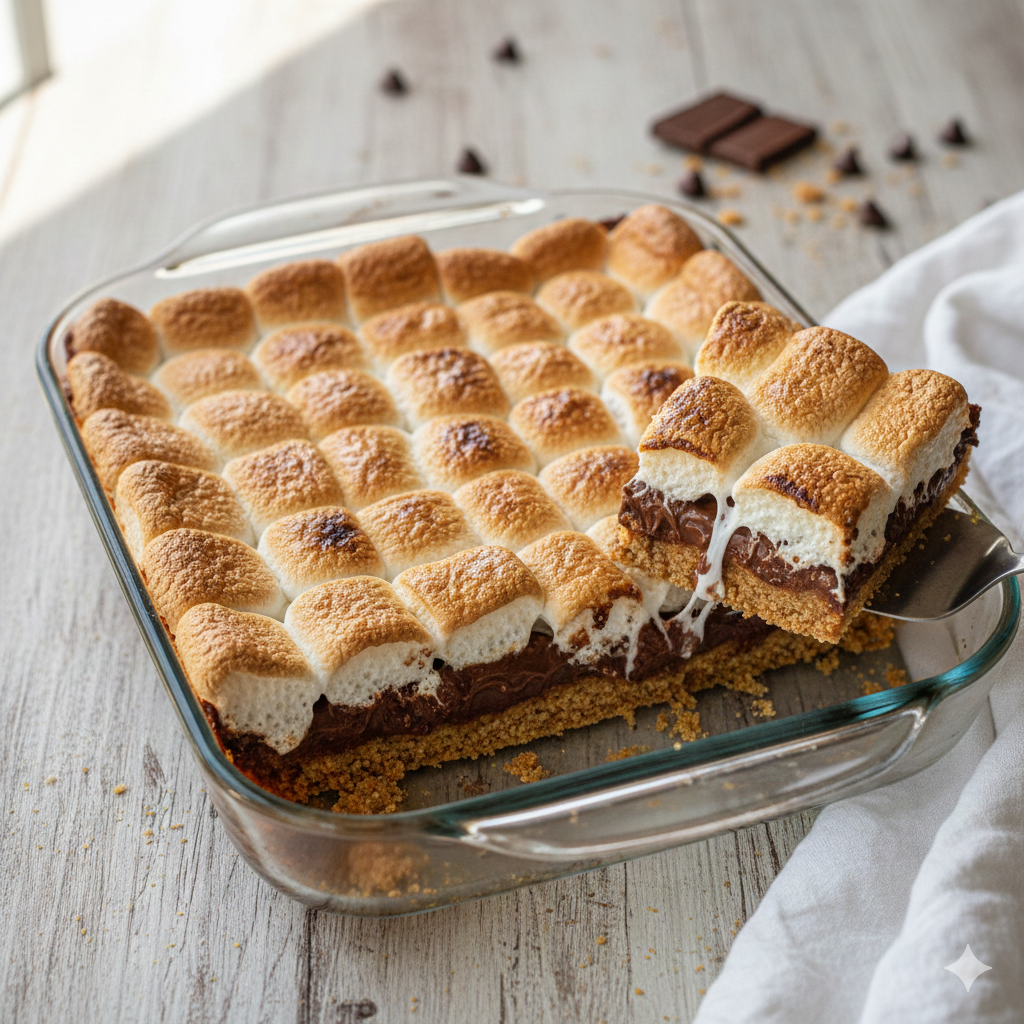
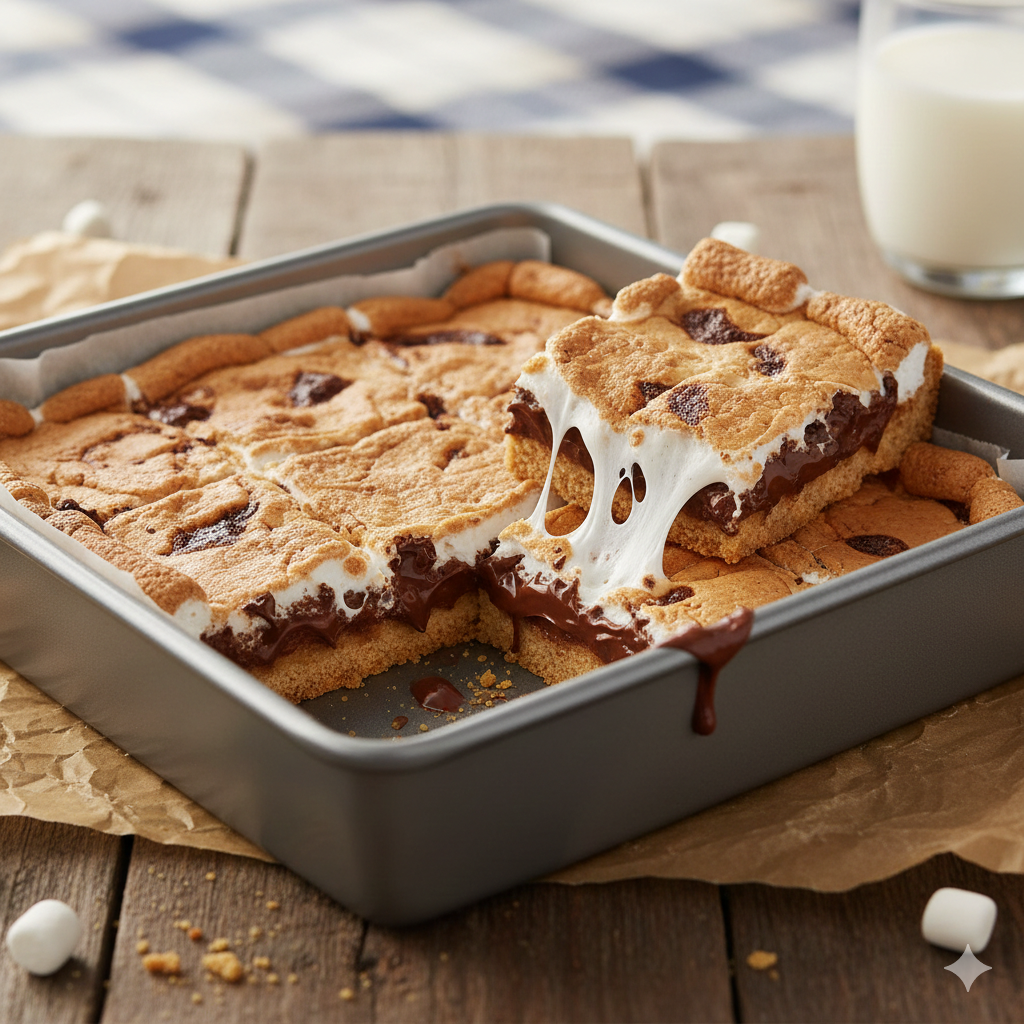
These Easy S’mores Bars were born from the desire to capture that nostalgic essence without the need for a sleeping bag or a bug spray. By reimagining the layers into a sliceable bar, we’ve created a dessert that is more structurally sound, easier to share, and—dare we say—even more delicious than the original. Whether you’re hosting a backyard BBQ in July or craving a cozy winter treat in January, these bars bring the outdoors in, delivering a thick, buttery crust and a golden-brown marshmallow pull every single time.
2. Recipe Overview
- Cuisine Type: American Dessert
- Difficulty Level: Easy
- Total Time: 45 minutes (15 mins prep, 30 mins baking/cooling)
- Dietary Classifications: Vegetarian
3. Equipment and Tools
To ensure the perfect bake and easy cleanup, gather the following:
- Baking Pan: 9×9 inch square metal or glass pan.
- Parchment Paper: Essential for lifting the bars out for clean slicing.
- Mixing Bowls: One large microwave-safe bowl for melting butter/chocolate; one medium bowl for the crust.
- Spatula: Silicone heat-resistant spatula for spreading the sticky marshmallow layer.
- Measuring Cups/Spoons: For precise ratio management.
- Kitchen Torch (Optional): If you prefer a “charred” look rather than a “toasted” look.
4. Serving Suggestions
These bars are rich, so a little goes a long way.
- Plating: Serve warm for a “gooey” experience or chilled for a “fudge-like” texture.
- Garnish: A light dusting of sea salt on the chocolate layer balances the sugar perfectly.
- Pairings: Serve with a cold glass of whole milk or a robust espresso to cut through the sweetness.
- Event: Perfect for potlucks, school bake sales, or movie nights.
5. Nutritional Information (Per Serving)
Estimate based on 16 servings per pan.
- Calories: 240 kcal
- Total Fat: 11g
- Carbohydrates: 34g
- Protein: 2g
- Fiber: 1g
- Sugar: 22g
6. Storage and Reheating
- Room Temperature: Store in an airtight container for up to 3 days.
- Refrigeration: Keeps for up to 1 week (this makes the chocolate quite firm).
- Freezing: Wrap individual bars in plastic wrap and freeze for up to 2 months.
- Reheating: To regain the “campfire” melt, microwave a single bar for 10–15 seconds.
7. Expert Tips and Variations
Professional Chef Tips
- The “Press” Matters: When making the graham cracker base, use the bottom of a flat measuring cup to press the crumbs firmly into the pan. This prevents the bars from crumbling when sliced.
- Broiler Watch: If using the oven broiler to toast the marshmallows at the end, do not walk away. Marshmallows turn from golden to burnt in approximately 5 seconds.
Creative Variations
- The Peanut Butter Swap: Add a layer of creamy peanut butter over the graham cracker crust before adding chocolate.
- Salted Caramel: Drizzle salted caramel over the chocolate layer before topping with marshmallows.
- Gluten-Free: Substitute standard graham crackers with your favorite gluten-free brand; the butter ratio remains the same.
8. Ingredients Section
| Ingredient | Imperial | Metric | Notes |
| Graham Cracker Crumbs | 2 cups | 250g | About 14–16 full sheets |
| Unsalted Butter | 1/2 cup | 115g | Melted |
| Granulated Sugar | 1/4 cup | 50g | Helps bind the crust |
| Milk Chocolate Chips | 2 cups | 340g | High-quality chips or chopped bars |
| Mini Marshmallows | 4 cups | 200g | Freshness is key for the “pull” |
| Vanilla Extract | 1 tsp | 5ml | Enhances the chocolate flavor |
9. Step-by-Step Instructions
- Prep the Environment: Preheat your oven to 350°F (175°C). Line your 9×9 pan with parchment paper, leaving an overhang on the sides for easy removal.
- Construct the Foundation: In a medium bowl, combine the graham cracker crumbs, melted butter, and sugar. Mix until the texture resembles wet sand.
- The First Bake: Press the mixture firmly into the bottom of the prepared pan. Bake for 8–10 minutes until slightly golden and fragrant.
- The Chocolate Layer: Remove the pan from the oven. Immediately sprinkle the chocolate chips evenly over the hot crust. Let them sit for 2 minutes to soften, then use a spatula to spread them into an even layer.
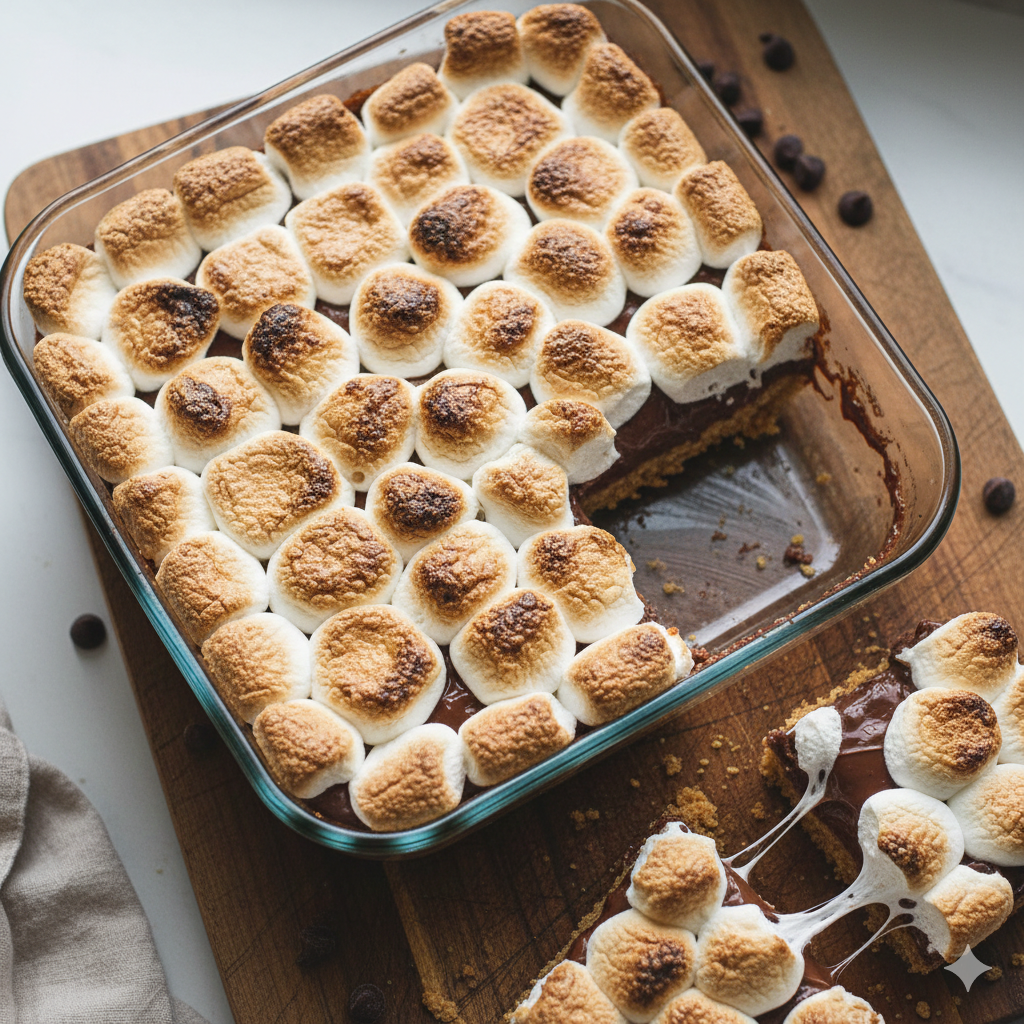
- The Marshmallow Topping: Pile the mini marshmallows over the chocolate.
- The Final Toast: Return the pan to the oven for 5–7 minutes. For the classic “burnt” campfire look, switch the oven to Broil for the last 30–60 seconds, watching intensely.
- The Cooling Phase: This is the hardest part. Let the bars cool for at least 20 minutes. If you cut them immediately, the chocolate will run. For clean squares, use a greased knife.
10. Frequently Asked Questions (FAQ)
Q: Can I use large marshmallows instead of mini ones?
A: Yes, but you should cut them in half and place them cut-side down so they don’t roll around and they melt more evenly.
Q: Why is my graham cracker crust falling apart?
A: Usually, this means the crumbs weren’t pressed down hard enough or there wasn’t enough butter. Ensure every crumb is moistened by the butter.
Q: Can I use Dark Chocolate instead of Milk Chocolate?
A: Absolutely. While milk chocolate is traditional for s’mores, dark chocolate provides a sophisticated bitterness that balances the sweet marshmallow.
Q: How do I get clean cuts?
A: Chill the bars in the fridge for 30 minutes before slicing. Wipe your knife with a bit of oil or warm water between each cut to prevent the marshmallow from sticking.