1. Introduction: A Slice of Sunshine
There is something undeniably nostalgic about a tray of freshly baked lemon bars. For many, they are the quintessential taste of summer—a bright, citrusy punch balanced by the comforting, decadent richness of a buttery shortbread base. Whether they remind you of neighborhood bake sales, sophisticated garden parties, or Grandma’s weekend kitchen experiments, lemon bars occupy a special place in the pantheon of dessert bars.
The beauty of this specific recipe lies in the contrast of textures. We aren’t just making a “lemon cake”; we are engineering a dual-layered masterpiece. The base is a “pâte sablée” style shortbread—dense, crisp, and heavy on the butter—which provides the structural integrity needed to support the star of the show: a silky, custard-like lemon curd top that’s just tart enough to make your mouth water.
Historically, lemon bars gained massive popularity in the United States during the mid-20th century, but the concept of citrus curds and shortbread dates back centuries to European pastry traditions. Our version honors that history while refining the ratios to ensure your crust never gets soggy and your filling never turns rubbery.
2. Recipe Overview
- Cuisine Type: American / Dessert
- Difficulty Level: Intermediate (requires precision with baking times)
- Total Time: 3 hours (45 mins active, 45 mins baking, 2 hours cooling/chilling)
- Dietary Classifications: Vegetarian, Nut-Free
3. Equipment and Tools
To achieve professional results, ensure you have the following specs ready:
- Baking Pan: 9×9-inch (23×23 cm) square metal baking pan.
- Note: Glass pans retain heat longer and may cause the edges to overcook before the center sets.
- Parchment Paper: Essential for “lifting” the bars out for clean cuts.
- Food Processor or Pastry Cutter: For cutting cold butter into the flour.
- Fine-Mesh Sieve: For sifting powdered sugar and straining the lemon juice.
- Zester/Microplane: To capture the essential oils from the lemon peel.
- Whisk and Mixing Bowls: Stainless steel or glass (avoid reactive aluminum).
4. Serving Suggestions
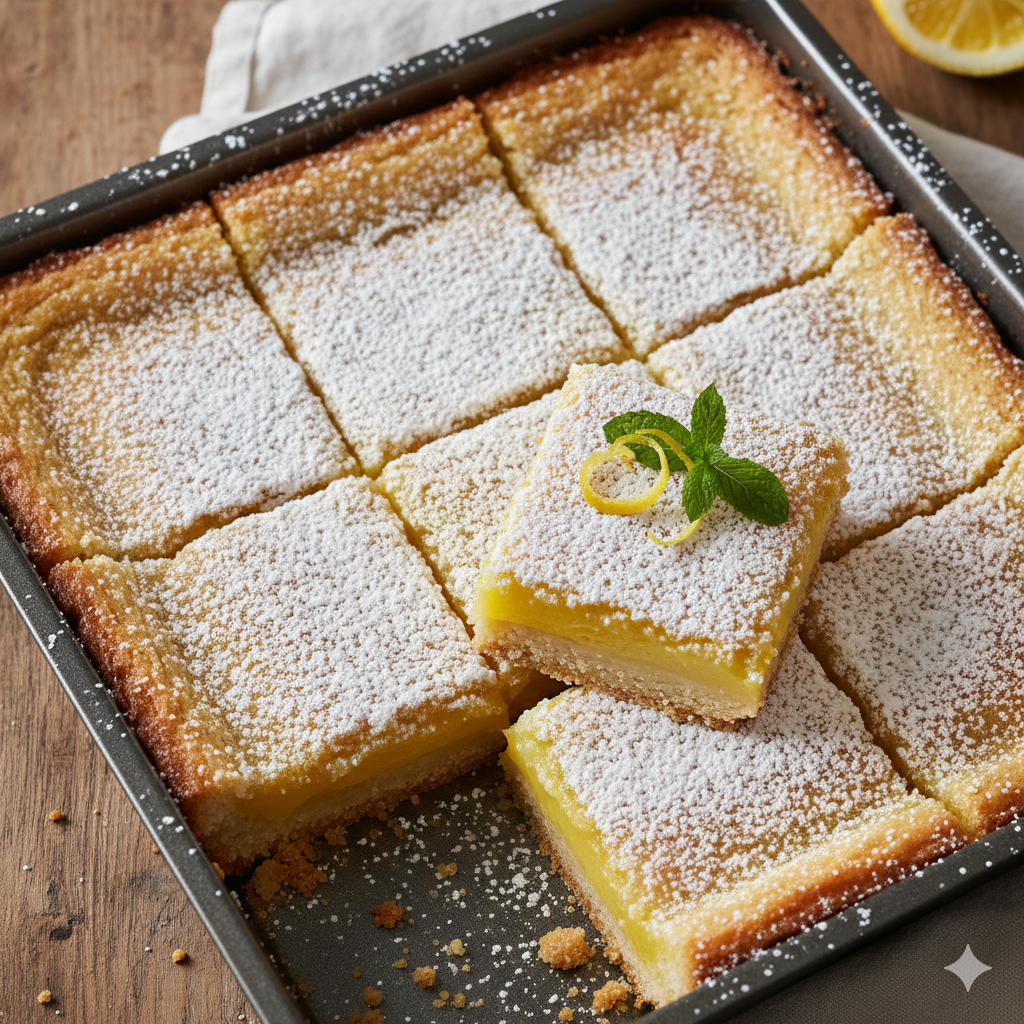
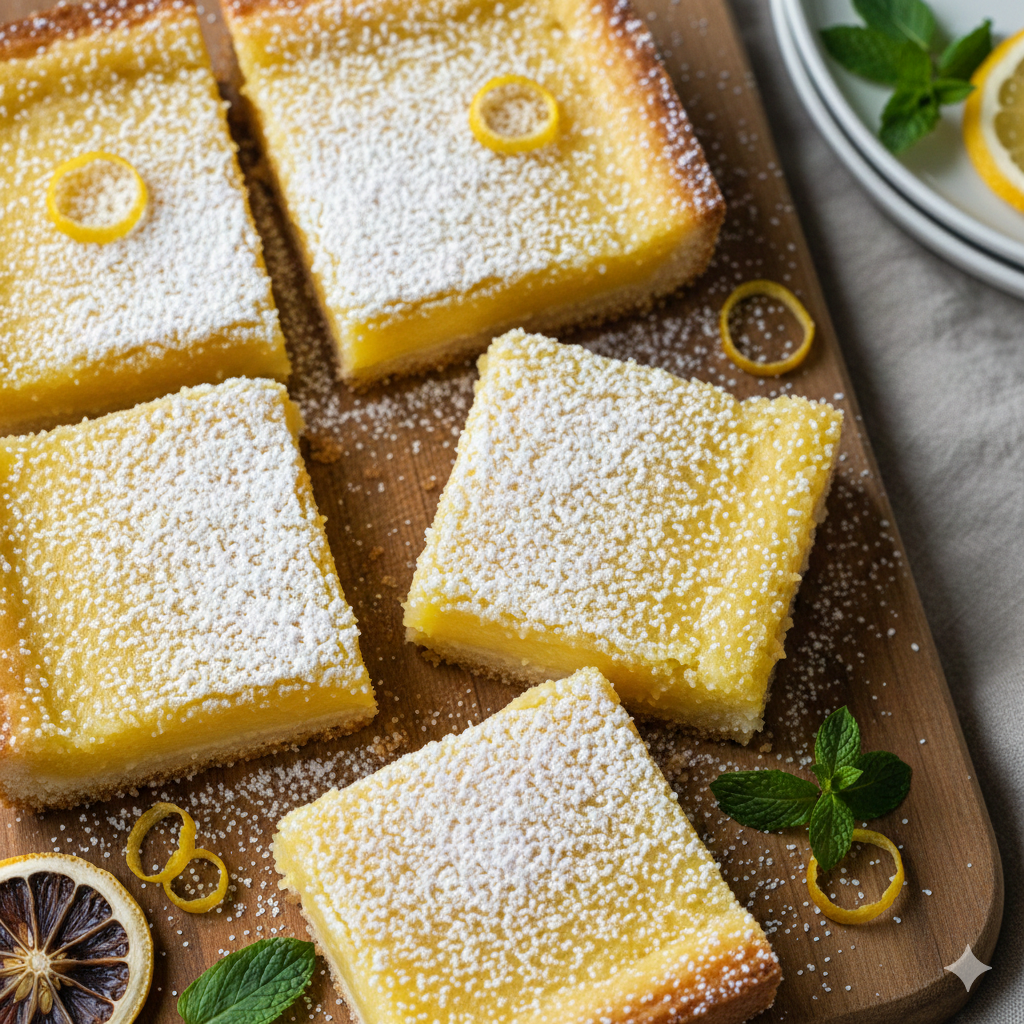
- The Classic Finish: A heavy snow-dusting of confectioners’ sugar just before serving.
- Garnish: Tiny sprigs of fresh mint or a single dehydrated lemon wheel.
- Plating: Serve chilled on a white marble slab to keep the butter in the crust firm.
- Pairing: Pairs beautifully with a crisp Sauvignon Blanc or a floral Earl Grey tea.

5. Nutritional Information (Per Serving)
Estimate based on 16 squares:
- Calories: 210 kcal
- Total Fat: 11g (Saturated Fat: 7g)
- Carbohydrates: 28g
- Protein: 3g
- Vitamin C: 12% DV (from fresh juice)
6. Storage and Reheating
- Refrigeration: Store in an airtight container for up to 5 days. These must stay cold; at room temperature, the curd can become too soft.
- Freezing: These freeze beautifully. Wrap individual squares in plastic wrap and store in a freezer bag for up to 3 months. Thaw in the fridge for 2 hours before eating.
- Reheating: Not recommended. These are best enjoyed cold or at a slight room temperature.
7. Expert Tips and Variations
- The “No-Bubble” Trick: Whisk your lemon filling gently. Incorporating too much air creates a foamy white layer on top of your bars.
- Blind Bake: Always bake the crust until it is golden brown before adding the liquid. This prevents the “soggy bottom” syndrome.
- Variation – Meyer Lemon: Use Meyer lemons for a sweeter, more floral profile with less acidity.
- Variation – Pink Lemonade: Add a tablespoon of raspberry puree to the filling for a vibrant pink hue.
8. Ingredients Section
The Shortbread Crust
- Unsalted Butter: 1 cup (225g), cold and cubed.
- All-Purpose Flour: 2 cups (250g).
- Granulated Sugar: ½ cup (100g).
- Salt: ½ tsp (to balance the sweetness).
The Lemon Filling
- Granulated Sugar: 1 ½ cups (300g).
- All-Purpose Flour: ¼ cup (30g) – this acts as a stabilizer.
- Large Eggs: 4, room temperature.
- Fresh Lemon Juice: ¾ cup (approx. 4–5 large lemons).
- Lemon Zest: 1 tbsp (packed).
9. Step-by-Step Instructions
Phase 1: The Crust
- Prep: Preheat oven to 350°F (175°C). Line your pan with parchment paper, leaving an overhang on two sides.
- Mix: In a food processor, pulse flour, sugar, and salt. Add cold butter cubes and pulse until the mixture looks like coarse crumbs.
- Press: Firmly press the mixture into the bottom of the pan. Use the bottom of a flat glass to ensure evenness.
- Bake: Bake for 20 minutes or until the edges are lightly browned.
Phase 2: The Filling
- Whisk: While the crust bakes, whisk the sugar and flour for the filling together. Add eggs one by one, then stir in lemon juice and zest.
- Pour: Once the crust is ready, reduce oven heat to 325°F (160°C). Pour the lemon mixture directly over the hot crust.
- Final Bake: Bake for 20–25 minutes. The center should have a slight jiggle but should not be liquid.
- Cool: Let cool at room temperature for 1 hour, then chill in the fridge for at least 2 hours.
10. Frequently Asked Questions (FAQ)
Q: Can I use bottled lemon juice? A: Technically yes, but the flavor will be flat. Fresh lemons contain oils and bright acidity that bottled juice lacks.
Q: Why did my lemon bars develop a thin white crust on top? A: This is usually due to air bubbles in the egg mixture or the sugar rising to the top. It tastes fine and is easily hidden by powdered sugar!
Q: How do I get perfectly clean slices? A: Wipe your knife with a warm, damp cloth between every single cut.


